
Size
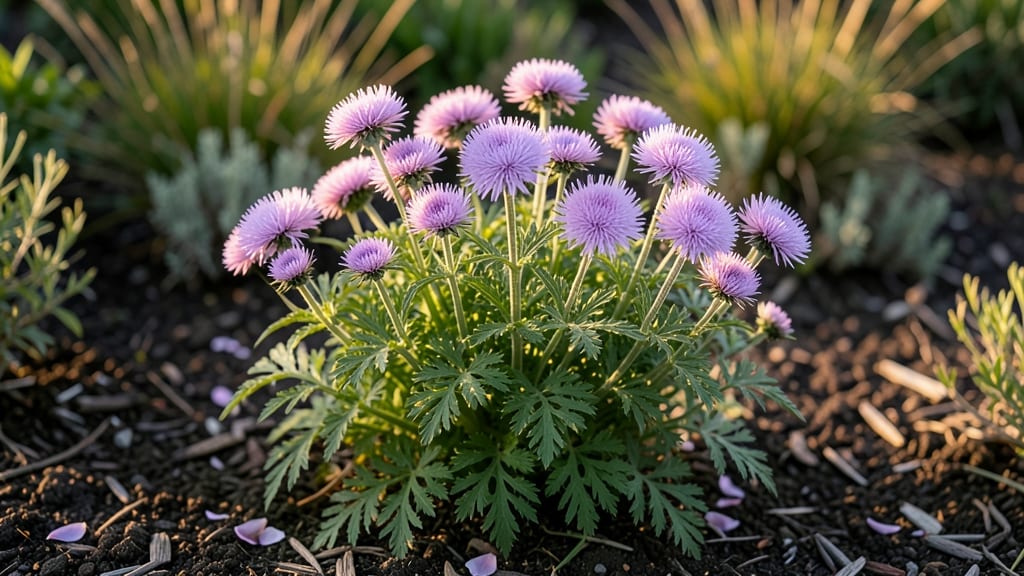
Growing pincushion flowers (Scabiosa) means bold, drought-tolerant blooms that thrive even when other annuals wilt. 🌿 These spherical flowers—with their papery petals and fuzzy centers—are my go-to for containers because they handle the Pacific Northwest’s damp springs and cool summers better than most.
The secret lies in their soil, sunlight, and a little patience with germination.
You’ll need well-draining soil (think 50% potting mix, 50% perlite or sand), a sunny spot with at least 6 hours of light daily, and containers with drainage holes. Seeds are finicky—start them indoors 8-10 weeks before your last frost—but once established, they’re nearly foolproof in pots.
Water only when the top inch of soil feels dry, and pinch back leggy stems to encourage bushier growth.
By midsummer, you’ll be rewarded with 3-inch-wide globes in shades of pink, purple, and white that last for weeks. The best part? They attract pollinators like crazy while staying disease-resistant and deer-proof. Even my black thumb can’t kill these—once they bloom, they’re the star of every patio display.
Perfect for small spaces, balconies, or even window boxes. Whether you’re growing from seed or dividing cuttings, these flowers prove beauty doesn’t require a big yard—just the right conditions. Let’s get those spherical blooms started!
📚 In This Guide
- What you need
- Instructions
- Tips and common mistakes
- Wrapping up and next steps
What you need
- ● Pincushion flower seeds or nursery-grown plants: Seeds: Scabiosa atropurpurea (pincushion flower) or Leucanthemum varieties (e.g., ‘Alaska’ or ‘Moonshine’). Start with 10–20 seeds per container or 3–5 plants for a full look.
- ● Transplants: 1–3 mature plants (3–6 inches tall) per 12–18-inch container.
- ● Containers: Size: 12–18 inches in diameter (deeper for Scabiosa, shallower for Leucanthemum). Drainage: 5+ drainage holes (critical for PNW’s wet winters!). Material: Terra cotta, fabric, or plastic (avoid metal if temps drop below 20°F).
- ○ Well-draining potting mix: 1 part premium potting soil (e.g., Miracle-Gro or FoxFarm). 1 part perlite or coarse sand (improves drainage for PNW’s clay-heavy soils). Optional: Add 1 part compost for extra nutrients (skip if soil is already rich).
- ● Slow-release fertilizer: 5–10–10 or 10–10–10 granules (follow label for container size). OR liquid fertilizer (diluted to half-strength) for feeding every 4–6 weeks.
- ● Basic gardening tools: Trowel or small hand shovel. Pruners (for deadheading or trimming). Spray bottle (for misting seeds).
- ○ Optional (but helpful!): Mulch (1–2 inches of shredded bark) to retain moisture and suppress weeds. Grow lights (12–14 hours/day) if starting seeds indoors before last frost. Container saucers or trays (to catch runoff). Stakes or rings (4–6 inches tall) for tall varieties like Scabiosa to prevent flopping.
- ● Sunlight: Full sun (6+ hours/day)—PNW’s partial shade won’t cut it for vibrant blooms!
- ● Watering schedule: Keep soil consistently moist but not soggy (water when top inch is dry).
- ● Hardiness: Choose perennial varieties rated for USDA Zones 3–9 (e.g., Scabiosa columbaria for drought tolerance).
- ● Timing: Seeds: Start indoors 6–8 weeks before last frost or direct-sow after frost risk passes. Transplants: Plant in spring (April–May) or early fall (September) for PNW’s mild winters.
Step-by-step instructions for growing pincushion flowers in containers
Here's the foolproof method I've used to grow vibrant pincushion flowers that thrive in Pacific Northwest conditions.
🌱 Step 1: Select the Right Container and Soil Mix
Choose a 5-6 inch diameter container with drainage holes—pincushion flowers (Scabiosa) despise soggy roots. I use terracotta pots because they breathe better than plastic, helping prevent fungal issues in our damp climate. Fill the container with a well-draining mix: combine equal parts potting soil, perlite, and compost for optimal aeration and moisture control.
Tap the container gently to settle the mix, then moisten it until damp but not saturated. The ideal soil should hold its shape when lightly squeezed but not leave water beading on the surface. This balance ensures roots get both oxygen and moisture without the risk of rot.
☀️ Step 2: Plant Seeds at the Correct Depth and Spacing
Sow seeds ¼ inch deep—any deeper and they’ll struggle to push through the soil. I plant 3-4 seeds per 5-inch pot since pincushion flowers grow in clumps. Space seeds 1 inch apart to allow room for their bushy growth habit. Cover lightly with a fine layer of the soil mix, then mist gently with water until the surface looks evenly moist.
Place the container in a warm spot (around 65-70°F) with bright, indirect light—direct sun can dry out the soil too quickly at this stage. I use a seedling heat mat for the first week to encourage faster germination, which typically occurs in 10-14 days. Don’t overwater now; the dome of moisture from the misting is enough to keep seeds happy.
💧 Step 3: Provide Consistent Light and Water After Germination
Once seedlings emerge, move them to a south-facing window or under grow lights for 12-14 hours of light daily. Pincushion flowers need strong light to develop their signature globe-shaped blooms, and leggy seedlings are a sure sign they’re stretching for more. You’ll notice strong seedlings have compact stems and deep green leaves—if yours look pale and stretched, adjust the light source within 4 inches of the plants.
Water when the top inch of soil feels dry to the touch, but avoid letting the soil dry out completely. I use a watering can with a narrow spout to direct moisture to the base, preventing fungal issues. Mulch the surface with a thin layer of orchid bark to retain moisture and suppress weeds—this is especially helpful in our rainy climate.
✂️ Step 4: Fertilize and Prune for Bushier Growth
After 4-6 weeks, when seedlings have 3-4 sets of true leaves, switch to a balanced liquid fertilizer (10-10-10) diluted to half-strength. Feed every 2-3 weeks during the growing season to encourage robust blooms. Pincushion flowers respond well to pruning, so pinch back the tips of new growth to encourage bushier, fuller plants. This step is critical—skipping it leads to tall, spindly stems with fewer flowers.
Deadhead spent blooms regularly to redirect the plant’s energy into new flowers. I use clean, sharp scissors to snip just above a set of leaves, which also prevents the plant from going to seed too early. In the Pacific Northwest, pincushion flowers often bloom from late spring through early fall, so consistent care keeps them flowering for months.
🪴 Step 5: Overwinter and Repot as Needed
Before the first frost, move containers to a protected spot or indoors where temperatures stay above 40°F. Pincushion flowers are perennial in USDA zones 3-8, but our wet winters can cause root rot, so I reduce watering and keep them in a bright, cool location. If your plants outgrow their containers, repot in early spring using the same well-draining mix and a pot just 1-2 inches larger in diameter.
Divide mature clumps every 2-3 years to rejuvenate growth. Dig up the plant, separate the roots, and replant the healthiest sections. This ensures your pincushion flowers stay vigorous and continue producing those charming, pom-pom-like blooms year after year. With the right care, they’ll become a low-maintenance staple in your container garden.
Tips & tricks for perfect pincushion flower growth
These practical insights will help you cultivate thriving pincushion flowers that defy Pacific Northwest challenges.
Container Selection: Terracotta pots are ideal for their breathability, but if you prefer plastic, ensure it has drainage holes and avoid glazed containers that trap moisture. I've found that containers with 5-6 inch diameter provide just enough room for pincushion flowers to establish strong root systems without becoming root-bound too quickly. The slightly rough texture of terracotta also helps prevent fungal spores from clinging to the sides, which is crucial in our damp climate.
Soil Mix Strategy: The equal parts potting soil, perlite, and compost ratio is non-negotiable for these plants. I recommend sifting the mix to eliminate large clumps before filling containers—this ensures even moisture distribution and prevents air pockets that can suffocate young roots. For extra insurance against fungal issues, I add a handful of orchid bark to the mix, which improves aeration without altering the moisture balance.
Light Management: Those critical 12-14 hours of daily light are essential for developing those signature globe-shaped blooms. In the Pacific Northwest, where natural daylight varies dramatically by season, I supplement with a simple LED grow light during winter months. Position the light source within 4 inches of the plants—closer than this can scorch tender leaves, while farther away won't provide sufficient intensity. Rotate containers daily to ensure even growth.
Pruning Technique: The pinch-back method for encouraging bushier growth requires precision. Use clean, sharp scissors to snip just above a set of leaves when you see 3-4 sets of true leaves emerge. This technique stimulates lateral branching by redirecting the plant's energy from vertical growth to producing more stems. I perform this pruning every 4-6 weeks throughout the growing season to maintain that full, rounded shape that makes pincushion flowers so charming.
Pro Tips for Grow Pincushion Flower
- These practical insights will help you cultivate thriving pincushion flowers that defy Pacific Northwest challenges.
- Container Selection: Terracotta pots are ideal for their breathability, but if you prefer plastic, ensure it has drainage holes and avoid glazed containers that trap moisture.
- Soil Mix Strategy: The equal parts potting soil, perlite, and compost ratio is non-negotiable for these plants.
Frequently asked questions
Got questions about growing pincushion flowers?
Here are answers to the most common ones to help you cultivate these charming blooms with ease!
How long does it take for pincushion flowers to bloom after planting?
Patience is key! Most pincushion flowers (like Scabiosa varieties) take 60–90 days to bloom from seed, while established plants may flower in 3–4 months after planting. For faster blooms, opt for nursery-grown plants—just ensure they’re hardened off before transplanting.
Are pincushion flowers cold-hardy in the Pacific Northwest?
These tough beauties thrive in USDA Zones 3–9, making them perfect for PNW’s chilly winters. They handle frost well and even prefer cooler climates. Just ensure they’re in well-draining soil to avoid soggy roots during winter rains.
Can I grow pincushion flowers in containers, and what’s the best pot size?
Yes! Choose containers at least 12–14 inches wide and deep with drainage holes. Dwarf varieties like Scabiosa columbaria work well in smaller pots (8–10 inches), while larger types need room to sprawl. Use lightweight potting mix and fertilize lightly every 4–6 weeks.
Why aren’t my pincushion flowers blooming, and how can I fix it?
Common culprits include overcrowding, poor soil, or lack of sunlight. Thin plants to 12–18 inches apart, ensure they get 6+ hours of sun daily, and feed with a balanced fertilizer (10-10-10) in early spring. Deadhead spent blooms to encourage more flowers!
What are some low-maintenance alternatives to pincushion flowers?
If pincushions seem fussy, try these PNW-friendly picks:
- Lavender (drought-tolerant, fragrant)
- Yarrow (long-blooming, pollinator-friendly)
- Catmint (hardy, deer-resistant)
- Black-eyed Susan (bright, easy-care)
Wrapping up and next steps
Growing pincushion flowers—especially the tough, Pacific Northwest-resistant varieties—is a rewarding way to add vibrant color to your containers with minimal fuss! 🌸 With the right soil, sunlight, and a little patience, you’ll enjoy their cheerful blooms season after season.
Now that you’ve got the know-how, why not start small? Try planting one or two in a pot this spring and watch your green thumb grow!
Ready to expand? Experiment with different containers or companion plants to create your dream mini-garden. Happy growing!