Flowers
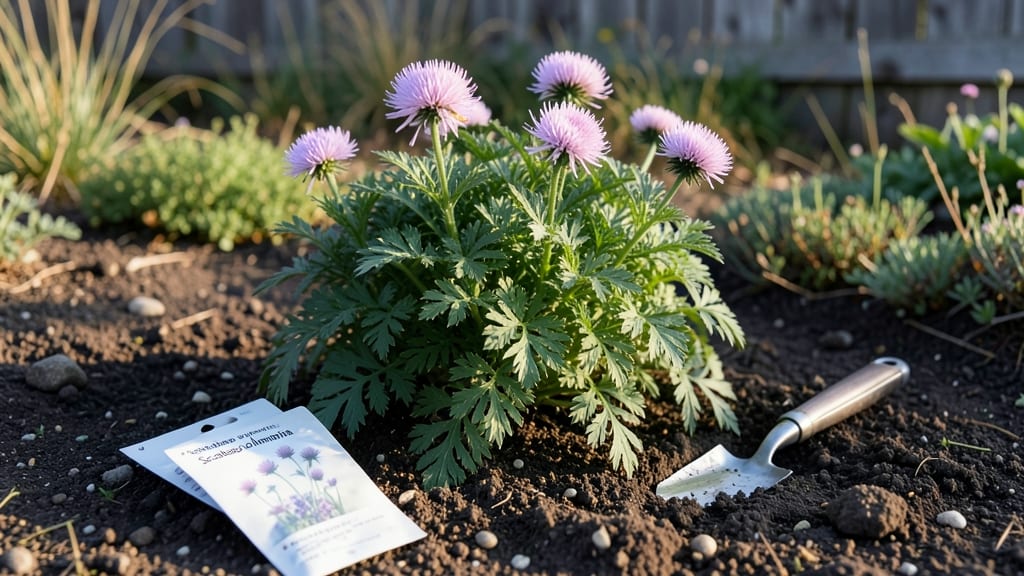
Planting pincushion flower seeds unlocks a garden that hums with pollinators and pops with textured drama—those globe-shaped blooms look like tiny pincushions, and they thrive where many flowers fail. I fell for them after watching bees swarm my first plants last summer, their fuzzy centers packed with nectar.
These aren’t just pretty faces; they’re the backbone of a low-maintenance, high-impact pollinator garden that blooms from early summer through frost.
The secret to success starts with well-draining soil—they hate soggy roots—and a sunny spot where they can stretch their wiry stems toward the sky. You’ll need patience (germination takes 2-4 weeks) and a light touch with watering, but once established, these plants practically grow themselves.
Varieties like Scabiosa columbaria (pincushion flower) and Scabiosa atropurpurea (dark purple pincushion) bring different heights and colors, so mix them for vertical layers that catch every breeze.
By midsummer, you’ll have clusters of blooms that last longer than most annuals, with stems that keep producing new flowers all season. The key is deadheading spent blooms and giving them space to sprawl—3-4 inches apart in full sun ensures they don’t compete for light.
These flowers aren’t just pretty; they’re pollinator magnets, and their long stems make stunning cut flowers too.
Perfect for cottage gardens, wildflower meadows, or even container edges where they can spill over. Let’s get those seeds started—they’re easier to grow than you’d think, and the payoff is worth every minute.
📚 In This Guide
- What you need
- Instructions
- Tips and common mistakes
- Wrapping up and next steps
What you need
- ● Pincushion flower seeds (e.g., Scabiosa columbaria or Scabiosa atropurpurea): Quantity: 50–100 seeds (or more for larger gardens)
- ● Type: Organic, untreated seeds for best germination
- ● Well-draining potting mix: Type: Lightweight, sandy loam or a 50/50 blend of garden soil and perlite
- ● Quantity: 1–2 gallons (depending on container size)
- ● Containers or garden beds: Options: 6–12-inch pots, raised beds, or in-ground plots (ensure depth of at least 6 inches)
- ● Drainage: Containers must have drainage holes to prevent root rot
- ● Watering can or hose with a gentle spray nozzle
- ○ Gloves (optional but recommended for handling soil)
- ● Slow-release fertilizer (e.g., 10-10-10 or organic compost) for nutrient boost
- ● Seed-starting kit (if sowing indoors first)
- ● Mulch (e.g., straw or shredded leaves) to retain moisture
- ● Trellis or stakes (if growing tall varieties for vertical support)
- ● pH testing kit (ideal soil pH: 6.0–7.0)
- ● Plant labels to track varieties and planting dates
Step-by-Step instructions for growing pincushion flowers from seed
These striking vertical blooms thrive with the right timing and care—here’s how to coax them from seed to showstopper.
Prepare Seeds and Sow in Optimal Conditions
Pincushion flowers (Scabiosa) benefit from a cold stratification period to break dormancy. Place the seeds in a sealed bag with slightly damp sand or peat moss and refrigerate for 4-6 weeks before sowing. This mimics winter’s natural chilling process and ensures stronger germination.
Use a light, well-draining seed-starting mix in cell packs or small pots (at least 2-3 inches deep). Scatter seeds ¼ inch deep—they’re tiny, so don’t overcrowd. Label each pot since pincushions come in vibrant colors, and you’ll want to track varieties. Keep the mix consistently moist but never soggy; a spray bottle prevents dislodging seeds.
Provide Warmth and Light for Germination
Germination occurs best at 65-75°F, so place pots on a seedling heat mat or in a warm spot (like atop the fridge). Cover with a humidity dome or plastic wrap to retain moisture—condensation on the lid signals ideal humidity. Expect sprouts in 14-21 days, though some varieties may take longer.
Once seedlings emerge, remove the dome immediately to prevent damping-off (a fungal rot that collapses stems). Position pots under grow lights (12-14 hours daily) 2-3 inches above the plants. Pincushions need bright light to avoid leggy growth—thin stems and widely spaced leaves are your warning signs.
Harden Off and Transplant Seedlings
When seedlings develop 3-4 true leaves (about 6-8 weeks after sowing), begin hardening off. Move pots to a sheltered outdoor spot for 1 hour daily, gradually increasing exposure over 7-10 days. This acclimates them to wind and sun, preventing transplant shock.
Choose a sunny, well-drained location with full sun to partial shade (6+ hours daily). Space plants 12-18 inches apart—they’ll reach 2-3 feet tall with 1-2 foot spreads. Dig holes slightly deeper than the root ball to encourage stability. Water deeply after planting to settle soil around roots.
Maintain Soil Moisture and Fertility
Pincushions thrive in average garden soil but prefer slightly alkaline conditions (pH 6.5-7.5). Mulch with 1-2 inches of organic matter (like shredded bark) to retain moisture and suppress weeds. Water at the base (not overhead) to keep foliage dry—this prevents powdery mildew, a common issue in humid climates.
Feed lightly with a balanced, water-soluble fertilizer (10-10-10) every 4-6 weeks during the growing season. Over-fertilizing leads to lush foliage but fewer blooms. Deadhead spent flowers to encourage continuous blooming from midsummer through fall. Cut back stems to 6 inches tall in early spring to promote bushier growth.
Protect and Extend the Blooming Season
Pincushions attract bees, butterflies, and beneficial wasps, making them a pollinator magnet. To prolong blooms, prune lightly after each flush of flowers—this redirects energy to new growth. In colder climates (below Zone 5), mulch heavily in fall and cut back stems to 2 inches tall before winter.
Watch for aphids or spider mites, which target stressed plants. A strong spray of water usually dislodges them, but neem oil works for persistent infestations. In containers, ensure pots have drainage holes—root rot is the fastest way to lose these perennials. With proper care, pincushions return year after year, their pom-pom blooms adding vertical drama to borders and cottage gardens.
Tips & tricks for growing pincushion flowers from seed
Here's what I've learned after growing these striking vertical blooms—tricks that make all the difference between struggling seedlings and thriving pincushions.
Cold Stratification is Non-Negotiable: That 4-6 week refrigeration period in Step 1 is absolutely critical. I've tried skipping it, and germination rates plummet dramatically. For extra insurance, you can even extend this to 8 weeks if you're in a warmer climate—just don't exceed 6 weeks unless you're certain your seeds are fresh. The goal is to mimic winter's natural chilling process that breaks seed dormancy. If you're short on time, you can use a seed stratification kit that maintains consistent moisture and temperature.
Light Matters More Than You Think: The 12-14 hours of grow light in Step 2 can't be compromised. I've seen leggy seedlings develop when light was insufficient, and those plants never recovered. Position your lights 2-3 inches above the plants and adjust as they grow. If you notice stems stretching toward the light or leaves spacing widely, it's time to move the lights closer. A simple LED grow light works perfectly for this—no need for expensive equipment. Remember, pincushions need bright light to prevent that classic "leggy" growth pattern.
Harden Off Gradually: The 1 hour daily progression in Step 3 is where most people make mistakes. I've seen gardeners rush this process, and their seedlings wilt dramatically when transplanted. Start with just 1 hour in a sheltered spot, then increase by 30 minutes each day. Watch for signs of stress like wilting or yellowing leaves—these are your cues to slow down. A small greenhouse or even a milk crate with shade cloth works perfectly for this gradual transition. The goal is to acclimate plants to outdoor conditions without shocking their systems.
Soil pH is Often Overlooked: While Step 4 mentions slightly alkaline conditions, many gardeners don't test their soil. I recommend using a simple soil pH test kit to verify your garden soil falls between 6.5-7.5. If it's too acidic, you can amend with crushed limestone. For container growing, use a pre-mixed slightly alkaline potting mix. The right pH prevents nutrient deficiencies that can cause yellowing leaves or poor flowering. This is particularly important for pincushions, which are sensitive to soil chemistry and need those proper conditions to thrive.
Pro Tips for Pincushion Flower Seeds
- Here's what I've learned after growing these striking vertical blooms—tricks that make all the difference between str...
- Cold Stratification is Non-Negotiable: That 4-6 week refrigeration period in Step 1 is absolutely critical. I've trie...
- Light Matters More Than You Think: The 12-14 hours of grow light in Step 2 can't be compromised. I've seen leggy seed...
Frequently asked questions
Got questions about growing pincushion flower seeds? You’re not alone! Here are some of the most common queries—plus quick answers to help you cultivate a thriving pollinator garden with ease.
How long does it take for pincushion flower seeds to germinate?
Patience is key! Under ideal conditions (warm soil, 65–75°F and consistent moisture), pincushion flower seeds typically germinate in 14–30 days. If you’re growing in cooler climates, consider starting seeds indoors 6–8 weeks before the last frost for a head start. Pro tip: Keep soil lightly moist but avoid sogginess—overwatering can drown tender sprouts!
When is the best time to plant pincushion flower seeds outdoors?
Timing matters! Plant seeds after the last frost date when soil temperatures reach at least 60°F. For most U.S. regions, this falls between mid-April and June, depending on your zone. If you’re in a hot climate, opt for fall planting (Sept–Oct) to avoid summer heat stress. Bonus: Direct sowing works best—pincushions dislike transplanting!
Do pincushion flowers attract bees and butterflies?
These pollinator magnets produce dense, spherical blooms packed with nectar, making them a favorite for bees, butterflies, and hummingbirds. For extra appeal, plant pincushions alongside coneflowers or black-eyed Susans to create a buzzing, butterfly-friendly oasis. Fun fact: Their unique texture also adds visual drama to cut flower arrangements!
Why aren’t my pincushion flower seeds sprouting?
Don’t panic—try these fixes:
- Check soil temp: Seeds need warmth to germinate. Use a seedling heat mat if your soil is too cool.
- Test moisture: Keep soil damp (like a wrung-out sponge) but not waterlogged.
- Verify freshness: Old seeds (over 2 years) may have low viability. Test a few in a damp paper towel for signs of life.
- Light exposure: Most pincushion seeds need light to germinate—don’t bury them deeply (¼ inch max).
Still stuck? Try scarifying seeds (lightly nicking the shell) to encourage sprouting.
Can I grow pincushion flowers in containers?
Yes! These hardy perennials thrive in containers with well-draining soil and a depth of at least 12 inches. Choose a pot with drainage holes and place it in full sun (6+ hours/day). For a striking display, pair pincushions with lavender or ornamental grasses. Just remember: Containers dry out faster—water consistently and fertilize lightly every 4–6 weeks.
Wrapping up and next steps
Growing pincushion flower seeds is a rewarding way to add vibrant vertical interest and support local pollinators in your garden. With their striking blooms and easy-care nature, these flowers bring both beauty and ecological benefits—perfect for gardeners of all levels.
Now that you’re armed with the right knowledge, why not take the next step? Grab those seeds, sketch your dream garden layout, and watch your space transform into a buzzing, colorful haven! 🌸🐝