Tools
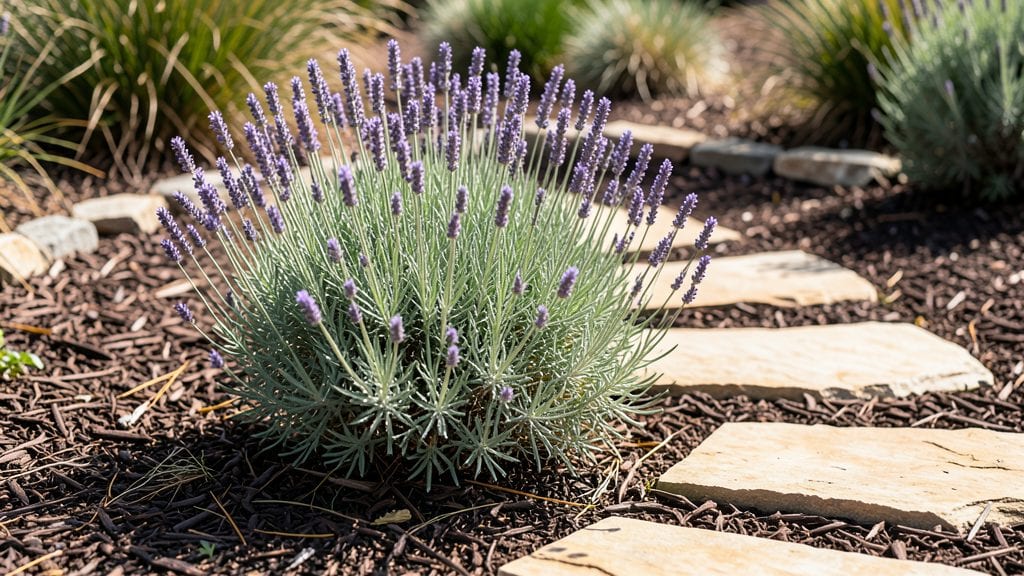
Designing my first flower garden plans and layouts that bloomed effortlessly was the kind of magic that turned weekends into joyful escapes—until I realized most gardens peak in summer and fade by fall. found the right plant combos that hand off blooms like a relay race.
The secret isn’t working harder; it’s working smarter with layered plants that overlap their seasons.
Start with a 4-step framework: sun exposure zones, height layers (tall to short), seasonal bloom sequences, and 3-5 focal points (like a trellis or bench). My cottage garden, for example, uses perennials with staggered blooms—peony in May, black-eyed Susan in July, and asters in September—so there’s always color.
Even beginners can pull this off with basic tools: a tape measure, graph paper, and a color wheel.
What you’ll end up with is a garden that looks effortless—vibrant even in winter—because the plants do the work. Imagine cutting flowers for arrangements all season long, with no wilted stems or sparse patches.
The best part? You’ll spend less time deadheading and more time enjoying the show. Here’s how to map it out step by step.
This approach works for any space: a 6-foot-wide border, a 100-square-foot backyard, or even container gardens on a patio. The key is repetition—grouping plants in odd-numbered clusters (3, 5, or 7) creates visual harmony without overcrowding. Let’s sketch your dream layout today!
📚 In This Guide
- What you need
- Instructions
- Tips and common mistakes
- Wrapping up and next steps
What you need
- ● Flower bulbs/seeds: Choose perennials like daylilies, coneflowers, black-eyed Susans, and Russian sage (3–5 plants per square foot for full coverage). Opt for self-cleaning varieties (e.g., Echinacea 'White Swan') to skip deadheading.
- ● Mulch: 2–3 inches of organic mulch (shredded bark or straw) to retain moisture and suppress weeds.
- ● Compost/fertilizer: 1–2 bags of balanced, slow-release fertilizer (10-10-10 or composted manure) to enrich soil.
- ○ Drip irrigation kit: 1/4-inch tubing, emitters, and a timer (optional but highly recommended for drought-resistant gardens).
- ● Hand trowel (for transplanting small bulbs/seeds).
- ● Garden fork (for aerating soil).
- ● Pruners (sharp, bypass-type for clean cuts).
- ● Wheelbarrow (for hauling mulch/soil).
- ● Measuring tape & stakes (to map layouts and mark plant positions).
- ● Garden gloves (cute and durable—think cactus or rose-resistant!).
- ● Sunlight audit: Measure 6+ hours of sun daily for most perennials (adjust for shade-lovers like heucheras or hostas).
- ● Soil test: Check pH (aim for 6.0–7.0; amend with lime or sulfur if needed). 💡 Local extension offices offer free tests!
- ● Layout sketch: Draft a to-scale design (use graph paper or apps like SketchUp Free).
- ● Native plants: Prioritize locally adapted species (e.g., purple coneflower in Midwest gardens) for resilience.
- ● Arbor or trellis for climbing flowers (e.g., clematis or morning glories).
- ● Solar-powered garden lights for evening ambiance.
- ● Rain gauge to monitor watering needs.
Step-by-step instructions for designing a season-long flower garden
Here's the method I use to create vibrant, low-maintenance gardens that bloom continuously.
Choose a Sun Exposure and Garden Shape
Start by mapping your garden's sunlight exposure. Most flowers thrive in full sun (6+ hours daily), but shade-loving varieties like impatiens or hostas need partial shade (3-6 hours). I sketch my space on graph paper, marking sun patterns throughout the day—morning sun on the east side, intense afternoon sun on the west.
Next, define your garden's shape. A rectangular layout works well for formal gardens, while curved edges create a natural, flowing look. I prefer irregular shapes because they feel more organic and reduce harsh lines that can make a space feel boxed in. Measure your area and note any existing structures like fences or trees that will influence plant placement.
Plan for Seasonal Layering
To achieve continuous color without deadheading, I layer plants by bloom time. Start with early spring bloomers like crocuses or hellebores at the front, followed by midseason flowers such as daylilies or black-eyed Susans in the middle, and late-season bloomers like chrysanthemums or asters at the back. This ensures one plant is always in flower.
Add height variation with tall grasses or perennials like coneflowers at the back, medium-height shrubs like butterfly bush in the middle, and low-growing annuals like petunias at the front. I like to group plants with similar water needs together—this makes maintenance easier. For example, place drought-tolerant lavender near succulents and moisture-loving impatiens near ferns.
Incorporate Focal Points and Pathways
Every great garden needs a focal point. I often use a striking ornamental tree, like a Japanese maple, as the centerpiece. Smaller focal points can include a birdbath, sculpture, or colorful pot>. Place your focal point where it will be visible from multiple angles—this draws the eye and adds depth.
Next, plan pathways. A simple gravel or mulch path> (about 2 feet wide>) creates a natural flow and makes weeding easier. I like to edge paths with low-growing plants like creeping thyme or sedum to soften the lines. Avoid straight paths unless you're going for a formal look—curved paths feel more inviting and encourage exploration.
Arrange for Natural Transition and Texture
Instead of planting in straight rows, I use the drift method>—grouping plants in odd-numbered clusters (3, 5, or 7) to create a natural, organic feel. This mimics how plants grow in the wild and makes the garden feel more relaxed. For example, plant three coneflowers together, then space them 18-24 inches apart> to allow for growth.
Mix textures for visual interest. Pair fine foliage> like ferns with bold leaves> like hostas, and add grasses or ornamental plants> for movement. I also incorporate plants with different heights—tall, medium, and low—to create layers. This not only adds depth but also makes the garden feel more dynamic and full.
Test and Refine Before Planting
Before digging, I sketch my layout on paper and walk through it to visualize the flow. I check sightlines from different angles—will the focal point be visible from the house? Does the pathway lead naturally to the garden's highlights? I also consider how the garden will look in each season, ensuring there’s always something blooming or interesting, like seed heads or colorful foliage.
Once I’m happy with the design, I mark planting spots with stakes or spray paint. This helps me avoid mistakes and ensures I don’t accidentally plant something in the wrong location. I also take photos of the layout for reference. If I’m unsure about a plant’s mature size, I check the tag or a reliable gardening resource to confirm spacing needs. This step saves time and frustration later!
Tips & tricks for perfect flower garden plans and layouts
Creating a garden that blooms continuously takes a few strategic moves—here's how to make every season stunning.
Sunlight Strategy: Don't just guess at sun exposure—use a simple app or observe your space for a week. Note which areas get morning sun (gentler light) versus afternoon sun (intense heat). This helps you place heat-sensitive plants like impatiens in morning sun spots while tougher varieties like lavender can handle afternoon rays. I mark my garden with stakes to visualize sun patterns before planting.
Layering Like a Pro: The secret to zero deadheading is strategic layering by bloom time. Start with early bloomers like crocuses at the front (they'll fade first), then midseason flowers like daylilies in the middle, and late-season asters at the back. This creates a natural progression where one plant always has company. I like to add evergreens or ornamental grasses as "filler" plants—they provide structure when flowers aren't blooming.
Focal Point Placement: Your centerpiece should be visible from multiple angles. When placing your Japanese maple or birdbath, walk through your garden and check sightlines from different rooms in your house. I find that positioning focal points slightly off-center creates more visual interest than dead-on placement. Also, consider adding a secondary focal point for smaller spaces—even a colorful pot can serve this purpose.
Pathway Planning: Those 2-foot wide paths aren't just for walking—they're design elements too. I edge mine with creeping thyme which adds fragrance and softens the hard lines of gravel. For a more formal look, use boxwood or dwarf shrubs along the edges. Remember that curved paths feel more inviting and naturally guide visitors through your garden's highlights.
Pro Tips for Flower Garden Plans And Layouts
- Creating a garden that blooms continuously takes a few strategic moves—here's how to make every season stunning.
- Sunlight Strategy: Don't just guess at sun exposure—use a simple app or observe your space for a week.
- Layering Like a Pro: The secret to zero deadheading is strategic layering by bloom time.
Frequently asked questions
Got questions about designing your dream flower garden? We’ve got answers! Whether you’re a beginner or a seasoned gardener, these common queries will help you plan a stunning, low-maintenance layout that blooms all season long.
How do I choose flowers that bloom all season without deadheading?
Opt for a mix of annuals (like zinnias and marigolds) and perennials (such as coneflowers or black-eyed Susans) with staggered bloom times. Group plants by color or height for cohesion, and include self-cleaning varieties (e.g., cleome) to minimize deadheading. Succession planting ensures continuous color!
When is the best time to plant a flower garden layout?
For most climates, spring (after the last frost) or early fall are ideal. Cool-season flowers (like pansies) thrive in fall, while warm-season blooms (e.g., petunias) love spring warmth. Container gardens can be planted year-round with seasonal swaps. Always check your USDA hardiness zone for precision!
What’s a budget-friendly way to start a flower garden layout?
Start small with cuttings, seed swaps, or dollar-store pots! Buy seeds instead of seedlings, reuse containers, and propagate perennials like mint or lavender. Thrift stores often have affordable gardening tools. Native plants are cost-effective and thrive with minimal care.
How do I fix a flower bed that looks messy or overgrown?
First, prune dead or leggy plants to the base. Add mulch (2–3 inches) to suppress weeds and retain moisture. Replace crowded plants with low-maintenance perennials like sedum or ornamental grasses. A fresh layer of compost will revive soil health in no time!
Can I design a flower garden layout in a small space, like a balcony or patio?
Use vertical planters, hanging baskets, or tiered shelves to maximize space. Choose compact varieties like bacopa, nasturtiums, or dwarf petunias. Even a window box can hold a mini garden with the right layout. Containers let you rotate plants for seasonal interest!
Wrapping up and next steps
Creating a stunning, low-maintenance flower garden that blooms season after season is easier than you think! By choosing the right plants, planning thoughtful layouts, and embracing zero deadheading strategies, you’ll enjoy vibrant color with minimal effort.
Whether you’re a beginner or a seasoned gardener, the key is to start small, experiment with designs, and let nature do the work.
Ready to transform your space? Grab your tools, sketch a simple plan, and plant with confidence! Your future garden will thank you—one bloom at a time. 🌸