Container Gardens
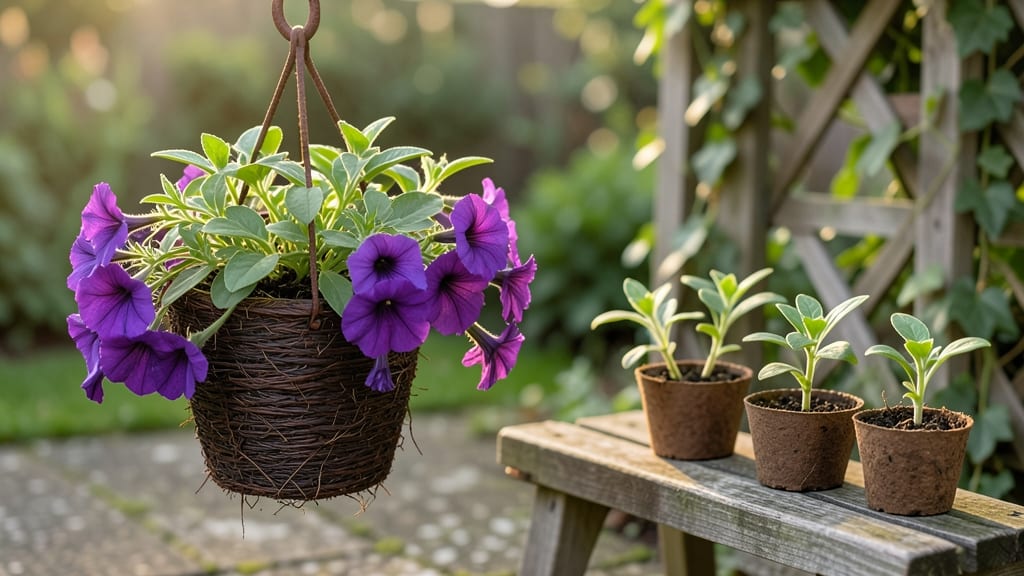
Creating flower hanging baskets that spill over with color is easier than you think—no green thumb required. 🌸 I’ve turned my balcony into a vertical garden using this foolproof layering method, and the results are showstopping without the fuss.
The secret lies in the right basket, soil, and plant pairing that holds up all season.
Start with a 14-inch basket (or larger for bigger blooms) and moisture-retentive potting mix—skip the cheap soil, or you’ll water every day. Add a slow-release fertilizer at planting to feed roots for weeks.
Then layer plants from top to bottom: trailing vines (like sweet potato vine) on the edges, mid-height fillers (like petunias), and a thriving centerpiece (like geraniums or fuchsias).
Within three weeks, you’ll see vines cascading like a waterfall, and the blooms will attract butterflies all summer. The key is watering from the top (so roots stay moist) and fertilizing monthly—no dead zones, no wilted edges. Even my black thumb can’t kill these.
Pro tip: Swap out finicky annuals for perennial baskets in fall (like heuchera or sedum) to cut spring prep time. Hang where they get 6+ hours of sun, and your balcony will look like a botanical masterpiece—with zero effort. Ready to get started?
📚 In This Guide
- What you need
- Instructions
- Tips and common mistakes
- Wrapping up and next steps
What you need
- ● Hanging basket: Choose a basket with drainage holes (8–12 inches in diameter for small baskets, 14+ inches for larger displays). Pro tip: Plastic, wire, or coconut fiber baskets all work—pick based on your style!
- ○ Sphagnum moss or liner: A 2–3 inch layer to retain moisture and prevent root rot (optional but highly recommended for beginners).
- ● Potting soil: A high-quality, well-draining container mix (avoid garden soil—it compacts!). Aim for 1–2 gallons per basket.
- ● Slow-release fertilizer: Mix 1–2 cups into the soil for a nutrient boost that lasts 3–4 months.
- ● Flowering plants: Select 3–5 varieties (thrillers, fillers, and spillers) for a balanced look. Popular picks: Thrillers: Tall plants like Dracaena or Aspidistra (1–2 per basket).
- ● Fillers: Bushy plants like Impatiens or Begonias (3–4 per basket).
- ● Spillers: Trailing plants like Petunias or Sweet Potato Vine (2–3 per basket).
- ● Gloves: Protect your hands from soil and thorns (nitrile or leather work great).
- ● Hand trowel or small shovel: For digging and arranging plants neatly.
- ● Watering can or hose with a gentle spray nozzle: Avoid over-saturating the soil.
- ● Scissors or pruners: Trim plant roots or stems if they’re too long.
- ○ Optional but handy: Mulch (like orchid bark) to retain moisture.
- ● Decorative elements (ribbons, paint, or moss for a finished look).
- ● Plant supports (small stakes for top-heavy thrillers).
- ● Sunlight knowledge: Check your plants’ light needs (full sun, partial shade, etc.) and match them to your hanging spot.
- ● Watering routine: Plan for daily watering for the first week, then adjust based on weather.
- ● Patience: Give plants 2–4 weeks to root and fill out before expecting full blooms!
Step-by-Step instructions for creating stunning flower hanging baskets
Transform any space with lush, cascading blooms—here’s my tested method for baskets that thrive all season.
🪴 Step 1: Select and Prepare the Basket
Choose a coir or plastic basket with drainage holes—coir allows roots to breathe while plastic retains moisture longer. I prefer 12-14 inch diameter for four plants per basket, as specified. Rinse the basket thoroughly with warm water to remove any manufacturing residues that could harm roots. Place a 1-inch layer of sphagnum moss at the bottom to prevent soil from escaping through the drainage holes.
This moss layer acts as a natural filter, keeping your premium potting mix in place while allowing excess water to drain freely. If your basket lacks built-in drainage, drill ¼-inch holes along the bottom edges using a step bit—just enough to let water out without letting soil wash away. Real talk: skipping this step leads to soggy roots and wilted plants within weeks.
🌱 Step 2: Build the Moisture-Retention Layer
Add a 2-inch layer of orchid bark or perlite over the moss. This creates an airy foundation that prevents compaction while promoting root growth. For baskets in hot, dry climates, I blend 50% bark with 50% hydroponic clay pebbles—this combo holds moisture near the roots while allowing excess to drain. Moisten this layer lightly with a spray bottle until it feels damp but not saturated.
Here’s the thing—this layer is your secret weapon against root rot. Without it, the dense potting mix will suffocate roots by trapping too much moisture. Press down gently to settle, but don’t compact it. You’ll know it’s right when your finger sinks in slightly but springs back.
🌿 Step 3: Add Potting Mix and Plant Strategically
Fill the remaining space with high-quality potting mix (avoid garden soil—it compacts and blocks drainage). Leave 1-2 inches at the top for finished plants. For four plants, divide the mix into four equal portions—this ensures even moisture distribution. Gently form small mounds in the center of the basket where you’ll place your plants.
When planting, position the largest plants at the center-back of the basket and smaller trailing varieties toward the edges. This creates a natural tiered effect as they grow. Water the soil thoroughly after planting to eliminate air pockets and help roots establish contact with the mix. You’ll see the soil settle slightly—this is normal and ensures good root coverage.
☀️ Step 4: Water and Fertilize for Immediate Growth
Water the basket deeply until water runs freely from the drainage holes. This ensures the entire root zone is hydrated without creating surface puddles. Let it drain completely, then water again lightly to settle the soil around the roots. For the first two weeks, I fertilize with a diluted liquid bloom booster (half-strength) to jumpstart growth without burning tender new roots.
After planting, place baskets in bright, indirect light for 3-5 days to reduce transplant shock. You’ll notice new leaves emerging within 7-10 days—that’s your signal everything’s working. Here’s where it gets fun: rotate baskets quarter-turn daily so plants grow evenly toward the light, not lopsided.
⏰ Step 5: Maintain Through the Blooming Season
Water baskets daily in hot weather and every other day in cooler conditions, checking that the top inch of soil feels dry before watering. Hang baskets where they’ll receive 6+ hours of sunlight daily—morning sun with afternoon shade works best to prevent wilting. Feed plants weekly with a balanced liquid fertilizer during the blooming season, but reduce to biweekly once flowers fade.
Deadhead spent blooms weekly to encourage continuous flowering. You’ll see new buds forming within 3-5 days of pruning. For trailing varieties, gently weave stems through the basket’s edges to create a fuller, more dramatic cascade. This is the moment that matters: with consistent care, your baskets will stay vibrant for 3-4 months—far longer than store-bought displays.
Tips & tricks for perfect flower hanging baskets
These simple yet game-changing strategies will transform your hanging baskets from ordinary to showstopping displays that last all season.
Basket Selection Matters: For the best results, opt for coir baskets in the 12-14 inch range—they breathe better than plastic and create that perfect cascading effect. If you choose plastic, look for ones with built-in drainage holes, but be prepared to drill your own if needed. I've found that coir baskets hold up better in windy conditions too, which is a bonus for outdoor displays.
Layering is Everything: The 2-inch moisture-retention layer in Step 2 isn't just about drainage—it's your insurance against root rot. When mixing bark and pebbles, use a spray bottle to moisten it until it feels like a damp sponge. This layer should never be compacted; think of it as creating a fluffy pillow for your plants' roots to nestle into.
Plant Placement Strategy: Positioning your plants strategically in Step 3 creates that stunning tiered effect. Place your tallest plants in the center-back and work your way outward with shorter varieties. Pro tip: For trailing plants like petunias or fuchsias, gently tuck the stems through the basket's edges as they grow—this creates instant fullness without waiting for them to cascade naturally.
Watering Wisdom: The deep watering in Step 4 is crucial—you want water running freely from the bottom, but avoid creating puddles. After the initial deep watering, let the basket drain completely before giving that light second watering. This two-step process ensures your plants get a thorough soaking without becoming waterlogged. During hot weather, I find it helpful to water in the early morning to prevent evaporation and give plants a full day to absorb moisture.
Pro Tips for Make Flower Hanging Baskets
- These simple yet game-changing strategies will transform your hanging baskets from ordinary to showstopping displays that last all season.
- Basket Selection Matters: For the best results, opt for coir baskets in the 12-14 inch range—they breathe better than plastic and create that perfect cascading effect.
- Layering is Everything: The 2-inch moisture-retention layer in Step 2 isn't just about drainage—it's your insurance against root rot.
Frequently asked questions
Got questions about crafting your own stunning flower hanging baskets? You’re not alone! Here are answers to the most common queries to help you create beautiful, thriving displays with confidence.
What’s the best time of year to plant hanging baskets?
For most climates, late spring to early summer (after the last frost) is ideal—when temperatures are warm but not scorching. However, cool-season flowers (like pansies or violas) can thrive in early spring or fall. Check your plant hardiness zone for specifics!
How often should I water hanging baskets?
Hanging baskets dry out faster than ground-level pots due to wind exposure. Water daily in hot weather and every other day in mild conditions. Test moisture by sticking your finger 1–2 inches into the soil—if it’s dry, it’s time to hydrate! Pro tip: Use a self-watering basket or drip irrigation for consistency.
Can I reuse old baskets or containers?
Clean, sturdy containers
(plastic, metal, or even repurposed buckets) work great. Just ensure they have drainage holes to prevent root rot. For a fresh look, add liners (coconut fiber or moss) or paint them with non-toxic outdoor paint. Bonus: Macramé hangers add a boho-chic touch!
How do I keep pests away from my hanging baskets?
Pests like aphids, spider mites, or fungus gnats love hanging baskets too! Prevent them with:
- Neem oil spray (weekly preventive treatment).
- Sticky traps for flying insects.
- Ensuring good airflow (avoid overcrowding plants).
- Removing yellowing leaves promptly.
What are the best beginner-friendly flowers for hanging baskets?
Start with low-maintenance, trailing, or compact varieties like:
- Petunias (vibrant colors, drought-tolerant).
- Begonias (lush foliage, shade-friendly).
- Lobelia (tiny blue/purple blooms, great for edges).
- Sweet potatoes (vine-type) (fast-growing, dramatic cascades).
- Calibrachoa (mini petunia lookalike, heat-loving).
How do I overwinter hanging baskets?
If you live in a cold climate, move baskets to a protected spot (like a garage or under an eave) before frost. Trim dead foliage, reduce watering, and cover with burlap if temps drop below 20°F. Dormant plants (like heuchera or ivy) can survive with minimal care—just avoid freezing soil!
Wrapping up and next steps
Creating your own flower hanging baskets is simpler—and more rewarding—than you think! With just a few supplies and a little creativity, you can transform any space into a vibrant, cascading oasis.
Whether you’re a gardening pro or a beginner, these foolproof layers will help you craft stunning baskets that bloom with confidence.
Now that you’ve got the know-how, grab your supplies and get planting! 🌸 Start small with a single basket, or go all out with a full balcony garden. Your future self (and your neighbors!) will thank you for the burst of color and life.