Propagation
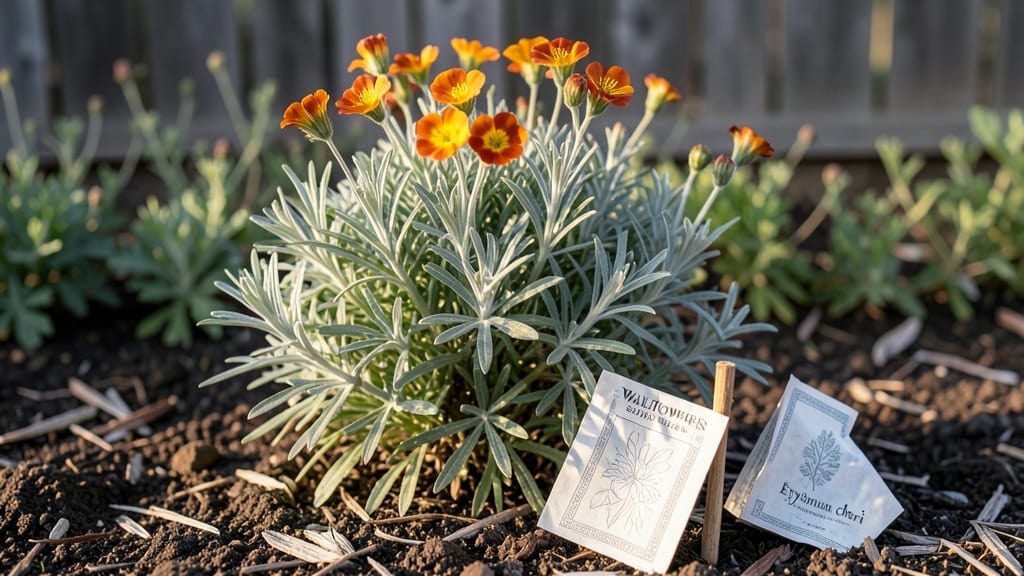
Growing wallflowers from seed means 60 days to vibrant blooms that thrive in cold climates and bring bees buzzing to your garden. 🌿 I’ll never forget the first time I scattered those tiny seeds—what looked like dust turned into a riot of color by spring.
These hardy perennials (Erysimum spp.) reward patience with long-lasting flowers that perfume the air.
The secret starts with timing: sow seeds 8-10 weeks before your last frost for outdoor planting, or 6 weeks indoors under grow lights. Wallflowers love well-draining soil—mix in sand or perlite if your garden holds moisture—and keep seeds just below the surface (no deeper than ¼ inch).
Germination can take 10-21 days, so stay patient and keep the soil consistently moist but never soggy.
Once seedlings sprout, thin them to 12-18 inches apart to prevent overcrowding (a common mistake that stunts growth). Young plants need full sun to partial shade and regular watering until established.
By late spring, you’ll have sturdy stems covered in clusters of blooms—yellow, purple, or white—that last from spring into summer.
Wallflowers handle cold better than most perennials, making them perfect for early-season color. They even self-seed, so you’ll get free plants for years. Here’s where the magic happens—let’s get those seeds started!
📚 In This Guide
- What you need
- Instructions
- Tips and common mistakes
- Wrapping up and next steps
What you need
- ● Wallflower seeds: Choose cold-hardy varieties like Erysimum cheiri or Cheiranthus (1–2 packets, ~50–100 seeds total). Opt for organic, non-GMO seeds for best results.
- ● Seed trays or pots: 2–4 shallow trays (3–4 inches deep) with drainage holes, or 2–3-inch diameter pots (6–12 total). Use biodegradable pots if transplanting directly.
- ● Seed-starting mix: A lightweight, sterile mix (e.g., 50% peat moss, 30% perlite, 20% vermiculite) or a pre-mixed seedling soil (1–2 bags). Avoid garden soil—it’s too dense!
- ● Grow lights or sunny windowsill: A full-spectrum LED grow light (12–16 hours/day) or a south-facing window with consistent sunlight.
- ● Spray bottle: For gentle watering (avoid overhead streams to prevent seed displacement).
- ○ Plastic wrap or humidity dome: To retain moisture until germination (optional but helpful for humidity-loving seeds).
- ● Fertilizer: A balanced, water-soluble fertilizer (5-10-5 or 10-10-10) for seedlings, diluted to half-strength.
- ● Heating mat (70–75°F) to speed up germination in cool climates.
- ● Fungicide (e.g., neem oil or copper-based) to prevent damping-off disease.
- ● Plant labels and a marker to track varieties.
- ● Twine or clips for staking taller seedlings.
- ● Outdoor hardening-off tray (for gradual acclimation before transplanting).
Step-by-step instructions for growing wallflowers from seed
Here’s how to coax vibrant, cold-hardy wallflowers from tiny seeds into blooming perennials.
🌱 Step 1: Start Seeds Indoors 8-10 Weeks Before Last Frost
Fill 2-3 inch deep seed trays with a well-draining seed-starting mix. Wallflower seeds need excellent air circulation, so avoid compacting the soil—just press it lightly to settle. Scatter seeds ¼ inch apart on the surface, as they require light to germinate. A gentle misting ensures even moisture without burying them.
Cover the tray with a clear plastic dome or wrap to retain humidity, then place it in a cool (60-65°F) spot. Wallflowers germinate slowly—expect tiny shoots in 2-4 weeks. Remove the cover once sprouts emerge to prevent damping-off. Watch for the first true leaves (not the initial seed leaves) to appear before thinning.
💧 Step 2: Provide Cool Conditions and Controlled Watering
Wallflowers thrive in cool temperatures—keep seedlings at 55-65°F day and night. A sunny windowsill or under grow lights for 12-14 hours daily prevents leggy growth. Water from the bottom of the tray to avoid disturbing delicate seedlings; the soil should stay evenly moist but not soggy.
Once seedlings have 2-3 sets of true leaves (about 4-6 weeks), thin to 2 inches apart to reduce competition. Use clean scissors to snip unwanted seedlings at soil level—don’t pull, or you’ll disturb roots. Fertilize lightly with a balanced 10-10-10 solution at half-strength to encourage sturdy growth.
☀️ Step 3: Harden Off and Transplant After Frost Risk Passes
Two weeks before your last frost date, begin hardening off seedlings by placing them outdoors in partial shade for 1-2 hours daily. Gradually increase exposure over 7-10 days, ending with full sun. Wallflowers tolerate light frost but need acclimation to prevent shock.
Transplant seedlings 12-18 inches apart in well-drained soil with full sun to partial shade. Dig holes slightly deeper than the root ball to encourage strong root establishment. Water deeply after planting to settle the soil. Mulch lightly with 1-2 inches of organic mulch to retain moisture and suppress weeds.
✂️ Step 4: Maintain Through First Season for Next Year’s Blooms
Wallflowers are drought-tolerant once established, but water 1 inch per week during the first growing season. Deadhead spent blooms to encourage more flowers and prevent self-seeding where you don’t want it. Fertilize lightly in early spring with 5-10-10 fertilizer to support root and foliage growth.
In fall, cut back foliage to 2-3 inches tall to promote a tidy appearance and protect crowns from harsh winters. Wallflowers are perennial and will return year after year with proper care—just be patient, as they may take 60-90 days to bloom their first season.
Tips & tricks for perfect wallflower seedlings
Wallflowers might seem finicky, but these insider tips will help you navigate their quirks and grow thriving plants with minimal stress.
Light Requirements: Wallflower seeds need light to germinate, so avoid pressing them into the soil—just scatter them on the surface. If you're using a seed tray without a clear lid, place it under grow lights for 12-14 hours daily to prevent leggy seedlings. I've found that positioning the lights just 4-6 inches above the tray creates the ideal balance between growth and strength.
Temperature Matters: Maintaining that 60-65°F range is crucial, especially during germination. If your home runs warmer, place the seed tray on a cooling mat or in a spot away from heat sources like radiators. Once sprouts appear, keep them at 55-65°F day and night—cool nights help prevent disease and encourage sturdy stems.
Harden Off Gradually: The 7-10 day hardening-off process is where many beginners struggle. Start with just 1-2 hours of partial shade, then increase exposure by 1 hour daily. I've seen wallflowers go into shock when moved too quickly—watch for wilting or yellowing leaves as warning signs. A simple shade cloth can help ease the transition if your seedlings seem stressed.
Transplanting Wisdom: When transplanting, dig holes slightly deeper than the root ball to encourage strong root establishment. This might seem counterintuitive, but wallflowers appreciate the extra depth. After planting, water deeply but avoid creating puddles—these plants hate soggy soil. A light layer of 1-2 inches of organic mulch helps retain moisture without smothering the delicate seedlings.
Pro Tips for Wallflowers From Seed
- Wallflowers might seem finicky, but these insider tips will help you navigate their quirks and grow thriving plants with minimal stress.
- Light Requirements: Wallflower seeds need light to germinate, so avoid pressing them into the soil—just scatter them on the surface.
- Temperature Matters: Maintaining that 60-65°F range is crucial, especially during germination.
Frequently asked questions
Got questions about growing wallflowers from seed? You’re not alone!
Here are answers to the most common queries—from timing to troubleshooting—to help you cultivate these cheerful blooms with confidence.
How long does it take for wallflower seeds to germinate?
Wallflower seeds typically germinate in 2–4 weeks when kept in consistent moisture and warmth (around 60–70°F). For faster results, pre-chill seeds for 1–2 weeks in the fridge before sowing. Patience is key—some stubborn seeds may take up to 6 weeks!
Can I plant wallflower seeds directly outside, or should I start indoors?
Direct sowing is possible in early spring or fall (after the last frost), but starting indoors 6–8 weeks before the last frost gives seedlings a head start. Use biodegradable pots to avoid transplant shock. If sowing outside, choose a sunny, well-drained spot—wallflowers hate soggy soil!
Why aren’t my wallflower seedlings sprouting? Troubleshooting tips?
Try these fixes if seeds aren’t germinating:
- Check moisture: Keep soil evenly damp (not waterlogged). Mist lightly daily.
- Test depth: Seeds need 1/4 inch of soil coverage—too deep = slower sprouting.
- Warmth matters: Place trays on a seedling mat or sunny windowsill.
- Fresh seeds: Old seeds (2+ years) may lose viability. Try scarifying (lightly nicking) seeds to break dormancy.
Are there fast-growing wallflower varieties for quicker blooms?
Yes! Erysimum ‘Bowles Mauve’ and ‘Fire King’ (red) are reliable choices, blooming in 60–70 days from seed. For height, try ‘Apricot Glow’ (2–3 feet tall). Always check seed packets for days-to-maturity—some dwarf varieties bloom even faster!
Do wallflowers attract pests? How can I protect them?
Wallflowers are generally pest-resistant, but aphids or cabbage moths may visit. Prevent issues by:
- Spraying seedlings with neem oil if aphids appear.
- Avoid overcrowding—thin seedlings to 6–12 inches apart for airflow.
- Plant near marigolds or garlic to deter pests naturally.
Wrapping up and next steps
Growing wallflowers from seed is a rewarding journey that brings vibrant color to your garden in just 60 days—and the best part? These cold-hardy perennials thrive with minimal fuss!
Whether you’re a beginner or a seasoned gardener, your patience will pay off with fragrant blooms that attract pollinators and brighten up winter landscapes. 🌱✨
Now that you’re armed with tips and tricks, take the next step: grab those seeds, mark your calendar, and start sowing! Watch your garden transform into a fragrant paradise—one tiny seed at a time. Happy planting! 🌸