Vegetables
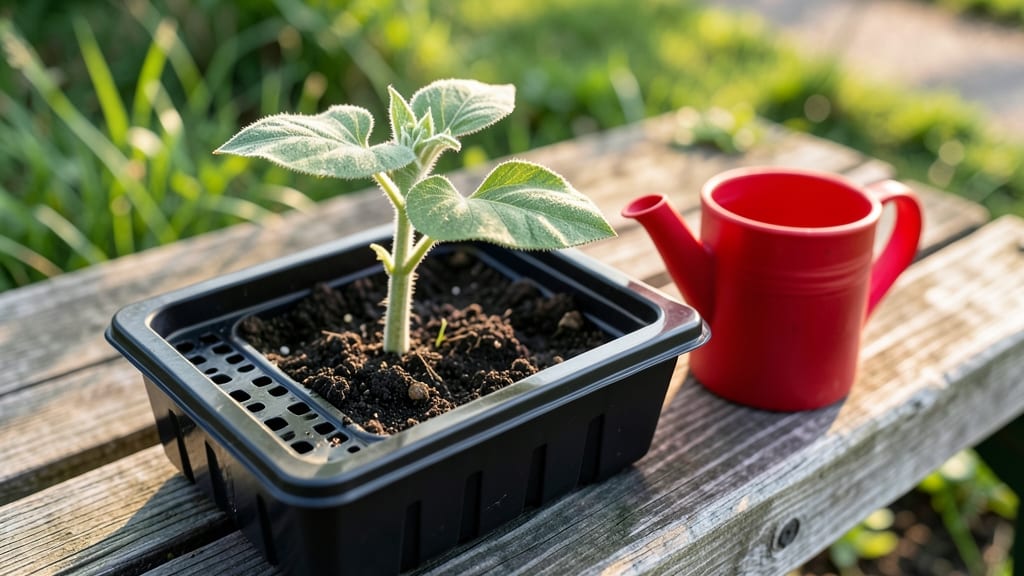
Sunflower sprout leaves appear within 3-5 days when you nail the germination setup—warmth, moisture, and darkness are the magic trio. I’ve watched tiny cotyledons unfurl like nature’s own origami, and once you see it, you’ll never buy sunflower seedlings again.
The first leaves pack a nutritional punch too, with more protein than mature sunflower heads.
Here’s the secret: keep seeds in 75-80°F soil with a damp paper towel until sprouts crack open. Once they do, move them to bright light (but not direct sun yet) and you’ll avoid those sad, leggy seedlings that stretch toward the window like starving toddlers.
Those first leaves? They’re your plant’s power source—thin and delicate, but full of potential.
📚 In This Guide
- What you need
- Instructions
- Tips and common mistakes
- Wrapping up and next steps
What you need
- ● Sunflower seeds: 1–2 cups (about 150–200 seeds) – Choose heirloom or organic varieties like Russian Mammoth or Sunflower ‘Autumn Beauty’ for best results.
- ● Growing medium: Option 1: 1–2 quart-sized mason jars or wide-mouth glass containers (clean and sterilized).
- ● Option 2: A shallow tray or seedling tray (10"x20" or larger) with drainage holes.
- ● Cheesecloth or breathable mesh: 1–2 pieces (cut to fit jar openings or tray edges). Secure with a rubber band or twist tie.
- ● Water: Distilled, filtered, or chlorine-free tap water (lukewarm, ~70°F).
- ● Spray bottle: 1 (for misting, if using a tray method).
- ● Scissors: Small pair for trimming sprouts (if harvesting leaves).
- ● Colander: Fine-mesh for rinsing sprouts (if growing in jars).
- ● Grow light or sunny windowsill: 6+ hours of indirect light daily (south-facing window or LED grow light).
- ● Organic potting soil or coconut coir: 1–2 cups (for tray method, if transplanting).
- ○ Humidity dome or plastic wrap: To retain moisture (optional for tray setups).
- ● Food processor or knife: For chopping leaves into salads or smoothies.
Step-by-step guide to growing sunflower sprout leaves quickly
Here’s the method I’ve used to harvest sunflower sprouts in just 5-7 days—packed with nutrients and ready for salads or juicing.
🌱 Step 1: Soak Sunflower Seeds Overnight for Faster Germination
Place 1 cup of sunflower seeds in a bowl and cover them with 2 cups of lukewarm water. Let them soak for 12 hours—this softens the outer shell and kickstarts germination. You’ll notice tiny white sprouts emerging after just 6-8 hours. Drain the water completely before proceeding, as excess moisture encourages mold.
If you’re working with organic, untreated seeds, this step is non-negotiable. The soaking process also removes any potential inhibitors in the seed coat, ensuring your sprouts break through the soil (or growing medium) faster. I like to use a fine-mesh strainer to drain them efficiently—no soggy seeds left behind.
💧 Step 2: Set Up a Germination Tray with Proper Drainage
Line a shallow tray (like a baking sheet or sprouting lid) with a clean kitchen towel or paper towels, dampened just enough to feel moist but not dripping. Spread the soaked seeds evenly in a single layer—don’t crowd them, or they’ll compete for space and grow unevenly. A good rule is ½ inch between seeds to allow airflow.
Cover the tray with another damp towel and secure it loosely with a rubber band or clip. Place the tray in a warm, dark spot (like a cupboard or under the sink). Check on them twice daily—mist lightly if the towels dry out, but avoid soaking them. You’ll see first true leaves in 24-48 hours, signaling it’s time to move them to light.
☀️ Step 3: Transition to Indirect Light for Leaf Growth
Once the first true leaves (not the initial sprouts) appear, uncover the tray and place it in bright, indirect light for 4-6 hours daily. Direct sunlight at this stage can scorch delicate sprouts, so a north-facing windowsill or a grow light 12 inches away works best. You’ll notice the leaves turning deep green and slightly elongated—this is when they start packing in nutrients.
Rotate the tray quarter-turn daily to prevent leaning. If you’re using a grow light, keep it on for 14-16 hours to mimic natural daylight. After 3-4 days in light, your sprouts will reach 2-3 inches tall—perfect for harvesting. The key here is balance: too little light stunts growth, but too much too soon stresses the young plants.
✂️ Step 4: Harvest at Peak Nutrient Density
Harvest when the first true leaves are fully unfurled but before they yellow—this is typically 5-7 days total from soaking. Use clean, sharp scissors to snip just above the seed base, or gently twist the sprouts off by hand. Rinse them briefly under cool water to remove any towel fibers, then drain on a clean towel or paper towels.
Store harvested sprouts in an airtight container in the fridge for up to 5 days. For longer storage, spread them on a dehydrator tray at 115°F for 4-6 hours—they’ll keep for months and make a great nutrient boost for smoothies or teas. Real talk: the flavor is mild but packed with vitamin E, magnesium, and healthy fats, so don’t skip the harvest window.
🌿 Step 5: Regrow for Continuous Harvests (Optional)
After harvesting, rinse the tray thoroughly and pat dry. Return the remaining seed bases to the damp towel setup and cover again. In 3-5 days, you’ll get a second flush of smaller sprouts, though they’ll be less robust. Repeat this process 2-3 times before discarding the seeds—each cycle yields fewer sprouts, but it’s a great way to extend your harvest without replanting.
I’ve found this method works best with raw, unsalted sunflower seeds—no additives mean purer sprouts. If you’re growing for juicing, harvest when leaves are tender but still firm; for salads, wait until they’re 3-4 inches tall for a heartier bite. The faster you work, the quicker you’ll have fresh, homegrown greens on your plate.
Tips & tricks for perfect sunflower sprout leaves
Here's what nobody tells you about growing sunflower sprouts faster and more successfully.
Soaking Secret: The 12-hour soak is your foundation, but don't rush it! I've found that using lukewarm water (around 90°F) rather than cold water speeds up germination by 1-2 hours—the seeds absorb water faster. After draining, spread them on a clean towel for 5 minutes to remove excess moisture before transferring to the tray. This prevents mold while keeping the seeds hydrated enough to sprout.
Germination Environment: Warmth is everything during the dark germination phase. I place my tray near the oven (with the oven off) or on top of the fridge—both spots maintain a consistent 70-75°F temperature. If your kitchen is cooler, you might see sprouts in 36-48 hours instead of the 24-48 hour range. The key is consistency—fluctuating temperatures slow down germination completely.
Light Transition: When moving to light after 24-48 hours, start with just 2-3 hours of indirect light the first day. This gradual introduction prevents shock to the delicate sprouts. I use a simple LED desk lamp 12 inches away—it provides enough light without the intensity of direct sunlight. The goal is to see the leaves turn bright green within 24 hours of light exposure, signaling they're photosynthesizing properly.
Harvest Timing: The 5-7 day total timeframe is ideal, but watch for these visual cues: leaves should be 2-3 inches tall with 3-5 fully unfurled leaves. If you're growing for juicing, harvest when leaves are tender but still firm—this is usually 1 day earlier than for salads. The leaves should snap cleanly when bent, not feel mushy or yellowing at the edges. Overgrown sprouts lose their delicate texture and become bitter.
Pro Tips for Sunflower Sprout Leaves
- Here's what nobody tells you about growing sunflower sprouts faster and more successfully.
- Soaking Secret: The 12-hour soak is your foundation, but don't rush it! I've found that using lukewarm water (around ...
- Germination Environment: Warmth is everything during the dark germination phase. I place my tray near the oven (with ...
Frequently asked questions
Got questions about growing sunflower sprout leaves?
You’re not alone! Here are answers to the most common ones—from germination tricks to troubleshooting—so you can grow these nutrient-packed greens like a pro.
How long does it take for sunflower sprout leaves to emerge?
Sunflower sprouts are fast—you’ll see tiny leaves (called cotyledons) in just 3–5 days! True leaves (the edible, feathery greens) appear in 7–10 days if you’re using the soaking method. For microgreens, harvest in 10–14 days when leaves are 2–3 inches tall.
Why are my sunflower sprout leaves turning yellow or moldy?
Yellowing or mold (fuzzy white/green growth) usually means overwatering or poor airflow. Fix it by:
Pro tip: If leaves look limp, they’re thirsty—rinse and drain them ASAP! Yes! Sunflower sprouts are low-light tolerant for the first 5–7 days while germinating. After that, place them near a bright window (south-facing) or under grow lights (12–16 hrs/day) to encourage leafy growth. Without light, they’ll grow leggy (long stems, few leaves). Try both! Sprouts for quick nutrients, microgreens for texture. They’re 100% edible raw and packed with vitamin E, magnesium, and healthy fats. Rinse them thoroughly before eating to remove any soil or bacteria. Store in an airtight container in the fridge for 3–5 days. For extra flavor, toss with lemon juice or olive oil. Don’t toss them yet! Try these fixes:
Still no luck? Try a new batch—some seeds just need a little more patience!
Can I grow sunflower sprout leaves without sunlight?
What’s the difference between sunflower sprouts and microgreens?
Sunflower Sprouts
Sunflower Microgreens
Harvested at the cotyledon stage (first leaves).
Harvested after 2–3 true leaves appear (10–14 days).
Milder, crunchy flavor; great for salads or blending.
More peppery and robust; ideal for garnishes or sandwiches.
Grows in 3–5 days.
Takes 10–14 days.
Are sunflower sprout leaves safe to eat raw?
What if my sunflower seeds don’t sprout?
Wrapping up and next steps
Growing sunflower sprout leaves is a rewarding journey that brings fresh, nutrient-packed greens to your table in record time! 🌱 Whether you're a beginner or a seasoned gardener, these vibrant sprouts are easy to cultivate with just a few simple steps.
Packed with vitamins, minerals, and a delightful crunch, they’re a fantastic addition to salads, sandwiches, or even smoothies.
Now that you’re armed with the fast-germination secrets, why not take the next step? Try experimenting with different varieties or even growing them indoors year-round. Happy sprouting—your taste buds (and body) will thank you! 🌟