Orchid Care
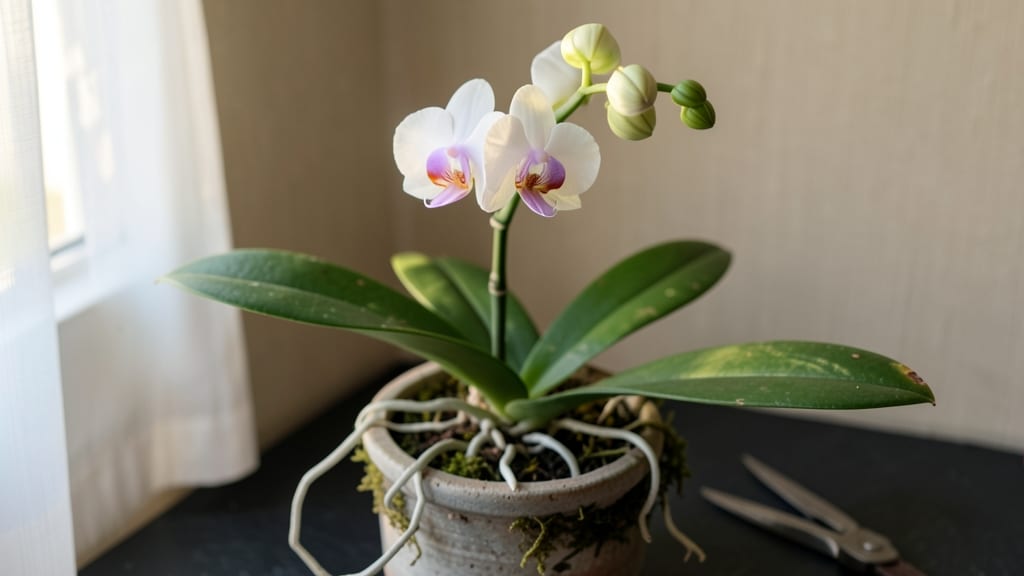
That first orchid flower spike is the moment you’ve been waiting for—proof your plant is thriving after months of careful care. 🌿 I remember the excitement when mine finally emerged last spring, a tight green bud that would soon unfurl into vibrant blooms.
The key to getting there lies in understanding what your orchid truly needs: not just water and light, but the right balance to coax that spike into action.
Most people overlook the basics that make all the difference: bright, indirect light, slightly cooler nights, and a watering routine that mimics tropical rains. My orchids now produce spikes reliably because I adjusted their environment after a few failed attempts—less guessing, more science.
You’ll see the difference in just a few weeks once you get these fundamentals right.
What you’ll end up with are orchids that burst with long-lasting blooms, some lasting up to three months with proper care. The flowers will be velvety to the touch, their colors popping against the glossy leaves, and you’ll have the satisfaction of knowing you nurtured them through every stage.
Let’s turn that potential spike into reality—step by step.
This works for Phalaenopsis, Cattleya, and even finicky Dendrobium orchids, whether you’re growing them on a sunny windowsill or under grow lights. The same principles apply whether you’re troubleshooting a spike that won’t form or extending the life of existing blooms. Here’s how to make it happen.
📚 In This Guide
- What you need
- Instructions
- Tips and common mistakes
- Wrapping up and next steps
What you need
- ○ Orchid plant: Choose a mature Phalaenopsis (moth orchid) or other spike-producing variety (e.g., Cattleya, Dendrobium). Well-draining orchid mix: 3–4 cups of bark-based or sphagnum moss mix (avoid garden soil!). Pot with drainage holes: 4–6" diameter for most orchids (terracotta or plastic with airflow). Watering can or spray bottle: Soft, room-temperature water only (chlorine-free!). Balanced orchid fertilizer: 20-20-20 or 10-10-10 (diluted to half-strength). Pruning shears or sterilized scissors: Sharp and cleaned with rubbing alcohol to prevent disease. Grow lights (optional but helpful): LED or fluorescent (12–14 hours/day) for low-light spots. Humidity tray or pebble tray: To maintain 50–70% humidity if your home is dry. Thermometer/hygrometer (optional): Tracks temperature (60–80°F) and humidity for optimal growth. 💡 Pro Tips for Success 🌡️ Temperature matters: Most orchids need a 10–15°F nighttime drop to trigger spikes (use a fan or AC if needed!).
- ● ✨ Light love: East or west windowsill is ideal; avoid harsh midday sun.
- ● 💧 Water wisely: Soak roots for 5–10 minutes, then let excess drain completely.
How to coax a healthy orchid flower spike
Here's how I've learned to trigger those dramatic, long-lasting spikes—without the guesswork.
🌱 Step 1: Identify Your Orchid's Maturity Stage
First, check your orchid's age and health. Most phalaenopsis orchids need 12-18 months of consistent care before producing spikes. Look for 5-7 mature leaves that are firm and upright—anything smaller means wait a season. I always count leaves after repotting; that's when I notice the biggest growth signals.
If your orchid has 3-4 leaves and is still in its juvenile phase, focus on building leaf strength first. Give it bright indirect light and balanced fertilizer every 2 weeks until it matures. The key visual cue is leaves that reach 4-6 inches long—that's when the plant shifts energy toward flowering.
☀️ Step 2: Adjust Light Exposure Strategically
Orchids need 12-14 hours of bright, indirect light daily to trigger spiking. I move my orchids to a east-facing window in summer or use a 20-watt grow light on a timer. Too little light keeps them leafy but spike-less, while too much causes leaf burn.
Watch for these light cues: leaves that stay deep green need more light; leaves turning yellow with purple undersides mean it's getting too much. The perfect light balance makes leaves bright green with slight red edges. This is when I start looking for that first tiny spike bud in the leaf axils.
💧 Step 3: Apply the Right Watering Trigger
Here's the trick I've found works best: reduce watering by 50% for 4-6 weeks before you want a spike. Let the top 1-2 inches of mix dry out completely between waterings. This stress signal tells the plant it's time to reproduce. I water from the bottom using my orchid tray—never let water pool in the saucer.
After 3-4 weeks of this dry-down routine, you'll see tiny 1-inch buds forming at the base of the leaves. That's your orchid's way of saying "I'm ready." Once buds appear, return to normal watering—every 7-10 days—but keep the mix slightly drier than usual to support spike growth.
⏰ Step 4: Support the Spike as It Develops
When your spike emerges, it's delicate and slow-growing—don't move the plant! I stake mine immediately using a soft floral wire tied to a 3-inch wooden stake inserted into the pot. This prevents the spike from bending under its own weight as buds form.
Keep the spike in bright light but avoid direct sun—it'll bleach the buds. You'll see buds form in 4-6 weeks, starting from the base and working upward. Each bud needs 1-2 weeks to fully develop, so a 6-inch spike can produce 10-15 buds over 2-3 months.
🌿 Step 5: Maintain Conditions for Long-Lasting Blooms
Once buds open, keep your orchid in 60-70°F days and 55-65°F nights. I place mine near a dehumidifier in winter to maintain 40-50% humidity. Avoid cold drafts—buds drop if they experience below 50°F for more than a few hours.
Water every 10-14 days from the bottom, letting the mix dry completely between waterings. You'll know you're doing it right when blooms last 2-3 months instead of wilting after a week. After blooms fade, I cut the spike 1 inch above a node—sometimes it produces a second flush of buds!
Tips & tricks for encouraging orchid flower spikes
These are the little details that make all the difference between waiting years for a spike and seeing buds appear in months.
Light Balance is Everything: That perfect 12-14 hours of bright indirect light is non-negotiable, but here's the thing: I've found that placing my orchids on a rotating schedule works wonders. Move them to a slightly sunnier spot for 2-3 weeks before you want to see buds—this gradual increase mimics natural seasonal changes and triggers the flowering response. Watch for those slight red edges on leaves as your cue that the light conditions are just right.
Watering Strategy Matters More Than You Think: The 4-6 week dry-down period before spiking is where most people go wrong. I've learned that using a moisture meter helps track exactly when the top 1-2 inches are bone dry. Pro tip: Water from the bottom using your orchid tray—this prevents water from pooling at the roots, which can cause rot and delay spiking. Confession: I skipped this step for years and wondered why my orchids never bloomed!
Staking is Non-Negotiable: Once that spike emerges, it's delicate as a newborn's first steps. I stake every single one using soft floral wire and a 3-inch wooden stake inserted into the pot. This prevents the spike from bending under its own weight as buds form. Between us, I've seen too many beautiful spikes collapse under their own blooms—don't make my mistake!
Temperature Consistency is Key: Those 60-70°F days and 55-65°F nights aren't just suggestions—they're critical for bud development. I keep my orchids away from drafty windows and heating vents. A simple trick: Place your orchid near a thermometer for a week to monitor the actual temperature range. If you notice buds dropping, it's usually because temperatures dipped below 50°F for too long. A small space heater with a thermostat can be a game-changer in winter.
Pro Tips for Orchid Flower Spike
- These are the little details that make all the difference between waiting years for a spike and seeing buds appear in...
- Light Balance is Everything: That perfect 12-14 hours of bright indirect light is non-negotiable, but here's the thin...
- Watering Strategy Matters More Than You Think: The 4-6 week dry-down period before spiking is where most people go wr...
Frequently asked questions
Got questions about orchid flower spikes? You’re not alone! Here are some of the most common concerns—plus quick, actionable answers to keep your orchids thriving.
Why isn’t my orchid producing a flower spike?
Orchids need the right conditions to trigger blooming. If your plant isn’t sending up a spike, check its light exposure—most orchids (like Phalaenopsis) need 12–14 hours of bright, indirect light daily. Also, ensure it’s not overwatered; let the roots dry slightly between waterings. A temperature shift (like cooler nights) can also encourage spikes. If it’s been months with no activity, try repotting into fresh, well-draining media.
How long does it take for an orchid flower spike to appear?
Patience is key! After providing ideal care (light, water, and temperature), a flower spike may emerge in 4–12 weeks. Some orchids, like Cattleyas, can take longer, while Phalaenopsis often spike faster. If no spike appears within 3–4 months of healthy growth, reassess care—like adjusting fertilizer (use a balanced 20-20-20 formula) or checking humidity levels (aim for 40–70%).
Can I cut back an orchid flower spike after blooms fade?
Yes! Once flowers wilt, trim the spike—but only if it’s fully brown and shriveled. If the spike is still green, it may rebloom or produce keiki (baby plants). Cut 1–2 inches above a node (a bump on the spike) using sterilized scissors. For Phalaenopsis, you can also leave a green spike; it might regrow flowers or keikis. Always disinfect tools to prevent disease!
What if my orchid spike turns yellow or mushy?
Yellowing or mushy spikes usually signal rot or overwatering. First, stop watering until the medium dries out. Check for soft, dark spots—a sign of fungal/bacterial infection. If caught early, trim the affected area with clean scissors and treat with a fungicide (like neem oil). Improve airflow by spacing plants apart and avoid letting water pool in the pot. If the spike is beyond saving, cut it off to redirect energy to healthy growth.
Are there alternatives if my orchid won’t spike?
If your orchid resists blooming, try these proven tricks:
- Light boost: Move it to a south- or west-facing window or use a grow light for 12+ hours/day.
- Temperature shock: Drop night temps to 55–60°F (13–15°C) for 2–3 weeks to mimic seasonal changes.
- Fertilizer tweak: Switch to a high-phosphorus fertilizer (e.g., 10-30-20) during blooming season (spring/fall).
- Repot: Refresh old media with fresh bark mix to improve drainage and aeration.
Wrapping up and next steps
Caring for your orchid’s flower spike is all about patience, observation, and a little TLC!
By understanding its unique needs—like proper lighting, humidity, and watering—you’ll unlock stunning, long-lasting blooms that brighten any space. 🌸 Remember, every orchid is different, so don’t hesitate to experiment and adjust based on what works best for your plant.
Ready to take your orchid care to the next level? Try tracking your plant’s blooming cycle in a journal or app—it’s a fun way to refine your routine and celebrate those gorgeous spikes! Happy growing! 🌱