Flowers
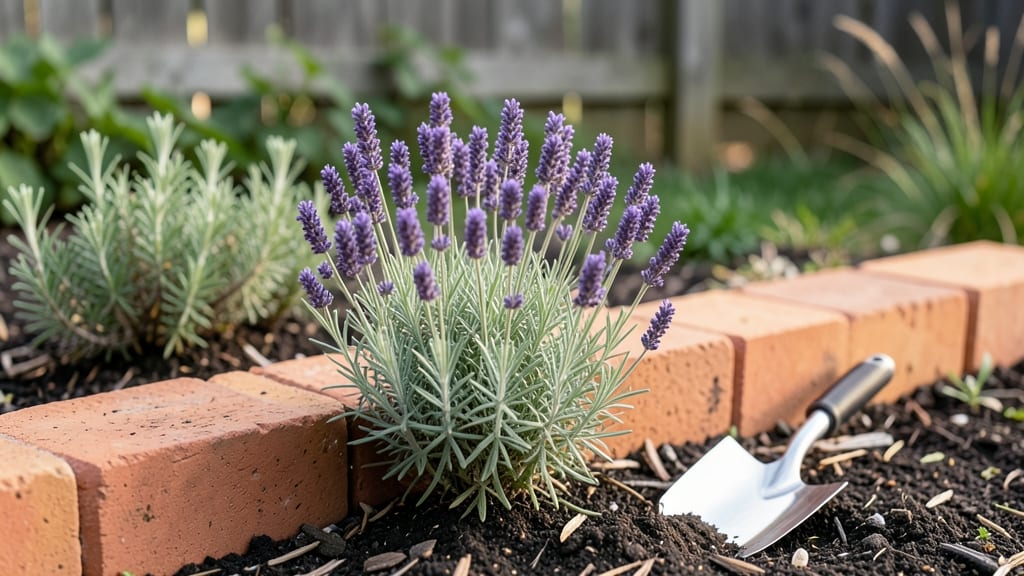
Building a flower bed with bricks gives your garden a polished look that lasts for years—no more crumbling wood or shifting metal edges.
I’ve built three brick-edged beds now, and the key to making them look intentional (not DIY) is in the prep work: leveling the ground, choosing bricks with consistent thickness, and cutting corners cleanly. The first time I skipped this, my bed leaned like a drunk fence post by summer’s end.
You’ll need basic tools—a shovel, rubber mallet, string line, and level—but the real secret is staggering the bricks like bricklayers do, so the seams don’t line up. Use landscape fabric under the bricks to keep weeds from creeping up, and pack sand or gravel in the base for drainage.
Most people underestimate how much sand they’ll need—trust me, buy an extra bag. For a 4-foot-by-6-foot bed, you’re looking at about 50 bricks and 20 pounds of sand.
Once the bricks are set, you’ll have a crisp, clean edge that holds its shape through freeze-thaw cycles and heavy rains. Fill the bed with well-draining soil and your favorite perennials or annuals, and you’ll get a garden feature that looks intentional, not thrown together.
The best part? After the first season, the bricks settle, and the bed looks like it’s been there for decades. No more patching or replacing edges every few years.
Pro tip: If you want to add height, stack bricks vertically on one side for a raised bed effect—just reinforce the corners with extra mortar or bricks. For a softer look, top the bricks with mulch or small stones to blend them into the landscape.
This project takes a weekend but transforms your garden from ordinary to showstopping.
📚 In This Guide
- What you need
- Instructions
- Tips and common mistakes
- Wrapping up and next steps
What you need
- ● Brick pavers or bricks: 20–50 bricks per linear foot (depends on bed size and brick width). Choose concrete pavers (durable) or clay bricks (aesthetic).
- ● Landscape fabric: 1 roll (4’ x 50’), to block weeds and retain soil.
- ● Gravel or crushed stone: 2–3 inches of 1/2-inch crushed gravel for drainage (1 bag covers ~10 sq. ft.).
- ● Topsoil or garden soil: 2–3 cubic feet per square foot of flower bed depth.
- ○ Sand (optional): Poly-sand or masonry sand for mortar-free brick laying (1 bag covers ~10 sq. ft.).
- ○ Mortar (optional): Pre-mixed brick mortar (1 bag covers ~30 sq. ft.) if you want a permanent, seamless look.
- ● Measuring tape and string line for marking layout.
- ● Shovel or spade for digging and soil prep.
- ● Rubber mallet or hammer to tap bricks into place.
- ● Wheelbarrow for hauling gravel, soil, and bricks.
- ● Level (2–4 ft.) to ensure bricks stay even.
- ● Safety gloves and knee pads for comfort.
- ● Trowel or brick set (for mortar) or rubber edging tool (for sand).
- ○ Plate compactor (optional) to compact gravel for stability.
- ● Clear the area of grass, weeds, or debris (use a garden rake or sod cutter if needed).
- ● Check local regulations—some areas require permits for hardscaping projects.
- ● Sketch a rough design (or measure your space) to calculate brick quantities accurately.
- ● Pick a sunny or partially sunny spot for your flower bed (most blooms thrive here!).
Step-by-Step instructions for building a brick-edged flower bed
Here’s how to create a timeless, sturdy flower bed that stays in place for years—no shifting or sinking.
Plan and Mark Your Flower Bed Layout
Start by sketching your design on paper, then use a garden hose or spray paint to outline the shape directly on the ground. I like to lay out the hose in a loop, then walk around it to ensure the path is wide enough for your plants and tools. For a 4-foot-wide bed, allow at least 3 feet of walkway space around it to prevent trampling.
Check the ground’s slope—bricks need a level base to stay stable. If your yard slopes, dig a shallow trench along the lower edge to create a level foundation. Use a 4-foot level to verify the ground is even before proceeding. Mark the center of each corner with stakes and string for precise brick placement.
Excavate and Prepare the Base
Dig down 4-6 inches along the marked outline, removing grass, weeds, and topsoil. The deeper the trench, the more stable your bricks will be. I use a shovel to create a slightly tapered edge—wider at the bottom (about 8 inches) and narrower at the top (about 4 inches). This helps the bricks sit securely without toppling.
Compact the soil firmly with a hand tamper or rented plate compactor. You want the base solid enough to support the bricks without sinking over time. For extra stability, lay down a 2-inch layer of crushed gravel in the trench. This drains water and prevents soil from pushing against the bricks later.
Lay the First Course of Bricks
Begin at one corner, placing the first brick flush against the trench’s edge. Use a rubber mallet to tap it gently into place—this ensures it sits level and snug. For a clean look, I stagger the bricks in a running bond pattern, offsetting each row by half a brick. Leave a ½-inch gap between bricks for mortar or landscape fabric (optional for flexibility).
Check for level frequently with your 4-foot level. If a brick sinks or tilts, remove it and add or remove a thin layer of gravel beneath. For curves, cut bricks with a masonry saw or angle grinder. I mark cuts with a pencil first to avoid mistakes—trust me, you’ll thank yourself later when the edges look seamless.
Build Up the Brick Walls and Secure Them
Continue stacking bricks in courses, using landscape adhesive or mortar between layers if you want a permanent look. For a more flexible option, skip adhesive and let the bricks sit directly on the gravel base. Every 2-3 courses, check the vertical alignment with a string line—this keeps the walls straight and prevents leaning.
Once the bricks reach your desired height (2-3 courses high is standard), cap them with a final course of whole bricks for a finished look. If you’re worried about shifting, secure the top course with galvanized U-shaped pins driven into the ground behind the bricks. This is especially important in high-traffic areas or sloped yards.
Backfill and Plant Your Flower Bed
Fill the center of the bed with 3-4 inches of amended topsoil, mixing in compost for nutrients. Avoid packing the soil too tightly—roots need room to grow. I like to add a 1-inch layer of mulch on top to retain moisture and suppress weeds. Leave a 1-inch gap between the soil and the bricks to prevent moisture buildup that could erode the base over time.
Plant your flowers or ground cover immediately after backfilling. Water deeply to settle the soil around roots, then maintain regular watering. The bricks will now hold their shape while your plants thrive—no more sinking edges or messy mulch spills. Step back and admire your work; you’ve just built a flower bed that’ll last for decades.
Tips & tricks for building a sturdy brick-edged flower bed
A few key strategies will help you avoid common pitfalls and create a flower bed that stays beautiful for years. Here's what I've learned from building several of these myself.
Level is Everything: In Step 1, when you're checking for slope, don't just eyeball it—use that 4-foot level every few feet along your outline. Even a slight tilt can cause bricks to shift over time. I've seen projects where people skipped this step and had to tear out bricks after just one season. Pro tip: For extra precision, use a line level or laser level if you have one available.
Base Depth Matters: The 4-6 inch excavation depth in Step 2 isn't just arbitrary—it's what creates that sturdy foundation. If you're working with particularly soft soil, consider digging an extra inch or two. For clay-heavy soils, add a 4-inch gravel layer instead of the recommended 2 inches. This prevents the bricks from sinking as plants grow and soil settles over time.
Brick Selection Tip: Not all bricks work equally well for flower beds. Choose bricks that are at least 3 inches thick—they're more stable and less likely to crack under pressure. For curved sections, look for bricks that come in various lengths or consider using pavers that can be cut more easily. I've found that bricks with textured surfaces grip better than smooth ones when it comes to holding soil.
Security for High-Traffic Areas: If you're building near walkways or play areas (Step 4), don't skip the galvanized U-shaped pins. I've seen too many beautiful brick beds get damaged when kids or pets lean against them. For extra security, you can also use landscape fabric between the bricks and soil—it prevents weeds from growing between the bricks while still allowing water drainage.
Pro Tips for Build A Flower Bed With Bricks
- A few key strategies will help you avoid common pitfalls and create a flower bed that stays beautiful for years.
- Level is Everything: In Step 1, when you're checking for slope, don't just eyeball it—use that 4-foot level every few feet along your outline.
- Base Depth Matters: The 4-6 inch excavation depth in Step 2 isn't just arbitrary—it's what creates that sturdy foundation.
Frequently asked questions
Got questions about building a brick flower bed? You’re not alone! Here are answers to the most common concerns to help you create a lasting, beautiful garden edge.
What’s the best type of brick for a flower bed?
Use concrete bricks (like pavers) for durability and stability—they won’t rot or warp. For a rustic look, sandstone or clay bricks work too, but they may need sealing. Avoid soft or porous bricks; they’ll crumble over time.
How long does a brick flower bed last?
With proper installation, a brick-edged bed can last 10–25 years or more! Concrete bricks resist weather, while natural stone may degrade faster if exposed to freeze-thaw cycles. Regular sealing (every 2–3 years) extends lifespan.
Do I need a gravel base under the bricks?
Yes!
A 2–4 inch layer of compacted gravel (or crushed stone) prevents shifting, weeds, and erosion. Skip this step, and your bricks may sink or crack over time. Level the ground first for a pro finish.
Can I build a brick flower bed without mortar?
Dry-stacking bricks
is easy and reversible. Just interlock them tightly (use landscape adhesive for extra hold) and secure with landscape pins or plastic brick ties if needed. Mortar isn’t required for stability.
Will rain or snow damage my brick flower bed?
Not if built right! Ensure bricks are angled slightly inward (10°) to shed water. For heavy clay or freeze-prone areas, use frost-resistant pavers and add a weed barrier fabric under the bricks to prevent moisture buildup.
Pro Tip:
Need a quick fix? Try brick edging clips or metal stakes to hold bricks in place temporarily while planting. Perfect for renters or test layouts!
Wrapping up and next steps
Building a flower bed with bricks is a rewarding project that adds beauty and structure to your garden while lasting for years! By following these steps—from planning your design to securing your bricks—you’ll create a durable, eye-catching border that any gardener will admire. 🌸
Now that you’re ready to roll up your sleeves, why not pick out your favorite flowers and bring your vision to life? Whether you’re a beginner or a seasoned DIYer, this project is the perfect way to elevate your outdoor space—one brick at a time. Happy gardening! 🌿