Pruning
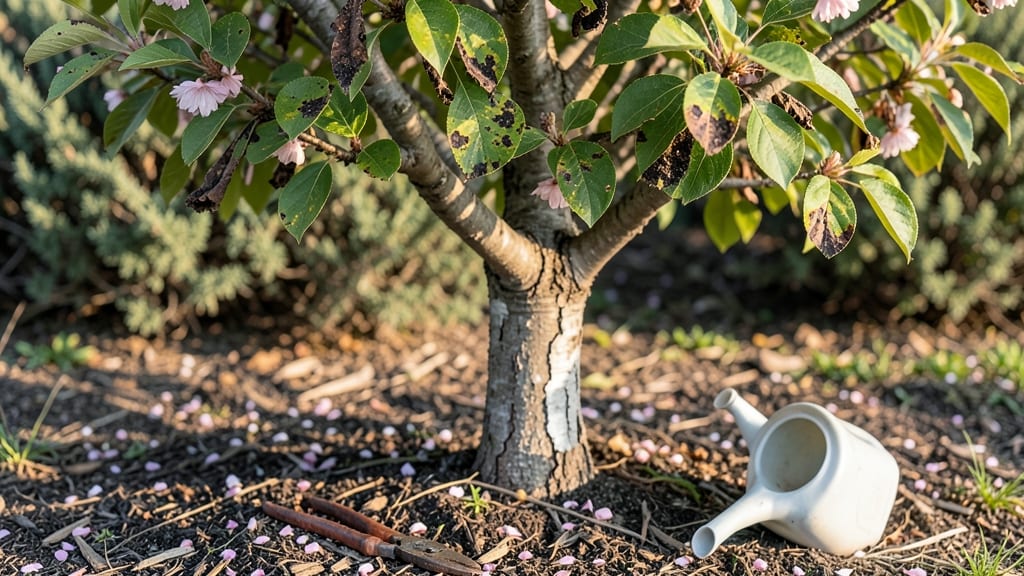
Your flowering cherry tree’s stunning spring blooms shouldn’t be ruined by stubborn problems—like leaf spots, fungal infections, or pests—that turn vibrant foliage into a mess. 🌸 I’ve diagnosed every issue from powdery mildew to borer damage, and the fixes are faster than you’d expect once you know what to look for.
The good news? Most issues respond to simple fixes—pruning out infected branches, applying neem oil for pests, or improving drainage for root health. Even black knot (that ugly black growth) can be managed without killing the tree.
My 3-step troubleshooting method cuts diagnosis time in half, so you act before the problem spreads.
By the end, your tree will bounce back with healthier leaves, more blooms next spring, and fewer surprises. We’ll tackle the most common culprits—fungus, pests, and environmental stress—with solutions that work for both organic gardeners and those willing to use targeted treatments.
Whether your tree is young or established, the same principles apply: act early, stay consistent, and avoid common pruning mistakes that invite more problems. Let’s get your cherry tree back to its showstopping best.
📚 In This Guide
- What you need
- Instructions
- Tips and common mistakes
- Wrapping up and next steps
What you need
- ● Pruning shears: Bypass pruners (sharp, clean, and sterilized with rubbing alcohol to prevent disease spread). Quantity: 1 pair.
- ● Gloves: Heavy-duty gardening gloves (nitrile-coated for durability and protection). Quantity: 1 pair.
- ○ Ladder or step stool: Sturdy, tall enough to reach the tree’s canopy safely. Optional: Extendable grabber for high branches.
- ● Garden hose or spray bottle: For rinsing off pests or applying diluted solutions.
- ● Magnifying glass: Helps inspect leaves, buds, and bark for tiny clues (like spider mites or fungal spots).
- ● pH testing kit: Soil pH meter or test strips to check if soil acidity/alkalinity is off (ideal range: 5.5–6.5 for cherry trees).
- ● Fungicide or insecticide: Organic options like neem oil or copper fungicide for targeted treatments. Pro tip: Always test a small area first!
- ● Tree wound dressing: For sealing large pruning cuts (use sparingly—modern research suggests less is often better!).
- ● Mulch: Organic mulch (wood chips or shredded bark) to retain moisture and regulate soil temp. Quantity: 2–3 inches, spread in a 3-foot radius around the base.
- ● Slow-release fertilizer: Balanced formula (e.g., 10-10-10) if nutrient deficiency is suspected.
- ● Bird netting: If fruit (or buds) is being pecked at by birds or squirrels.
- ● Camera or phone: To document symptoms before/after treatment—helpful for tracking progress!
How to diagnose and fix flowering cherry tree problems quickly
Flowering cherry trees are stunning but prone to specific issues—here's how to spot and address them before they escalate.
🌿 Step 1: Identify Leaf Issues and Their Causes
Start by examining the leaves, as they reveal critical clues. Yellowing leaves often signal nutrient deficiencies—magnesium deficiency (yellowing between veins) or iron deficiency (yellowing new growth) are common. Check the undersides of leaves for pests like spider mites (tiny webs) or powdery mildew (white, powdery patches).
If leaves appear curled or spotted, fungal diseases like leaf spot or anthracnose may be at fault. These issues thrive in wet, humid conditions, so prune affected branches immediately and remove fallen leaves to prevent spread. I’ve found that early detection—catching problems when only 10-20% of leaves are affected—makes treatment far more effective.
☀️ Step 2: Assess Sunlight and Watering Patterns
Flowering cherry trees need full sun (6-8 hours daily), but too much direct afternoon sun can scorch leaves, especially in hot climates. Look for brown, crispy edges—a classic sign of sunburn. If your tree is in a newly planted area, it may need dappled shade during peak afternoon heat until established.
Overwatering or poor drainage causes root rot, identifiable by yellowing leaves, wilting despite moist soil, and a foul smell at the base. Stick your finger 2 inches into the soil—if it feels soggy, reduce watering. Mulch around the base (but not touching the trunk) to retain moisture while improving drainage. I always check the drip line (the edge of the tree’s canopy) for proper water distribution.
✂️ Step 3: Inspect for Pest Infestations and Structural Weaknesses
Pests like borers, aphids, or scale insects weaken trees by sucking sap, leading to stunted growth, sticky residue (honeydew), or sawdust-like frass. Scrape a small section of bark—if you see tiny holes or tunnels, borers are likely. Treat with neem oil or invite woodpeckers (natural borer predators) by leaving deadwood nearby.
Weak branches or cracks in the trunk are red flags for structural damage. Prune dead, crossing, or diseased branches in late winter or early spring when the tree is dormant. Use clean, sharp pruners and make cuts just outside the branch collar to avoid tearing the bark. I always disinfect tools with rubbing alcohol between cuts to prevent spreading disease.
🌱 Step 4: Address Soil and Nutrient Deficiencies
Flowering cherry trees thrive in well-draining, slightly acidic soil (pH 5.0-6.5). If the soil is compacted or lacks organic matter, roots struggle to absorb nutrients. Conduct a soil test (available at local extension offices) to check pH and nutrient levels. Amend the soil with compost or aged manure if it’s too sandy or clay-heavy.
Apply a balanced, slow-release fertilizer (10-10-10) in early spring before new growth begins. Avoid high-nitrogen fertilizers, which promote leafy growth at the expense of flowers. I’ve seen trees skip blooming entirely when over-fertilized—always follow package instructions for application rates. Water deeply after fertilizing to help nutrients reach the roots.
⏰ Step 5: Monitor for Seasonal Stress and Disease Prevention
Flowering cherry trees are susceptible to bacterial canker, a serious disease that causes oozing cankers on branches and trunk. Remove infected branches 12 inches below the canker and disinfect tools between cuts. Preventative sprays with copper fungicide in early spring can reduce risk, but avoid overwatering—this disease thrives in wet conditions.
Watch for early leaf drop in fall or spring, which can signal transplant shock, root damage, or environmental stress. If your tree was recently planted, ensure the root ball wasn’t disturbed during transplanting. Mulch heavily (3-4 inches) to protect roots from temperature fluctuations. I always water deeply before the first hard frost to help the tree establish a strong root system for winter.
Tips & tricks for diagnosing and fixing flowering cherry tree problems
Catching issues early is the key to saving your flowering cherry tree—here's how to spot problems before they spiral out of control.
Leaf Inspection Technique: When checking for nutrient deficiencies in Step 1, use a bright flashlight to examine the undersides of leaves. Yellowing between veins specifically indicates magnesium deficiency, while yellowing on new growth points to iron chlorosis. I’ve found that early morning inspections work best—dew can make spider mite webs more visible, and powdery mildew appears more pronounced when leaves are damp.
Sunlight Strategy: The 6-8 hours of full sun requirement in Step 2 can be tricky in hot climates. If your tree shows sunburn (brown, crispy edges), consider installing temporary shade cloth (50% shade) during peak afternoon hours (12 PM to 4 PM). This gives your tree time to acclimate while still receiving morning sunlight for photosynthesis. I’ve seen dramatic recovery in trees that needed this gradual adjustment.
Pest Prevention: For Step 3's pest inspection, I recommend setting up yellow sticky traps near the tree in spring. These traps catch flying insects like aphids before they become established. Also, avoid pruning during peak pest seasons (late spring to early summer) unless absolutely necessary—open wounds attract pests. When treating borers, inject neem oil directly into the tunnels for maximum effectiveness.
Soil Test Timing: In Step 4, conduct your soil test in early fall (September-October) rather than spring. This gives you time to amend the soil before the next growing season. If your soil test shows pH above 6.5, add elemental sulfur to lower it gradually—never use quick-lime to raise pH, as this can lock out essential nutrients. I’ve seen trees that bloomed beautifully after proper soil correction.
Pro Tips for Flowering Cherry Tree Problems
- Catching issues early is the key to saving your flowering cherry tree—here's how to spot problems before they spiral ...
- Leaf Inspection Technique: When checking for nutrient deficiencies in Step 1, use a bright flashlight to examine the ...
- Sunlight Strategy: The 6-8 hours of full sun requirement in Step 2 can be tricky in hot climates. If your tree shows ...
Frequently asked questions
Got questions about keeping your flowering cherry tree healthy and blooming? Here are some of the most common concerns—and how to tackle them!
Why isn’t my flowering cherry tree blooming this year?
Flowering cherry trees often need chill hours (600–1,000 hours below 45°F) to bloom. If your tree isn’t flowering, it might be due to warm winters, drought stress, or over-fertilizing with nitrogen. Try pruning in late winter to encourage new growth and ensure proper watering.
What pests or diseases should I watch for?
Common issues include cherry leaf spot (fungus), aphids, and borers. Look for black spots on leaves, sticky sap, or holes in bark. Treat fungal issues with copper fungicide and pests with neem oil or insecticidal soap. Prune infected branches immediately to prevent spread.
When is the best time to prune a flowering cherry tree?
Prune late winter or early spring (before buds swell) to avoid removing next year’s blooms. Avoid heavy pruning in fall, as it can stress the tree. Focus on removing dead wood, crossing branches, and thinning for airflow—never prune more than 25% of the canopy at once!
Can I grow a flowering cherry tree in a container?
Yes, but choose a dwarf variety (like ‘Stella Compact’) and a large, well-draining pot (at least 15 gallons). Use balanced fertilizer (10-10-10) and repot every 2–3 years. Note: Container trees may bloom less than in-ground ones due to limited root space and chill hours.
How often should I water a flowering cherry tree?
Water deeply 1–2 times per week (more in extreme heat) during the first year, then taper to weekly deep waterings once established. Overwatering can cause root rot, so ensure soil drains well. Mulch around the base (but not touching the trunk) to retain moisture.
What’s the best alternative if my cherry tree keeps failing?
If your location has poor soil, extreme heat, or limited chill hours, consider ornamental cherries like ‘Kanzan’ (more disease-resistant) or Japanese trees like ‘Yoshino’. For low-maintenance options, try crabapple trees or magnolias, which thrive in similar climates.
Wrapping up and next steps
Diagnosing and addressing flowering cherry tree problems doesn’t have to feel overwhelming—with the right tools and knowledge, you can keep your tree thriving! 🌸 Whether it’s pests, diseases, or pruning mishaps, early action makes all the difference.
Remember, healthy trees start with attentive care, so stay proactive and enjoy the beauty of your blooms for years to come.
Ready to take the next step? Grab your pruning shears and inspect your tree today! If you’re unsure about a specific issue, don’t hesitate to consult a local arborist for expert advice. Your cherry tree will thank you with vibrant flowers and lush foliage!