
Flowers
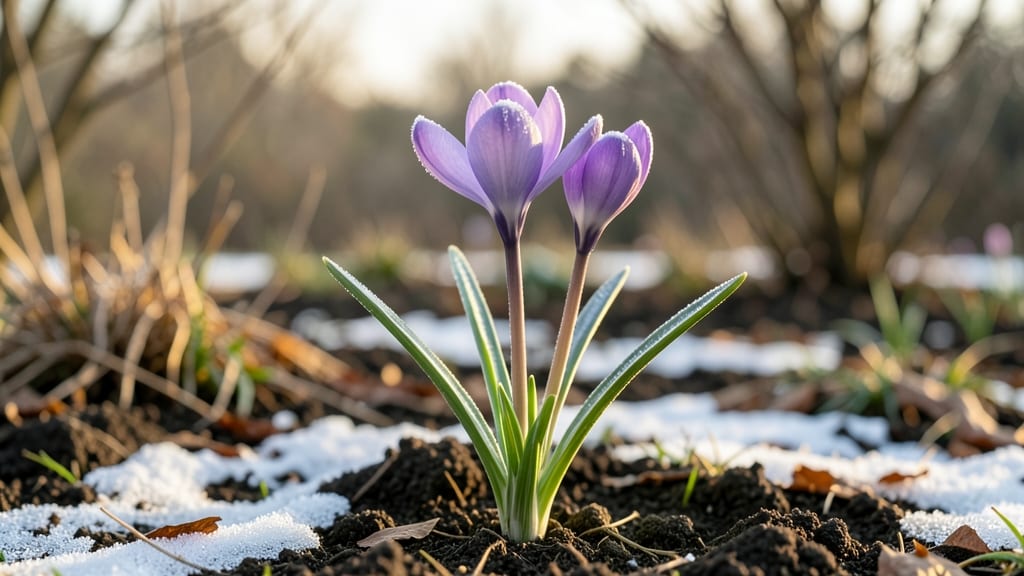
There's nothing like watching crocus flowers push through snow—proof that life thrives even when the world looks frozen. These hardy blooms are the first sign spring is coming, and they’re shockingly resilient in cold climates where other flowers would give up.
I’ve grown them in zones where snow lingers until April, and with the right care, they’ll reward you with vibrant purple, white, or yellow blooms before daffodils even think about waking up.
The secret to their success in snowy conditions is simple: plant them early, in well-draining soil, and give them a spot with at least six hours of sunlight.
They don’t need much—just a little protection from heavy snow (a light layer of mulch or a burlap wrap works) and they’ll bounce back stronger each year. My first batch surprised me by blooming through three inches of snow, and they’ve been coming back stronger ever since.
By late winter, you’ll see those first delicate petals peeking through the thawing snow, a bright reminder that spring is on its way. The flowers last just a few weeks, but their impact is huge—adding color to gray days and attracting early pollinators.
Plus, they’re disease-resistant and deer-proof, so you won’t waste time fighting pests or wilting leaves.
Whether you’re in a cold northern climate or a high-altitude garden, crocuses are the perfect early bloomer. They multiply over time, so you’ll end up with drifts of color year after year—with almost no effort. Ready to bring a little color to your winter landscape?
📚 In This Guide
- What you need
- Instructions
- Tips and common mistakes
- Wrapping up and next steps
What you need
- ● Crocus bulbs: Choose Crocus vernus (Dutch crocus) or Crocus tommasinianus (early bloomers). Buy 10–20 bulbs per square foot for a lush carpet effect.
- ● Well-draining soil: Mix 60% garden soil + 30% compost + 10% perlite/sand to prevent bulb rot.
- ● Organic fertilizer: Use a low-nitrogen (5-10-10) bulb fertilizer (e.g., bone meal or 10-10-10 blend). Apply 1 tbsp per 5 bulbs at planting.
- ● Mulch: 2–3 inches of shredded bark or straw to insulate bulbs and retain moisture.
- ● Garden gloves & trowel: Essential for handling bulbs and digging.
- ● Slow-release fertilizer spikes: For extra winter nutrition (place near bulbs at planting).
- ● Snow protection: Lightweight landscape fabric or burlap to shield bulbs from heavy snow accumulation.
- ● Decorative stones or pebbles: Adds contrast and prevents soil splatter when snow melts.
- ● Drip irrigation system: For consistent moisture (especially in dry winters).
How to plant crocus for stunning winter blooms
Here's how to bring those cheerful purple, white, and yellow specks to your winter landscape—tried and true over years of chilly-season gardening.
🌱 Step 1: Choose the Right Crocus Varieties for Snow
Select crocus species that thrive in cold climates, like Dutch Master, Tommasinianus, or Giant Snowflake varieties. These hardy types bloom through snow and even light frost. Avoid spring-blooming crocus—they won't survive winter exposure. Check your zone: most winter crocus thrive in USDA zones 3-8, meaning they need no summer dormancy to rebloom.
I always buy bulbs certified for winter hardiness from reputable suppliers. Look for firm, dry bulbs—any soft spots mean rot risk. Store them in a cool, dark place until planting. The key is selecting bulbs that promise early blooms, typically 4-6 weeks before last frost when ground temps hover around 32-40°F.
🪴 Step 2: Prepare Planting Sites for Cold Tolerance
Pick a spot with full sun to partial shade—morning sun is ideal to melt snow quickly while avoiding afternoon heat stress. Avoid low spots where snow lingers too long; those bulbs will rot. Amend the soil with 2-3 inches of compost mixed into the top 6 inches to improve drainage, since crocus bulbs hate soggy soil. I test drainage by digging a hole, filling it with water, and waiting—if it drains in under 2 hours, it's safe.
For best results, plant in well-draining, slightly rocky soil. If your soil is heavy clay, mix in sand or grit to prevent waterlogging. The goal is to mimic their natural Mediterranean habitat where they experience dry winters. Overwatering in winter is the #1 mistake—it causes bulbs to rot before they even bloom.
☀️ Step 3: Plant Bulbs at the Right Depth and Spacing
Dig holes 3 times as deep as the bulb's height—typically 3-4 inches deep for standard crocus. Space bulbs 2-3 inches apart in all directions; they multiply over time, so don't crowd them. I plant in early fall (6-8 weeks before first frost) so roots establish before winter sets in. The rule is: plant when daytime temps are 60-70°F and nights dip into the 40s.
Place bulbs with the pointy end up—this ensures proper growth direction. Cover with soil and water lightly to settle it. Avoid heavy watering; crocus bulbs need minimal moisture during dormancy. After planting, mulch with 1-2 inches of straw or leaves to insulate roots but not smother them. This protects against freeze-thaw cycles that can heave bulbs out of the ground.
⏰ Step 4: Care for Blooms Through Winter and Beyond
Once blooms appear, do not deadhead—let seed pods form to encourage natural bulb multiplication. Water only if rainfall is scarce during bloom time; crocus are drought-tolerant once established. After blooming, let the foliage yellow naturally—this feeds the bulb for next year's flowers. I wait until half the leaves brown before cutting them back to avoid starving the bulb.
Fertilize once in early fall with a low-nitrogen, high-phosphorus fertilizer (like 5-10-10) to encourage strong root growth. In spring, add a light mulch of compost around the planting area to replenish nutrients. Crocus are perennial, so with proper care, they'll return year after year, often naturalizing into cheerful carpets of color by spring.
✂️ Step 5: Divide and Expand Your Patch Every 3-4 Years
Crocus bulbs multiply quickly—after 3-4 years, you'll have 50-100% more bulbs than you planted. In late summer (after foliage dies back), dig up clumps, separate the bulbs, and replant the healthiest ones. Discard any soft, shriveled, or moldy bulbs—they won't survive another winter. I always replant some in new spots to create fresh drifts of color each year.
This is also the time to refresh mulch and check for pests like squirrels or voles that might dig up bulbs. A chicken wire barrier buried 4 inches deep around the perimeter keeps critters out without harming the plants. With proper division, your crocus patch will grow exponentially, turning early winter into a living tapestry of color beneath the snow.
Tips & tricks for perfect winter crocus planting
Winter's first bursts of color start with the right approach—here's how to set your crocus up for success that'll last for years.
Bulb Selection Wisdom: When choosing winter-hardy crocus bulbs, look for ones labeled as "early bloomers" or "winter blooming." These varieties are specifically bred to handle cold temperatures and even light frost. I always check the packaging for the exact variety name—Dutch Master or Giant Snowflake are my go-tos because they consistently bloom through snow. The key is avoiding spring-blooming types; they won't survive the winter exposure needed for true winter color.
Soil Preparation Secret: The drainage test in Step 2 is non-negotiable—poor drainage is the #1 reason crocus bulbs rot before they bloom. If your soil drains slowly (taking more than 2 hours to drain), mix in extra sand or perlite until you achieve that under-2-hour drainage. I've learned this the hard way: soggy soil means no blooms. Also, consider adding a layer of small gravel at the bottom of planting holes in heavy clay soils to create additional drainage channels.
Planting Timing Strategy: Those 6-8 weeks before first frost aren't just arbitrary—they give roots time to establish before winter sets in. I track local frost dates using the National Weather Service website and plant when daytime temps consistently reach 60-70°F while nights dip into the 40s. This temperature range signals to the bulbs that winter is coming, triggering root growth while still allowing warm days for initial establishment.
Mulching Mastery: The 1-2 inches of mulch mentioned in Step 3 serves two critical purposes: insulation and moisture retention. I use straw rather than leaves because it breaks down more slowly and provides better insulation. The key is to apply mulch after planting but before the first hard freeze—this creates a protective barrier that shields bulbs from temperature fluctuations that can heave them out of the ground. Just don't overdo it; too much mulch can smother the bulbs.
Pro Tips for Crocus Flower Snow
- Winter's first bursts of color start with the right approach—here's how to set your crocus up for success that'll last for years.
- Bulb Selection Wisdom: When choosing winter-hardy crocus bulbs, look for ones labeled as "early bloomers" or "winter blooming."
- Soil Preparation Secret: The drainage test in Step 2 is non-negotiable—poor drainage is the #1 reason crocus bulbs rot before they bloom.
Frequently asked questions
about crocus flowers blooming in snow—here’s what you need to know!When do crocus flowers typically bloom in snowy conditions?
Crocus flowers are winter’s early risers! Most varieties bloom as soon as snow melts, often between late winter (February) and early spring (March), depending on your climate. Some hardy species, like Crocus vernus or Crocus tommasinianus, may even push through light snow for a cheerful pop of color.
Can crocus flowers survive heavy snowfall or freezing temperatures?
Crocus bulbs are extremely cold-hardy and can withstand temperatures down to -20°F (-29°C) or lower. Their bulbs stay dormant underground, while the flowers may bend under snow but bounce back once conditions improve. Just avoid heavy mulch that could suffocate them.
How do I encourage crocus flowers to bloom earlier in snowy climates?
For a head start, plant bulbs in well-draining soil in fall (September–October) so they establish roots before winter. Choose early-blooming varieties like Crocus chrysanthus or Crocus laevigatus. Avoid overwatering—they thrive in dry conditions! A light dusting of snow can even protect them from extreme cold.
Are there alternatives to crocus flowers for snowy landscapes?
Yes! If crocus isn’t your style, consider these cold-tolerant bloomers:
- Hellebores (Lenten Rose) – Bloom under snow, shade-loving, and deer-resistant.
- Winter Aconite (Eranthis hyemalis) – Bright yellow flowers that pop through snow.
- Snowdrops (Galanthus) – Classic white bells that defy winter chill.
- Puschkinia (Scilla) – Tiny blue stars that thrive in rocky, snowy spots.
Why aren’t my crocus flowers blooming in the snow this year?
Don’t panic! Common reasons include:
- Too much shade – Crocus needs sunlight to trigger blooming.
- Improper planting depth – Bulbs should be 3–4 inches deep.
- Poor drainage – Waterlogged soil can rot bulbs.
- Young bulbs – Give them 2–3 years to mature.
Wrapping up and next steps
The crocus flower’s bold emergence through snow is nature’s way of reminding us that beauty thrives even in winter’s chill. 🌸 Whether you’re admiring them in gardens, forcing bulbs indoors, or simply embracing their symbolism of resilience, these early bloomers bring warmth and hope to cold days.
Ready to welcome spring’s first colors? Plant a few crocus bulbs this fall—or share their magic with a friend! Even a small patch can transform a winter landscape into a cheerful oasis. 🌱