
Flowers
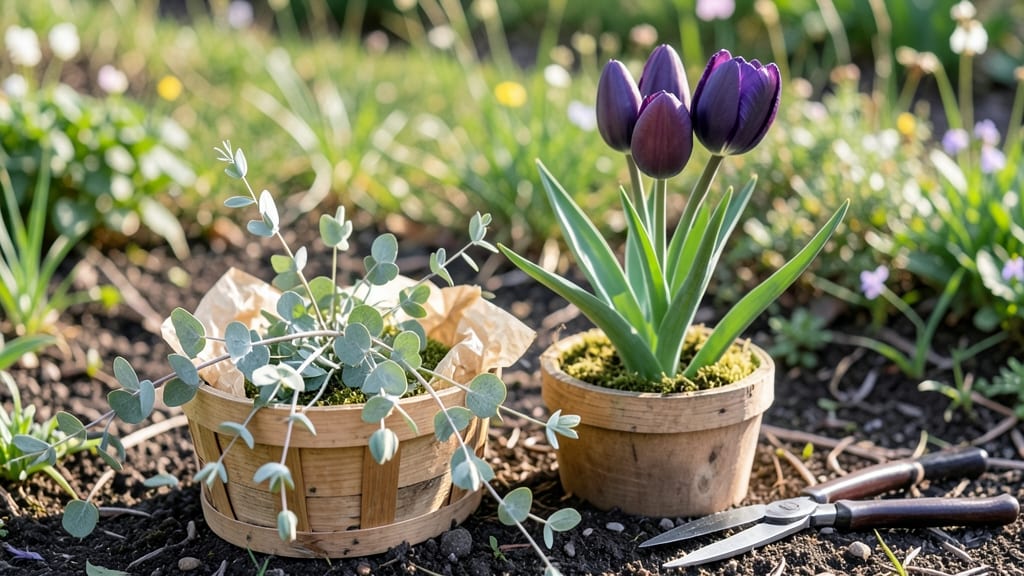
Spring bouquets of flowers burst with pastel hues that feel like sunshine in a vase. 🌸 I learned the hard way that timing is everything—planting tulips and daffodils too late means wilted stems by Mother’s Day.
The secret lies in starting bulbs in late fall and deadheading spent blooms to encourage reblooming.
For a pastel-perfect arrangement, mix tulips (soft pinks), daffodils (buttery yellows), and pansies (blues and purples) for contrast. These flowers thrive in well-drained soil and partial sun, with tulips needing 6-8 hours of light daily. Harvest stems early morning when buds are just opening—they’ll last 7-10 days in a vase.
Your bouquet will glow with freshness if you snip stems at an angle and change the water every 2-3 days. The scent of blooming tulips and the velvety petals of pansies make every arrangement feel like a spring celebration.
Let’s get those bulbs planted so you can enjoy the magic.
Works for gardeners with containers or beds, and even urban balconies with the right varieties. The key is patience—spring’s fleeting blooms reward those who plan ahead. Here’s how to make it foolproof!
📚 In This Guide
- What you need
- Instructions
- Tips and common mistakes
- Wrapping up and next steps
What you need
- ● Spring flowers (5-7 stems per type): Pastel pink peonies (2-3 stems)
- ● Soft lavender ranunculus (3 stems)
- ● Buttery yellow tulips (2 stems)
- ● Delicate pastel pink roses (2 stems)
- ● White or blush hydrangeas (1-2 stems, for volume)
- ● Filler flowers (3-5 stems): Pastel green eucalyptus (2 stems)
- ● Baby’s breath (white or blush, 3 stems)
- ● Pansies (mixed pastel colors, 2-3 stems)
- ● Greenery (for texture): Fern fronds (2-3 stems)
- ● Asparagus plumosus (1-2 stems)
- ● Floral supplies: Floral foam (1 block, 6"x6"x4") or a clean, wide-mouth vase
- ● Floral knife or sharp scissors
- ● Floral tape or rubber bands
- ○ Chicken wire (optional, for structural support)
- ● Extras for finishing touches: Pastel ribbon (1-2 feet, for wrapping)
- ○ Twine or raffia (optional, for a rustic touch)
- ● Waterproof glue (for securing delicate elements)
- ● Pre-cut stems at an angle (1-2 inches) to maximize water absorption.
- ● Choose flowers with open but not fully bloomed buds for longevity.
- ● Work in a well-lit area to see pastel shades clearly!
Step-by-Step guide to crafting a pastel spring bouquet
Here’s how I create arrangements that feel fresh, airy, and effortlessly seasonal every spring.
🌸 Step 1: Select the Perfect Pastel Palette
Start with a color scheme that feels cohesive yet natural—think blush pinks, mint greens, lavender, and soft yellows. I like to gather flowers in clusters of three shades total: one dominant, one secondary, and one accent. For example, a bouquet of peony blush pinks as the base, ranunculus butter yellow as the secondary, and delicate baby’s breath in white for texture. The key is to avoid clashing tones; if you’re unsure, stick to flowers from the same family (like all daisies or all roses) for instant harmony.
Gather flowers at their peak—first thing in the morning—when petals are fully unfurled but still crisp. Avoid overripe blooms with drooping heads or brown edges. A good rule: if the flower feels heavy in your hand, it’s past its prime. Hold a few stems against your cheek—if they smell sweet and fresh, they’re ready for cutting.
✂️ Step 2: Harvest and Prepare Stems for Longevity
Use sharp, clean pruners to cut stems at a 45-degree angle—about 6 inches from the base. This increases surface area for water absorption, which keeps flowers hydrated longer. Immediately place stems in a bucket of lukewarm water (cold water can shock them) with a flower preservative (like a pinch of bleach or a commercial mix). I like to strip lower leaves that would sit underwater, as they rot quickly and cloud the water.
For an extra boost, recut stems every 2-3 days while arranging. This refreshes the water intake and extends vase life by 2-3 days. If you’re working with wildflowers or foraged blooms, give them a 10-minute soak in the preservative solution before arranging—they often have dirt or debris clinging to stems.
🪴 Step 3: Design the Bouquet Structure
Fill a clear glass vase (or any container) with room-temperature water and add 2 tablespoons of floral preservative. Arrange stems in an odd-numbered cluster (3, 5, or 7 stems) for natural balance. Start by placing the tallest stems in the center, then fan out shorter stems around them, leaving 1-2 inches of stem submerged in water. This ensures even hydration and prevents leaning.
Work in layers: first the back-row stems (tallest), then the middle, and finally the front-row flowers (shortest). Tuck stems behind each other like spokes on a wheel, adjusting angles so no two stems point in the same direction. This creates depth and prevents a flat, one-dimensional look. For pastel arrangements, I like to weave in delicate filler flowers like statice or gypsophila to soften edges and add movement.
💧 Step 4: Secure and Hydrate for Lasting Beauty
Once all stems are placed, trim any uneven ends underwater to avoid air pockets that block water flow. Secure the bouquet with floral tape or a rubber band wrapped loosely around the stems, leaving the top open for adjustments. Place the vase in a cool, shaded spot (like a north-facing window) away from direct sunlight, which can cause petals to wilt faster.
Change the water and re-cut stems every 2 days to maintain freshness. If you notice leaves turning yellow or stems bending, it’s a sign the water needs refreshing. For an extra touch, add a dash of bleach (1/4 teaspoon per quart of water) to the vase to prevent bacterial growth, which keeps stems crisp for up to 10-14 days.
🌿 Step 5: Add Finishing Touches for Seasonal Elegance
Let the bouquet dry for 1-2 hours before arranging any greenery or accents. This allows stems to settle and prevents foliage from wilting under the weight of flowers. Add sprigs of eucalyptus, ferns, or ivy to fill gaps and create texture. For a pastel theme, I often use silver dollar eucalyptus or variegated dusty miller—their soft hues complement the blooms without competing.
Finally, arrange the bouquet asymmetrically—never perfectly centered. Let one side feel slightly fuller, with stems cascading naturally. This mimics how flowers grow in nature and adds a relaxed, organic feel. Step back and check from all angles; if one side looks heavier, redistribute stems until the arrangement feels balanced in your hands.
Tips & tricks for perfect spring bouquets
Creating pastel-perfect bouquets is all about the little details that make the difference between a charming arrangement and a truly showstopping centerpiece.
Timing is Everything: The 1-2 hour drying period in Step 5 is non-negotiable—this crucial rest time lets stems settle and prevents greenery from wilting under the weight of flowers. I've learned this the hard way after watching carefully arranged ferns collapse under heavy blooms. Place your bouquet in a cool, shaded spot during this time to maintain crispness.
Color Theory in Practice: When selecting your three-shade palette, think of the 60-30-10 rule from interior design: 60% dominant color (like peony blush pinks), 30% secondary (ranunculus butter yellow), and 10% accent (baby's breath). This creates visual harmony that feels natural rather than forced. For extra cohesion, choose flowers from the same botanical family—their similar shapes will create instant unity in your arrangement.
The Secret to Long-Lasting Blooms: That 10-minute soak for wildflowers isn't just about cleaning—it's a hydration boost that can extend vase life by up to 3-4 days. For store-bought flowers, give them a quick rinse and immediate preservative treatment to remove any wax coatings that might block water absorption. I always double-check stems for hidden dirt pockets that could harbor bacteria and shorten your bouquet's lifespan.
Structural Support: Don't underestimate the power of floral tape—it's not just for securing stems. Use it to create subtle "bridges" between stems that need extra support without being visible in the final arrangement. Wrap it loosely around stems at their base where they meet the vase, leaving room for water circulation. This hidden reinforcement prevents stems from toppling over during transport or when guests admire your creation up close.
Pro Tips for Bouquet Of Flowers Spring
- Creating pastel-perfect bouquets is all about the little details that make the difference between a charming arrangement and a truly showstopping centerpiece.
- Timing is Everything: The 1-2 hour drying period in Step 5 is non-negotiable—this crucial rest time lets stems settle and prevents greenery from wilting under the weight of flowers.
- This creates visual harmony that feels natural rather than forced.
Frequently asked questions
Got questions about crafting your dream bouquet of flowers spring arrangement? We’ve got answers! Whether you’re a beginner or a seasoned florist, these FAQs will help you nail that pastel-perfect look—without the stress.
What’s the best time of spring to pick fresh flowers for a bouquet?
For the brightest and longest-lasting blooms, aim for late spring (April–May) when flowers are in full bloom. Early spring (March) can be hit-or-miss—some flowers (like tulips) may still be budding, while others (like daffodils) might wilt faster. Pro tip: Pick flowers in the morning for maximum freshness!
How do I keep my spring bouquet fresh for as long as possible?
Extend your bouquet’s life with these tricks:
- Trim stems at an angle (about 1 inch) before placing them in lukewarm water.
- Change the water every 2–3 days and add a flower food packet (or a splash of bleach + sugar).
- Avoid direct sunlight—place your bouquet in a cool spot (like a bathroom or kitchen counter).
- Remove any wilted leaves or blooms immediately to prevent bacteria.
Can I use artificial flowers for a spring bouquet? Yes—but how?
Artificial flowers are a low-maintenance way to achieve that pastel spring vibe. Opt for high-quality silk or paper flowers with realistic textures. For a mixed look, pair them with a few real greenery stems (like eucalyptus or ferns) for depth. Bonus: Spray-paint plastic flowers in soft pastels for a custom touch!
What are some easy pastel flower combinations for beginners?
Start simple with these crowd-pleasing combos:
Theme
Flowers to Use
Greenery
Soft Romance
Peonies, ranunculus, baby’s breath
Lavender sprigs, dusty miller
Whimsical Garden
Tulips, hyacinths, sweet peas
Fern fronds, asparagus fern
Modern Minimalist
Roses (blush or pale pink), snapdragons
Olive branches, leatherleaf fern
Pro tip: Odd-numbered stems (3, 5, or 7) create natural balance!
My bouquet is wilting faster than expected—what went wrong?
Don’t panic! Common culprits include:
- Bacteria buildup—old water or dirty vases speed up wilting. Fix: Clean your vase with vinegar and refresh the water.
- Ethylene gas from overripe fruit or flowers. Fix: Keep bouquets away from bananas, apples, or other produce.
- Poor stem prep—if stems weren’t trimmed or sealed (with hot water or floral sealant), they’ll dry out. Fix: Re-cut stems and add a drop of bleach to the water.
If all else fails, revive wilting blooms by trimming stems again and placing them in ice-cold water for 2–3 hours.
Wrapping up and next steps
A bouquet of flowers in spring isn’t just a burst of color—it’s a celebration of renewal, joy, and effortless elegance. Whether you’re gifting a pastel masterpiece or crafting one for your own space, these arrangements bring life to any moment. Let your creativity bloom!
Ready to keep the magic alive? 🌸 Try experimenting with unexpected textures (think ferns or eucalyptus) or mix seasonal blooms for a one-of-a-kind look. Share your masterpiece on social media—tag us for a chance to be featured!