Orchid Care
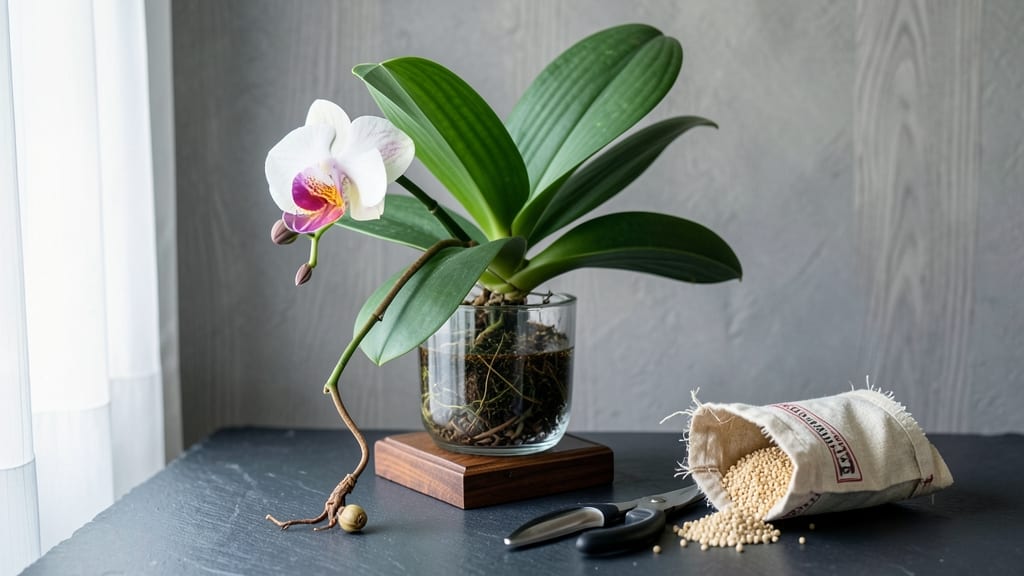
Your orchid’s spent its energy on stunning blooms—now it’s time to give it the care it needs to thrive again. 🌸 After flowering, most orchid owners make one critical mistake: cutting the stem too soon or ignoring its needs entirely.
The secret to reblooming lies in patience, precise pruning, and understanding your orchid’s seasonal rhythm.
Start by examining the flower spike. If it’s completely brown and shriveled, trim it back to a node (the small bump where leaves meet the stem). If green nodes remain, leave them—new blooms may emerge from there.
Repotting every 1-2 years refreshes the roots and prevents rot, while adjusting fertilizer to lower nitrogen in winter encourages stronger growth for next season.
You’ll notice new shoots within weeks if you’ve pruned correctly, and with proper light and humidity, your orchid will reward you with another spectacular display. The key is consistency: check roots monthly, mist leaves weekly, and rotate the pot for even sunlight.
Winter care is especially critical—cooler temps and reduced watering mimic its natural dormancy.
This method works for Phalaenopsis (the most common orchid) and many other varieties. Whether you’re a first-time owner or a seasoned grower, these steps will extend your orchid’s life and ensure it keeps gracing your home with color year after year. Let’s get it ready for its next showstopping performance.
📚 In This Guide
- What you need
- Instructions
- Tips and common mistakes
- Wrapping up and next steps
What you need
- ● Pruning shears or sterilized scissors – Sharp, clean tools prevent disease. Alcohol-wipe blades before use!
- ● New orchid pot – Choose a slightly larger pot (1–2 inches wider) with drainage holes. Terracotta or plastic with airflow holes work best.
- ● Fresh orchid bark mix or potting medium – 3–5 inches of cork bark chunks (1/4–1/2 inch size) or a pre-mixed orchid blend.
- ○ Sphagnum moss or perlite – Optional but helpful for moisture retention (use sparingly—orchids hate soggy roots!).
- ● Slow-release orchid fertilizer – Look for a balanced formula (e.g., 20-20-20 or 10-10-10) or a specialized orchid blend.
- ● Spray bottle with room-temperature water – For gentle hydration post-repotting.
- ○ Hydrogen peroxide (3%) or cinnamon powder – Optional but great for sterilizing cuts and preventing rot.
- ● Twine or orchid clips – To secure the plant in the new pot if needed.
- ● Patience – Orchids take time to recover; avoid overhandling!
- ● Bright, indirect light – Move your orchid to a spot with 1000–2000 foot-candles of light (e.g., east or west window).
- ● Warmth (65–80°F) – Avoid cold drafts or sudden temperature swings.
Instructions for reviving your orchid after blooming
Here's how to give your orchid the care it needs to bounce back strong.
✂️ Step 1: Prune the Spent Flower Spike
Once your orchid's blooms fade completely, examine the flower spike. If it turns completely brown and papery, you can cut it off at the base with clean, sharp scissors. I like to sterilize my scissors with rubbing alcohol first—this prevents any bacterial hitchhikers from causing trouble later.
If the spike is still green and firm, don't prune it yet. Some orchids like Phalaenopsis will produce new flowers from the same spike. Just wait until it's fully dried and brown before cutting. This ensures you don't accidentally remove potential future blooms.
🪴 Step 2: Check the Roots and Consider Repotting
Gently remove your orchid from its pot and inspect the roots. Healthy roots are green or silvery-gray, while dead roots are mushy and black. I like to repot every 1-2 years or when the potting mix breaks down—you'll know it's time when you see roots growing out of the pot's drainage holes.
If you're repotting, use a fresh chunky bark mix designed for orchids. I avoid compacting the mix—just place the orchid in and add enough mix to hold it steady. The roots need air circulation, so don't bury them too deeply. After repotting, place your orchid in a shaded area for a week to reduce stress.
☀️ Step 3: Adjust Light and Watering for Recovery
After flowering, your orchid needs bright, indirect light—think of it like a gentle morning sun. I position mine near an east-facing window where it gets morning light but avoids harsh afternoon sun. Too much direct light causes leaf burn, while too little makes the plant stretch and weaken.
Watering changes after blooming too. Instead of weekly soakings, let the top inch of mix dry out completely between waterings. I like to use room-temperature water and water in the morning so the plant has time to dry out before nightfall. Overwatering is the #1 killer of orchids—always check the mix before watering again.
💧 Step 4: Fertilize for Next Season's Growth
About 6 weeks after flowering, start fertilizing again with a balanced orchid fertilizer diluted to half strength. I use it every other week during spring and summer when your orchid is actively growing. The key is consistency—don't skip weeks or you'll see weak growth and fewer blooms next time.
Watch for new growth spikes emerging from the base of your orchid. These are your signal that the plant is storing energy for next year's flowers. I keep my fertilizer light during fall and winter when growth slows down—just enough to keep the roots happy without encouraging new growth that won't have time to mature.
Tips & tricks for reviving your orchid after flowering
A few simple tricks can make all the difference in helping your orchid recover and thrive for its next stunning bloom.
Pruning Precision: When you're ready to prune that spent flower spike in Step 1, look for the node—the small bump where leaves grow. If you cut just above a node, some orchids will surprise you with a new flower spike from that spot! Just make sure your scissors are sharp and clean to avoid damaging the plant. I've seen orchids rebloom from these nodes when pruned correctly.
Root Health Inspection: During Step 2's root check, pay special attention to the roots that look like tiny strings—these are healthy air roots. Don't trim them! Only remove the mushy black roots that feel soft when touched. Healthy roots should feel firm and springy. This careful inspection is what separates thriving orchids from struggling ones.
Light Positioning: For Step 3's light adjustment, east-facing windows are ideal, but if that's not available, a north-facing window works too. Avoid west-facing windows—the afternoon sun can be too intense. You'll notice your orchid's leaves will develop a nice medium green color when the light is just right. If leaves turn yellow, it's getting too much light; if they stretch and look pale, it needs more.
Fertilizer Timing: That 6-week mark in Step 4 is crucial—don't start fertilizing too soon after blooming. The plant needs time to recover its energy. I like to mark my calendar 6 weeks after the last bloom falls to remember when to begin. During the active growing season, I set a phone reminder every other week so I don't miss a feeding.
Pro Tips for What To Do With An Orchid After Flowering
- A few simple tricks can make all the difference in helping your orchid recover and thrive for its next stunning bloom.
- Pruning Precision: When you're ready to prune that spent flower spike in Step 1, look for the node—the small bump where leaves grow.
- Root Health Inspection: During Step 2's root check, pay special attention to the roots that look like tiny strings—these are healthy air roots.
Frequently asked questions
Got questions about what to do with your orchid after it blooms?
You’re not alone! Here are some of the most common concerns—and straightforward answers—to keep your orchid thriving for its next stunning display.
Do I need to cut off the flower spike after an orchid blooms?
Not always! If the spike turns yellow and shriveled, yes, snip it off with clean scissors. But if it’s still green, wait—it might produce new blooms or baby orchids (called "keikis")! For Phalaenopsis orchids, you can also trim it down to a node (a small bump) to encourage regrowth.
How long does it take for an orchid to rebloom after flowering?
Reblooming time varies, but with proper care, most orchids take 2–6 months to recover and produce new spikes. Factors like light, temperature, and fertilizer play a big role. Pro tip: Mimic seasonal changes by reducing water slightly in winter to signal dormancy and trigger blooming.
Can I repot my orchid right after it flowers?
Timing matters! Wait until the plant finishes blooming and starts growing new roots (usually 1–2 months later). Repotting too soon can stress the orchid. Choose a pot just slightly larger than the current one and use fresh bark mix to refresh its home.
My orchid’s leaves are yellowing after flowering—is it dying?
Not necessarily! Yellow leaves can signal overwatering, nutrient deficiency, or natural aging. Check the roots—if they’re mushy or black, it’s overwatered. If they’re healthy but leaves are yellowing, trim them off and adjust care. Pro tip: Fertilize lightly with a balanced orchid mix to boost recovery.
What if my orchid never blooms again after the first time?
Don’t panic! Many orchids need 6–12 months of consistent care before reblooming. Ensure it gets 12–14 hours of indirect light daily, cooler nights (50–60°F), and proper watering. If it’s a Phalaenopsis, it might take years to bloom again—patience is key!
Wrapping up and next steps
Caring for your orchid after it flowers is all about patience, attention, and a little TLC—and you’ve got this! 🌱 By pruning spent blooms, adjusting watering, and giving it the right nutrients, you’re setting the stage for a stunning comeback.
Remember, even the most experienced gardeners started somewhere, so don’t stress if it takes time.
Ready to level up your orchid game? 🌟 Next, track your plant’s progress—note what works (and what doesn’t!)—and soon, you’ll be rewarded with vibrant blooms again. Happy growing!