Vegetables
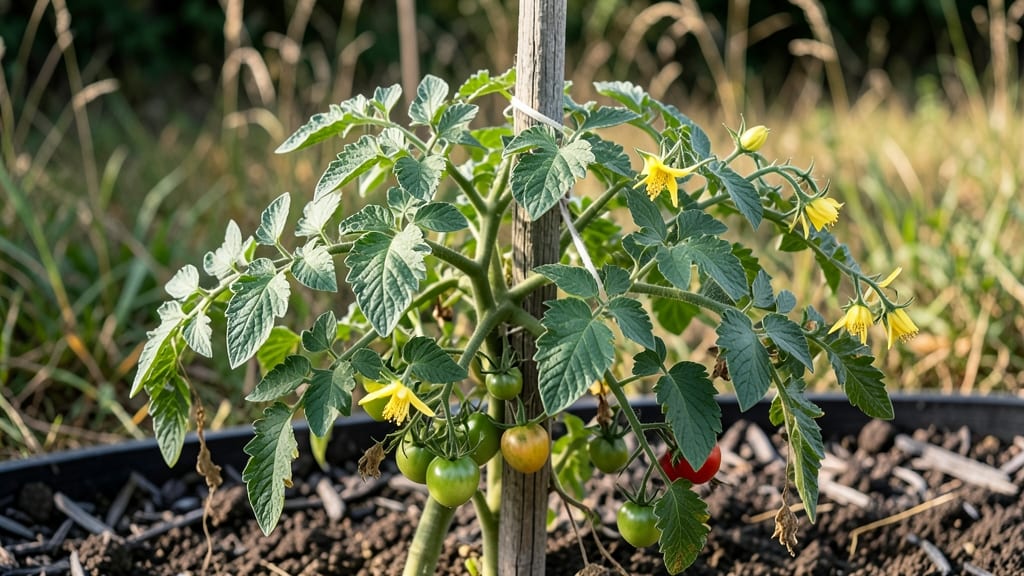
Understanding the tomato flower to fruit stages is the secret to going from a handful of flowers to a basket of ripe tomatoes—without losing half along the way. 🌱 I’ve watched my own plants drop blossoms like they were playing a cruel game, until I learned the exact conditions each stage needs to succeed.
The difference between a thriving vine and a sad, fruitless one often comes down to knowing when to step in and when to let nature take over.
This process unfolds in seven clear stages, starting with pollination and ending with that first ripe tomato. You’ll need basic tools like a spray bottle for humidity, a small brush for hand-pollination, and a watchful eye for temperature swings—especially those tricky 50-85°F sweet spots.
The biggest mistake? Assuming flowers mean fruit is guaranteed. Blossom drop happens when heat waves or dry air interfere, and knowing how to prevent it saves hours of frustration.
By the time you reach harvest, you’ll recognize the signs: fruit firming up, color deepening, and that unmistakable sweetness creeping in. The key is catching potential problems early—like stunted growth or cracked skins—and adjusting water or shade before it’s too late.
With these steps, you’ll turn every flower into a fruit, and your tomato plants will finally live up to their promise.
Works for all tomato varieties, whether you’re growing in containers, raised beds, or the ground. Let’s walk through each stage so you can troubleshoot before issues start—and enjoy a harvest that makes your neighbors ask for cuttings.
📚 In This Guide
- What you need
- Instructions
- Tips and common mistakes
- Wrapping up and next steps
What you need
- ● Tomato plants: Choose determinate (bush) or indeterminate (vining) varieties. Start with 3–5 healthy plants for a small harvest.
- ● Potting mix or garden soil: Use well-draining, nutrient-rich soil (pH 6.0–6.8). A 10–20 lb bag covers 3–5 plants.
- ● Watering can or hose: A 1–2 gallon capacity with a gentle spray nozzle for hydration.
- ● Fertilizer: Balanced fertilizer (10-10-10): 1–2 tbsp per plant every 2–3 weeks.
- ● Calcium supplement (e.g., crushed eggshells or lime): 1 cup per plant to prevent blossom-end rot.
- ● Pruning shears: Sharp, clean scissors (sterilized with rubbing alcohol) for trimming.
- ● Pollination aid: A soft paintbrush or handheld fan to assist in pollination on cloudy days.
- ● Grow lights or sunlight gauge: Ensure 6–8 hours of sunlight daily (or supplement with LED grow lights for indoor setups).
- ● Support structures: Cages or stakes for indeterminate varieties to prevent sprawling.
- ● Pest control: Neem oil or insecticidal soap (ready-to-use spray bottles) for aphids or hornworms.
- ● Harvesting basket: A breathable mesh bag to avoid bruising ripe tomatoes.
How to identify and support tomato fruit development
Here's how I track each stage—no guesswork, just clear checkpoints to ensure every flower turns into a ripe tomato.
🌱 Step 1: Recognize the Pollination Window
Tomato flowers open in the morning and must be pollinated within 24 hours or they drop. Look for yellow stamens (male parts) and a sticky white stigma (female part) at the center. If you see bees buzzing around, you're in luck—they handle most pollination naturally.
For greenhouse or indoor growers, give flowers a gentle shake at midday when they're fully open. I tap the stems lightly with my fingers—just enough to dislodge pollen. Watch for tiny white pollen grains drifting between flowers as a sign it worked.
☀️ Step 2: Spot the First Signs of Fruit Set
Within 3-5 days after successful pollination, the flower will begin to curl and shrivel at the base while the ovary swells. This is your first true signal—a tiny pea-sized bump forms where the fruit will grow. Don't confuse this with blossom end rot (which appears as dark spots later).
Healthy fruit sets feel firm to the touch and develop a slight green tint within a week. If flowers drop without swelling, your plants may need more phosphorus (use a 5-10-10 fertilizer) or better air circulation—crowded plants often fail to set fruit.
💧 Step 3: Monitor Water and Nutrient Balance
Once fruit sets, consistent moisture becomes critical. Water deeply every 2-3 days (until top 2 inches of soil feel damp) but avoid wetting the leaves—this prevents fungal diseases like early blight. I water at the base in the morning so foliage has all day to dry.
Switch to a low-nitrogen, high-potassium fertilizer (like 0-10-10) once fruit appears. Too much nitrogen now leads to leafy growth at the expense of fruit development. You'll see smaller, fewer tomatoes if the balance is off—watch for yellowing lower leaves, which signals over-fertilization.
🌿 Step 4: Watch for Cell Division Growth Spurt
About 10-14 days after pollination, the fruit enters rapid growth. You'll notice visible swelling—the tomato doubles in size within 3-5 days. At this stage, green shoulders appear where the stem meets the fruit. This is normal and not a sign of immaturity.
Support heavy clusters by tying stems to stakes or using soft plant ties. I loop the tie around the main stem and the fruit cluster, leaving 1 inch of space—this prevents bruising as the tomatoes grow. Remove any small, misshapen fruit now to redirect energy to larger tomatoes.
☀️ Step 5: Assess Color Change Readiness
About 45-60 days after pollination, the fruit stops growing and begins color development. The first sign? A slight blush near the shoulder (the side facing the stem). For heirloom varieties, this blush spreads slowly—wait until 90% of the surface shows color before harvesting.
For hybrid varieties, the color change happens faster. You'll see uniform red (or yellow/purple, depending on variety) within 2-3 weeks. A quick squeeze test helps: firm but slightly yielding means it's ripe. If it feels hard, it's not ready yet.
⏰ Step 6: Time the Harvest Window
Harvest within 24 hours of full color development to preserve flavor and texture. I pick in the early morning when temperatures are coolest—this reduces bruising. Cut the stem with clean pruners at a 45-degree angle, leaving ¼ inch of stem attached to the plant.
Unripe tomatoes left on the vine won't ripen properly indoors. If you must pick early, place them in a paper bag with a banana for 3-5 days—the ethylene gas speeds up ripening. Watch for soft spots or cracks, which signal overripeness and should be used immediately.
🌱 Step 7: Learn from Each Fruit's Development
Keep a simple journal noting which flowers set fruit and which didn't. I jot down temperature, humidity, and fertilizer dates next to each entry. Patterns emerge—like afternoon heat waves causing blossom drop or overwatering leading to cracked tomatoes.
Use this data to adjust next season's care. For example, if only top flowers set fruit, your plants need more calcium (try crushed eggshells in the soil). If fruit stays small, they need more sunlight or less competition from leaves. Small tweaks here prevent big problems later.
Tips & tricks for perfect tomato fruit development
These simple tips will help you turn every tomato flower into a juicy, flavorful fruit without the guesswork.
Pollination Timing: The 24-hour window for pollination is non-negotiable—flowers open in the morning and must be pollinated before they close. I've learned this the hard way after watching dozens of blooms drop without setting fruit. For greenhouse growers, a gentle midday shake works best when flowers are fully open and pollen is visible. The tiny white grains drifting between flowers confirm success—this visual cue is your green light to move on to the next step.
Early Fruit Set Check: In Step 2, when you spot that pea-sized bump within 3-5 days, don't confuse it with blossom end rot. Healthy fruit sets feel firm to the touch, while problematic ones feel soft or develop dark spots. I always check for that slight green tint within a week—it's your first sign of proper fruit development. If flowers keep dropping without swelling, it's time to check your phosphorus levels or improve air circulation.
Growth Support Strategy: During the rapid growth spurt in Step 4, those green shoulders are completely normal and not a sign of immaturity. This is when you'll notice the tomato doubling in size within just 3-5 days. I tie my stems with soft plant ties, leaving 1 inch of space to prevent bruising as the fruit grows heavier. Removing small, misshapen fruit now redirects all the plant's energy to the larger tomatoes you want to harvest.
Harvest Timing Secret: That 24-hour harvest window after full color development makes all the difference. I always pick in the early morning when temperatures are coolest—this reduces bruising and preserves texture. The 45-degree angle cut with clean pruners leaves just ¼ inch of stem attached, which helps the tomato ripen more evenly. And if you must pick early, the banana in a paper bag trick speeds up ripening in just 3-5 days without compromising quality.
Pro Tips for Tomato Flower To Fruit Stages
- These simple tips will help you turn every tomato flower into a juicy, flavorful fruit without the guesswork.
- Pollination Timing: The 24-hour window for pollination is non-negotiable—flowers open in the morning and must be pollinated before they close.
- Early Fruit Set Check: In Step 2, when you spot that pea-sized bump within 3-5 days, don't confuse it with blossom end rot.
Frequently asked questions
Got questions about transforming tomato flowers into juicy fruits? You’re not alone! Here are answers to the most common concerns—whether you’re troubleshooting, curious about timing, or just eager to maximize your harvest.
How long does it take for a tomato flower to turn into fruit?
After successful pollination, it typically takes 25–45 days for a tomato flower to mature into a ripe fruit, depending on the variety and growing conditions. Cherry tomatoes may ripen faster (around 25–30 days), while larger varieties like beefsteaks can take up to 60 days. Warmth and sunlight speed up the process!
Why aren’t my tomato flowers turning into fruit?
If your flowers aren’t fruiting, check for these common issues:
- Poor pollination: Hand-pollinate by gently shaking plants or using a small brush to transfer pollen.
- Extreme temperatures: Flowers may drop if temps exceed 90°F (32°C) or drop below 55°F (13°C).
- Lack of sunlight: Tomatoes need 6–8 hours of direct sun daily for fruit development.
- Overwatering or nutrient deficiency: Ensure balanced fertilizer (high in phosphorus) and well-draining soil.
Can I speed up the tomato ripening process?
Yes! Try these tricks:
- Move green tomatoes to a warm, sunny spot (like a windowsill or greenhouse).
- Wrap unripe tomatoes in newspaper and store them with a ripe banana (ethylene gas speeds ripening).
- Use a plant growth regulator like calcium carbide (follow label instructions carefully).
What if my tomato plant only has flowers but no fruit?
This is often called "flowering but no fruiting," and it’s usually due to stress or imbalance. Try these fixes:
- Prune excess foliage to improve airflow and redirect energy to fruit production.
- Add compost or a balanced fertilizer (like 10-10-10) to boost nutrients.
- Ensure consistent watering—drought or overwatering can cause flower drop.
- Check for pests (like whiteflies or aphids) and treat organically if needed.
Can I eat tomatoes that never ripen on the vine?
Green tomatoes are edible and delicious—they’re the star of dishes like fried green tomatoes or salsa verde. If you’re worried about flavor, let them ripen indoors (see tip above) or harvest them when firm and cook them. They’re packed with vitamin C and lycopene, even unripe!
Wrapping up and next steps
Watching a tomato flower transform into a juicy, ripe fruit is like witnessing nature’s little miracle! 🌱 From pollination to harvest, each stage plays a crucial role in ensuring a bountiful yield.
By understanding these steps—like hand-pollinating, protecting blossoms, and providing the right care—you’re well on your way to a thriving garden.
Now that you’re armed with the knowledge, why not put it into action? Grab your gardening gloves, head outside, and give your tomato plants the love they deserve. Happy growing—and enjoy those homegrown tomatoes this season! 🍅✨