Flowers
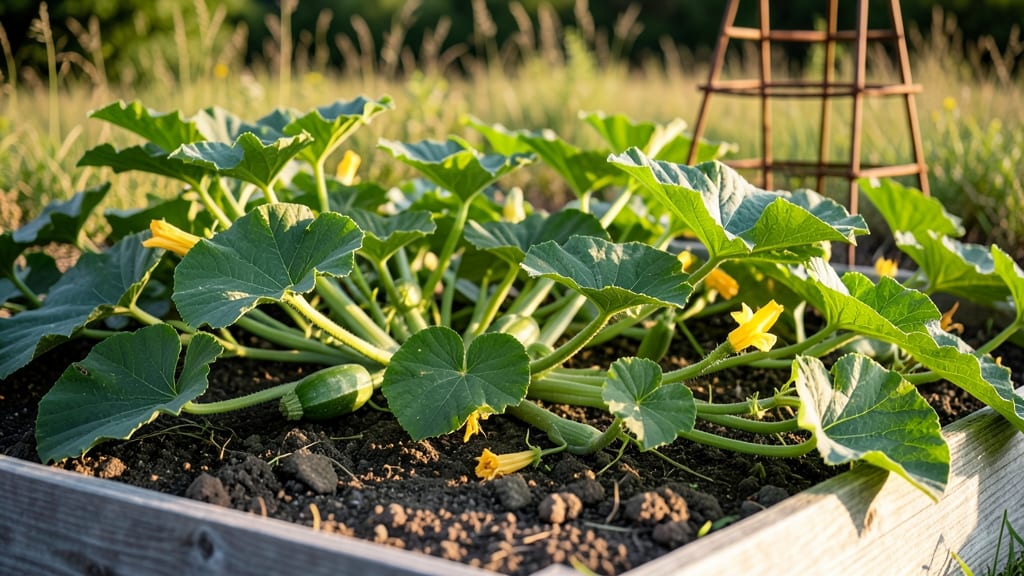
Summer squash flowers aren't just pretty—they're the secret to a bountiful harvest. 🌿 I've learned that those delicate blooms hold the key to whether your plants produce zucchini or just pretty faces, and understanding them changed how I garden.
The first time I saw a female flower turn into a squash, I knew I'd cracked the code to better yields.
Male flowers appear first, with a long stem and no bulge at the base, while female flowers have that telltale tiny squash forming behind the bloom. The trick to more fruit?
Giving your plants what they need—consistent watering, balanced fertilizer, and protection from pests that love to munch on those tender petals. Even a little hand-pollination can double your harvest when bees stay away.
You'll end up with clusters of bright yellow blooms that attract pollinators while giving you edible flowers for salads or garnishes. The best part? Those same flowers develop into the freshest summer squash you'll ever taste, straight from your garden to your plate. Let's get those vines producing!
This works whether you're growing bush varieties in containers or sprawling vines in the ground. The principles stay the same—just adjust your spacing and support. Here's how to make every flower count toward your harvest.
📚 In This Guide
- What you need
- Instructions
- Tips and common mistakes
- Wrapping up and next steps
What you need
- ● Summer squash seeds: Choose heirloom or hybrid varieties like Zucchini, Yellow Crookneck, or Patty Pan (1-2 seeds per plant, ~10-20 seeds for a small garden).
- ● Potting soil or seed-starting mix: 1-2 gallons per seedling (sterilized, well-draining).
- ● Containers or garden beds: Containers: 5-gallon pots or larger (1 plant per container).
- ● Garden beds: Full sun (6+ hours/day), loose, fertile soil with compost (amend with aged manure or composted leaves).
- ● Fertilizer: Balanced organic fertilizer (e.g., 10-10-10) or compost tea (mix 1 tbsp per gallon of water).
- ● Watering can or hose with gentle spray nozzle: For consistent moisture (avoid soggy soil!).
- ○ Garden gloves: Optional but helpful for handling prickly vines.
- ● Pruning shears or scissors: For harvesting flowers (sterilize with rubbing alcohol).
- ● Row covers or shade cloth (to protect young plants from pests like squash bugs).
- ● Trellis or stakes (for bush varieties to save space).
- ● Culinary tools: Tweezers (for delicate petals) or a small knife (for stems).
- ● Food-safe spray bottle (for rinsing flowers before cooking).
- ● Journal or app (to track planting dates and flower harvests).
Step-by-Step guide to growing edible summer squash flowers
Here’s how to coax those stunning, tasty blooms from seed to your plate.
🌱 Step 1: Start Seeds Indoors 4-6 Weeks Before Last Frost
Fill small pots with sterile seed-starting mix and plant 2-3 seeds per pot just ½ inch deep. Summer squash seeds germinate best in warm soil (70-85°F), so use a heat mat if your home runs cooler. Keep the soil consistently moist but not soggy—water gently from the bottom to avoid disturbing seeds.
Place pots in a sunny window or under grow lights for 14-16 hours daily. You’ll see sprouts in 5-10 days. Once seedlings have 2 true leaves, thin to the strongest one per pot. This prevents overcrowding and gives roots room to grow.
☀️ Step 2: Harden Off and Transplant After Frost
Two weeks before your last frost date, move seedlings outdoors for 2-3 hours daily, gradually increasing exposure. This toughens them up for the garden. Choose a spot with full sun (6+ hours daily)—squash flowers thrive where they get plenty of warmth.
Transplant seedlings 1-2 inches deeper than their pots, burying stems slightly to encourage strong root growth. Space plants 3-4 feet apart—they’ll spread! Water deeply right after planting to settle the soil and reduce transplant shock. Mulch around the base with straw or grass clippings to retain moisture and suppress weeds.
💧 Step 3: Maintain Soil and Water for Blooms
Keep the soil evenly moist—not soggy, not dry. Water at the base in the morning so leaves dry quickly, preventing fungal diseases. Summer squash are heavy feeders, so side-dress with compost or balanced fertilizer (10-10-10) when flowers first appear. This boosts production and keeps blooms coming.
Watch for yellowing leaves—a sign of overwatering or nutrient deficiency. If vines look leggy or flowers drop without fruiting, they need more sun or fertilizer. Pinch off early blooms if your plants are small to redirect energy to stronger growth.
✂️ Step 4: Harvest Flowers for Cooking or Pollinators
Pick fully open flowers in the morning for peak freshness. Use clean scissors to snip stems just above a leaf. For cooking, remove the stamen (the yellow part) and rinse gently. Flowers can be battered and fried, tossed into salads, or used as garnishes.
Leave some blooms on the plant to attract pollinators—bees and butterflies will visit, ensuring your squash fruits develop properly. If you’re growing for both flowers and produce, harvest only 2-3 flowers per vine to avoid overstressing the plant.
🪴 Step 5: Extend the Season with Succession Planting
For a continuous harvest, sow new seeds every 2 weeks after the first frost. This keeps flowers and squash coming all summer. If your season is short, choose bush varieties like ‘Eight Ball’ or ‘Patio Star’—they mature faster and produce flowers earlier than vining types.
As temperatures drop in late summer, protect plants with row covers to extend blooming. Harvest any remaining flowers before the first frost, then compost the vines or save seeds for next year. With a little care, you’ll enjoy edible summer squash flowers from seed to plate all season long!
Tips & tricks for perfect summer squash flowers
Growing edible summer squash flowers is easier than you think—once you know these game-changing tips!
Seed Starting Secrets: Don't rush the germination process in Step 1. Summer squash seeds need that 70-85°F soil temperature to sprout reliably. If your home stays cooler, place pots on a heat mat or even a sunny windowsill with a clear plastic wrap tent to trap warmth. I've seen germination rates jump from 50% to nearly 100% when I use this trick!
Harden Off Gradually: The 2-3 hours daily outdoor exposure in Step 2 should increase by 30 minutes every 2-3 days. This slow transition prevents shock that can stunt growth. Watch for wilting—if leaves droop, they're not ready for longer exposure yet. I've had seedlings recover from too-quick hardening, but they always lag behind properly acclimated plants.
Soil Moisture Balance: "Evenly moist" in Step 3 means your finger should sink in about 1 inch without hitting dry soil. Overwatering causes yellowing leaves, while underwatering leads to leggy plants. I use a spray bottle for morning watering to keep leaves dry, which prevents powdery mildew—the bane of summer squash growers. Mulching with straw helps maintain that perfect moisture level.
Harvesting Timing: Those fully open flowers in Step 4 are best picked in the morning when they're crisp and fresh. Use clean scissors to avoid damaging stems—this encourages more blooms. I've found that harvesting just 2-3 flowers per vine keeps the plant happy while still giving me plenty for cooking. Leave the rest for pollinators to do their magic!
Pro Tips for Summer Squash Flowers
- Growing edible summer squash flowers is easier than you think—once you know these game-changing tips!
- Seed Starting Secrets: Don't rush the germination process in Step 1.
- Harden Off Gradually: The 2-3 hours daily outdoor exposure in Step 2 should increase by 30 minutes every 2-3 days.
Frequently asked questions
Got questions about growing and using summer squash flowers? You’re not alone! Here are some of the most common queries—plus quick, practical answers to help you bloom with confidence.
When do summer squash flowers appear, and how long do they last?
Summer squash flowers typically emerge 4–6 weeks after planting, once the vines are established and temperatures stay above 55°F (13°C). Male flowers (with long stems) appear first, followed by female flowers (with tiny squash bumps at their base). Each bloom lasts just 1–2 days, so check your plants daily for fresh picks!
Can I eat summer squash flowers if I’ve never tried them before?
Summer squash flowers are mild, slightly sweet, and packed with nutrients (like vitamin C and fiber). Start with small amounts to test your tolerance—try them raw in salads or lightly sautéed with garlic. Pro tip: Remove the stamen (male flowers) or ovary (female flowers) for the best texture.
Why aren’t my summer squash flowers being pollinated?
Poor pollination is often due to lack of bees, extreme heat (above 90°F/32°C), or weak plants. Hand-pollinate by transferring pollen from male to female flowers with a small brush or cotton swab. For organic growers, plant bee-friendly flowers nearby (like marigolds or borage) to attract pollinators.
What can I do with excess summer squash flowers?
Don’t let them go to waste! Use them in:
- Fritters: Dip in batter and fry until golden.
- Stuffed blooms: Fill with cheese, herbs, or breadcrumbs.
- Garnishes: Top soups, pasta, or gazpacho for a fancy touch.
- Preserves: Freeze or dry for later use.
Can I grow summer squash flowers in containers or small spaces?
Yes! Choose bush varieties (like ‘Eight Ball’ or ‘Patio Star’) and use 5-gallon containers with well-draining soil. Ensure they get 6–8 hours of sun daily and support vines with trellises if needed. Just avoid overcrowding—flowers (and squash!) need room to thrive.
Wrapping up and next steps
Growing summer squash flowers is a rewarding journey that brings beauty, pollination, and even edible delights to your garden! 🌸 Whether you’re harvesting blooms for salads, attracting pollinators, or simply enjoying their vibrant charm, these versatile flowers make gardening both fun and fruitful.
Now that you’re equipped with the right knowledge—from seed to harvest—why not take the next step?
Start small with a few plants, experiment with recipes, or even share your blooms with fellow gardeners. Every seed you plant today could inspire a bountiful harvest tomorrow. Happy growing! 🌱