Flowers
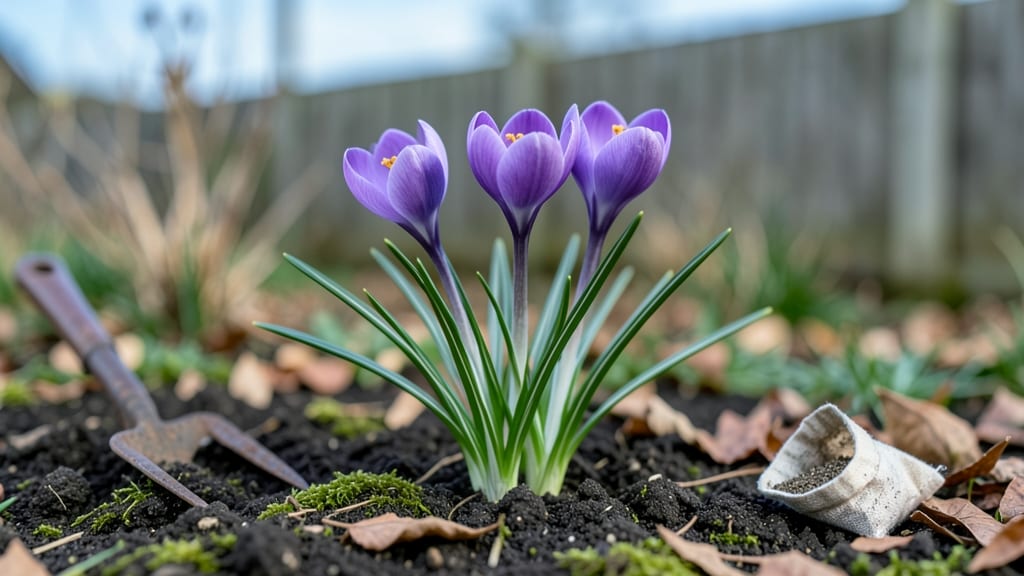
Spring crocus flowers burst through frost like nature’s purple fireworks—those first bold blooms are the gardening season’s most thrilling promise. I’ve planted them for years, and nothing beats watching them poke through snowdust in late winter, unfazed by cold.
The secret to their early show? Planting bulbs in fall, when soil temps drop below 60°F, so they establish roots before winter’s chill sets in.
These hardy perennials thrive in full sun to light shade and need well-draining soil—they’ll rot if left soggy. Most varieties bloom for just 2-3 weeks, but their impact lasts months: the foliage stays green until summer, feeding the bulb for next year’s display.
Even in rocky soil or containers, they deliver drama with almost no effort.
You’ll get vibrant purple, white, or striped blooms that attract early pollinators, plus the satisfaction of a garden that wakes up before the rest. The trade-off?
They’re shallow-rooted, so mulch lightly after blooming to protect next year’s buds. Just one clump can multiply into a carpet of color in 3-4 seasons.
Perfect for rock gardens, woodland edges, or even under deciduous trees where they’ll bloom before leaves shade them out. Once planted, they’re basically maintenance-free—just enjoy the show and let them do their thing. Here’s how to make them thrive in your yard.
📚 In This Guide
- What you need
- Instructions
- Tips and common mistakes
- Wrapping up and next steps
What you need
- ● Spring Crocus Bulbs (Crocus vernus or Crocus tommasinianus): 10–20 bulbs (for a vibrant cluster; more for larger areas)
- ● Choose pre-chilled bulbs (already refrigerated for 8–12 weeks) for faster sprouting.
- ● Well-draining soil: 1 part potting mix or garden soil
- ● 1 part perlite, sand, or gravel (for aeration)
- ● Garden tools: Trowel or bulb planter (for digging)
- ● Gloves (to protect hands from sharp soil)
- ● Watering can with a fine rose (gentle watering is key!)
- ○ Optional but helpful: Mulch (straw or shredded leaves to retain moisture)
- ● Slow-release fertilizer (5-10-10 ratio, sprinkled lightly)
- ● Rocks or decorative stones (to mimic natural habitats)
- ● Plant labels (to track varieties if mixing colors)
- ● Timing: Plant bulbs in early fall (6–8 weeks before frost) or late winter (for forced indoor blooms).
- ● Location: Full sun to partial shade (4–6 hours of sunlight daily)
- ● Avoid soggy spots—crocus hates wet feet!
- ● Climate: Hardy to USDA Zones 3–8 (survives light frosts!).
How to plant spring crocus for stunning early blooms
Here's the simple method I use to get vibrant purple crocus popping through snow—no fuss, just reliable color.
Choose the Right Location and Timing
Spring crocus thrives in full sun to partial shade, but I've found they bloom longest in spots with morning sun and afternoon shade. This prevents the bulbs from overheating during summer dormancy. Plant them in late summer or early fall, about 6-8 weeks before your first hard frost. The bulbs need time to establish roots before winter.
If you're in a warmer climate where winters are mild, you can plant as late as October. The key is getting those bulbs in the ground before the soil freezes. I always mark the planting spot with a small flag so I don't accidentally dig them up later. Crocus bulbs are small—about the size of a walnut—so don't plant them too deep.
Prepare the Soil and Plant the Bulbs
Crocus prefers well-draining soil with a pH between 6.0 and 7.0. If your soil is heavy clay, mix in 2-3 inches of compost or coarse sand to improve drainage. You can plant crocus in garden beds, rock gardens, or even containers—just make sure the container has drainage holes.
Dig a hole about 3 inches deep (or about 3 times the height of the bulb). Space the bulbs 2-3 inches apart in rows 4-6 inches apart. This gives them room to multiply over time. If you're planting in a lawn, you can use a bulb planter to make neat rows. Gently place each bulb in the hole with the pointy end facing up—this ensures they grow straight.
Cover and Water for Establishment
Once the bulbs are in the ground, cover them lightly with soil and water deeply to settle everything in place. The soil should feel moist but not soggy—think of it like a damp sponge. After watering, you won’t need to water again until spring, when the shoots emerge. Overwatering in fall can cause the bulbs to rot.
If you're planting in a container, use a well-draining potting mix and place the pot in a sheltered spot outdoors. Bring containers indoors before the first frost if your winters are harsh, but leave them outside if your climate is mild. The bulbs will go dormant naturally, and the cold helps them store energy for spring blooms.
Mulch and Protect for Winter
After planting, add a light layer of mulch (about 1 inch thick) to insulate the soil and protect the bulbs from extreme temperature swings. I use straw or shredded leaves because they break down slowly and won’t smother the bulbs. Avoid heavy mulch like wood chips, which can compact and trap moisture.
If you're in a zone with harsh winters, consider adding a thin layer of evergreen boughs over the mulch to shield the bulbs from freezing winds. This extra protection ensures the bulbs survive even if the ground freezes. In spring, remove the mulch as soon as the soil thaws—this prevents the bulbs from rotting when the weather warms up.
Enjoy the Blooms and Plan for Next Year
Crocus blooms typically appear 3-4 weeks before tulips or daffodils, often while there’s still snow on the ground. Once the flowers fade, leave the foliage alone—it needs 4-6 weeks to photosynthesize and store energy for next year’s blooms. If you cut the flowers for arrangements, leave at least half the leaves attached to the plant.
After the foliage turns yellow and dies back, you can fertilize lightly with a balanced, slow-release fertilizer (like 10-10-10) to encourage bigger blooms next year. If your crocus clumps get crowded, you can divide them in early fall by carefully lifting the bulbs, separating them, and replanting. Over time, a single bulb can multiply into a dozen, so you’ll have plenty to share!
Tips & tricks for perfect spring crocus planting
These simple tricks will help you get those vibrant purple blooms popping through snow like clockwork every spring.
Timing is Everything: The 6-8 week window before your first hard frost is critical for root establishment. I use my local weather service's frost date calculator to pinpoint the exact planting window. If you're in doubt, err on the earlier side—crocus bulbs can handle cooler soil better than they can handle being planted too late. Real talk: I've learned this the hard way after planting too close to winter and having bulbs rot.
Soil Prep Secrets: For heavy clay soil, I mix in 2-3 inches of coarse sand rather than just compost—this improves drainage without making the soil too loose. Test your soil's pH before planting; if it's below 6.0, add a bit of lime to adjust it. The right soil conditions make all the difference in getting those reliable blooms year after year.
Container Gardening Hack: If you're planting in containers, use a well-draining potting mix with 30% perlite or pumice mixed in. This prevents waterlogging, which is the #1 cause of bulb rot. I always place a layer of small pebbles at the bottom of containers for extra drainage—this simple trick has saved my crocus plants multiple times during heavy rains.
Winter Protection Strategy: That thin layer of evergreen boughs over mulch in harsh winters isn't just decorative—it creates a microclimate that protects bulbs from freezing winds. I've seen bulbs survive -20°F temperatures with this method when they would have heaved out of the ground without it. In spring, remove the mulch as soon as the soil thaws to prevent rot from spring rains.
Pro Tips for Spring Crocus Flower
- These simple tricks will help you get those vibrant purple blooms popping through snow like clockwork every spring.
- Timing is Everything: The 6-8 week window before your first hard frost is critical for root establishment. I use my l...
- Soil Prep Secrets: For heavy clay soil, I mix in 2-3 inches of coarse sand rather than just compost—this improves dra...
Frequently asked questions
Got questions about spring crocus flowers?
You’re not alone! Here are some of the most common queries—plus quick, practical answers to help you grow (and love) these frost-defying beauties.
When is the best time to plant spring crocus bulbs?
Plant them in fall (6–8 weeks before the first hard frost), ideally between September and November. Crocus bulbs need cold dormancy to bloom early spring, so don’t wait until winter! Aim for well-draining soil in partial sun.
Can spring crocus survive a late frost?
These hardy flowers thrive in USDA Zones 3–8 and often bloom before frost threatens. Their low-growing habit shields them from damage. Just avoid planting in soggy spots—they hate wet roots.
Why aren’t my crocus flowers opening?
Check these fixes:
- Light: They need at least 4–6 hours of sun daily.
- Depth: Plant bulbs 3–4 inches deep (too shallow = no blooms).
- Age: Older bulbs may need dividing. Dig up and separate offsets every 3–4 years.
Patience too—some varieties take 2–3 years to peak!
What’s the difference between spring crocus and autumn crocus?
Spring crocus (Crocus vernus, C. tommasinianus) blooms in purple, white, or yellow and is non-toxic. Autumn crocus (Colchicum autumnale) flowers in fall but is toxic—avoid if you have pets/kids!
Can I grow spring crocus in containers?
Yes! Use well-draining pots (like terracotta) with a mix of potting soil and sand. Plant 3–5 bulbs per 6-inch pot and place them in a sunny spot. Containers dry out faster—water lightly until leaves die back in summer.
Pro Tip:
Want longer blooms? Deadhead spent flowers (snip stems at the base) but leave the leaves until they yellow—this feeds the bulb for next year!
Wrapping up and next steps
Spring crocus flowers are nature’s bold, frost-defying artists, bringing vibrant purple cheer to gardens before most plants even wake up. Whether you’re a seasoned gardener or a beginner eager to try, these hardy blooms prove that beauty thrives even in early spring’s chill. 🌸
Now that you’re armed with tips on planting, care, and troubleshooting, it’s time to roll up your sleeves and get growing! Start small—plant a few bulbs in a sunny spot this fall, and reward yourself with a burst of color next spring. Happy gardening!