Vegetables
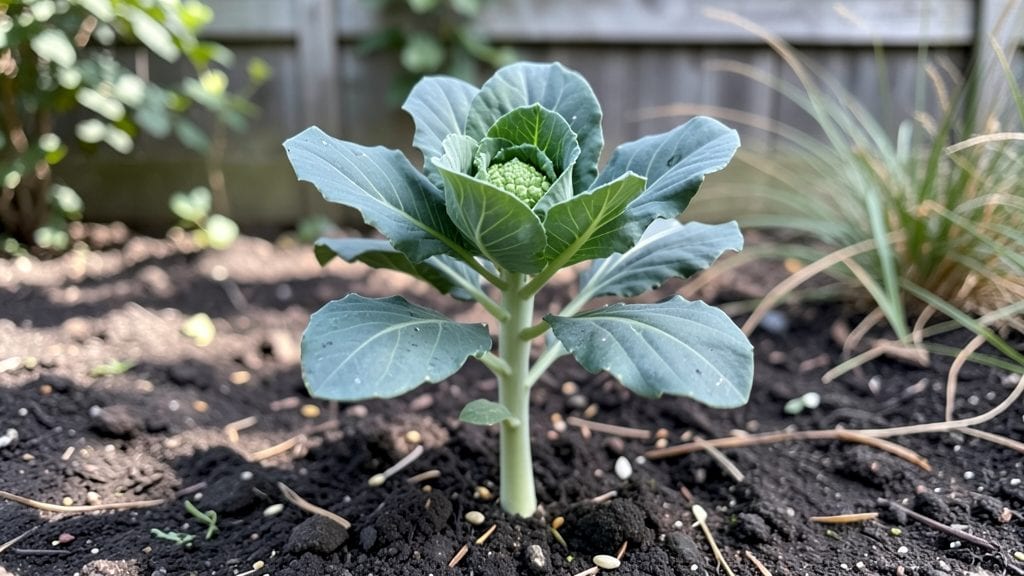
Growing romanesco cauliflower seedlings from seed gives you the perfect head start for a stunning, fractal-filled harvest—even in tight spaces. I’ll never forget the first time I saw my seedlings develop those intricate, lime-green spirals; it’s like nature’s geometry taking shape right in your garden.
The secret lies in starting them indoors, where you control the light and temperature until they’re ready for transplant.
You’ll need just a few supplies: seed-starting mix, small pots, a sunny windowsill or grow light, and patience. Romanesco thrives in cooler weather, so timing matters—plant seeds indoors 8-10 weeks before your last frost date.
The seedlings are sensitive to heat, so avoid letting soil temperatures creep above 75°F, or they’ll bolt prematurely. Keep them moist but not soggy, and watch those first true leaves emerge in 7-10 days.
Once transplanted, space your seedlings 18-24 inches apart to give their heads room to form properly. The fractal pattern develops best with consistent moisture and full sun (6+ hours daily).
You’ll know you’re on the right track when the curds tighten and deepen in color—ready for harvest in 70-90 days after transplanting. The payoff? A vegetable that’s as beautiful as it is delicious, and one that keeps producing even in small gardens.
Fair warning: Romanesco hates sudden temperature swings, so protect young plants from late frosts or hot spells. If you live in a warm climate, opt for fall planting instead of spring.
The key is consistency—light, water, and temperature—and soon, you’ll be snipping off those intricate florets for salads, roasts, or just admiring their perfect symmetry.
📚 In This Guide
- What you need
- Instructions
- Tips and common mistakes
- Wrapping up and next steps
What you need
- ● Romanesco cauliflower seeds: 5–10 seeds (organic, heirloom, or hybrid—check seed packets for days to maturity).
- ● Seed-starting mix: 2–3 cups of sterile, well-draining potting soil (avoid garden soil—it’s too dense!).
- ● Seed trays or small pots: 4–6 biodegradable or plastic cell trays (2–3 inches deep) or 4–6 small pots (3–4 inches in diameter).
- ● Grow lights or sunny windowsill: A full-spectrum LED grow light (12–16 hours/day) or a south-facing window with 6+ hours of direct sunlight.
- ● Spray bottle: For gentle watering (avoid over-saturating seeds!).
- ● Plastic wrap or humidity dome: To retain moisture while seeds germinate.
- ○ Heat mat (optional but helpful): Keeps soil at 70–80°F for faster germination.
- ● Patience: Romanesco seeds take 7–14 days to germinate—stay consistent!
- ● Transplanting supplies (later stage): Larger pots (5–6 inches) or garden bed prepared with compost.
- ● Fertilizer: Balanced 10-10-10 or organic options like fish emulsion (diluted to half-strength).
- ○ Support (optional): Small stakes or cages if growing in pots (romanesco gets 2–3 feet tall).
Step-by-Step instructions for growing romanesco cauliflower seedlings
Transform your small space into a year-round romanesco harvest with these precise, space-efficient techniques.
Prepare Containers and Seed Starting Mix
Fill 4-inch deep biodegradable pots with a sterile seed-starting mix—never garden soil, as its density slows germination and invites rot. I prefer a blend of 50% peat moss and 50% perlite for perfect drainage while retaining moisture. Moisten the mix until it feels like a wrung-out sponge: damp but not dripping. Press it down gently to eliminate air pockets, then tap the container once to settle the soil evenly.
Romanesco seeds are tiny and slow to germinate, so precision matters. Use a fine-mesh strainer to distribute seeds evenly—planting too densely leads to weak, crowded seedlings. Aim for 2-3 seeds per pot, spaced ¼ inch apart and pressed ⅛ inch deep. Cover lightly with a sprinkle of additional mix, then mist gently with water until the surface looks uniformly damp.
Create Ideal Germination Conditions
Cover the pots with a clear plastic dome or wrap them in plastic wrap to trap warmth and humidity. Romanesco thrives at 75-80°F for germination, so place the pots on a seedling heat mat if your home runs cooler. Without supplemental heat, germination can take 2-3 weeks instead of the usual 7-10 days. Check daily but resist the urge to water—condensation inside the dome provides all the moisture needed.
Once 50% of seeds sprout, remove the dome immediately. Trapped humidity after germination encourages damping-off, a fungal disease that collapses seedlings overnight. You’ll see tiny cotyledons (the first true leaves) emerge within 5-7 days after sprouting. At this stage, water from the bottom by placing pots in ½ inch of water for 10 minutes—this prevents soil-borne diseases while keeping roots hydrated.
Provide Optimal Light and Nutrients
Move seedlings under 14-16 hours of full-spectrum LED grow lights within 2 inches of the foliage. Romanesco needs high-intensity light to prevent leggy growth—without it, stems stretch weakly and leaves turn pale. Raise the lights gradually as seedlings grow, maintaining that 2-inch gap. You’ll know the light is perfect when seedlings develop dark green, compact leaves with no gaps between nodes.
After 3-4 weeks, when seedlings show 3-4 true leaves, fertilize with a half-strength liquid fertilizer (5-10-10 ratio). Over-fertilizing now burns tender roots. Water deeply every 2-3 days, ensuring the top 1 inch of soil feels dry before rewatering. Avoid wetting leaves—this reduces disease risk and ensures consistent growth.
Harden Off and Transplant
Two weeks before your last frost date, begin hardening off seedlings by placing them outside in partial shade for 1 hour the first day. Gradually increase exposure over 10-14 days, adding 1 hour daily until they tolerate full sun. Watch for wilting or yellowing—these are signs they’re not ready. Romanesco seedlings need strong stems before transplanting; weak ones snap easily in wind.
Transplant on a cloudy day or late afternoon to reduce stress. Dig holes twice as wide as the root ball but no deeper—burying the stem too far invites rot. Space plants 18-24 inches apart in well-draining soil amended with compost. Water deeply at the base, then mulch with 1-2 inches of straw to retain moisture and suppress weeds. Your romanesco will now focus on head formation instead of establishing roots.
Tips & tricks for perfect romanesco cauliflower seedlings
Mastering romanesco seedlings transforms your small space into a thriving garden—here's how to avoid common pitfalls and maximize success.
Seed Placement Precision: In Step 1, when planting those tiny romanesco seeds, use a toothpick to create individual ⅛-inch deep dimples in the soil. This ensures consistent depth and prevents seeds from being buried too deeply, which can suffocate them. I've found that spacing seeds ¼ inch apart gives each seedling enough room to develop strong roots without competing for nutrients. Remember, romanesco seeds are delicate—handle them with care using the fine-mesh strainer technique mentioned in the instructions.
Germination Temperature Control: The 75-80°F range specified in Step 2 is critical for optimal germination. If your home runs cooler, place your seedling heat mat under a heat lamp or on top of your refrigerator (not inside) to maintain consistent warmth. I've seen germination times stretch to 3 weeks when temperatures dip below 70°F, so monitor closely. Pro tip: Use an infrared thermometer to check soil temperature—it should read between 75-80°F at seed level, not just air temperature.
Light Management Strategy: For Step 3's 14-16 hours of light, consider using a timer for your grow lights to automate the process. Start with lights 2 inches above seedlings, then raise them gradually as plants grow—this prevents leggy growth. Watch for leaves touching the light fixture; if you see this, immediately increase the distance. I've noticed romanesco seedlings develop the most compact growth when lights are adjusted every 5-7 days to maintain that 2-inch gap.
Hardening Off Mastery: When beginning the 10-14 day hardening off process in Step 4, start with just 1 hour of partial shade exposure on day one. Gradually increase exposure by 1 hour daily, but always monitor for wilting or yellowing—these are clear signs the seedlings aren't ready. I've had success with a simple shade cloth system where I can easily adjust coverage. Remember, romanesco seedlings need strong stems before transplanting, so don't rush this crucial step.
Pro Tips for Romanesco Cauliflower Seedlings
- Mastering romanesco seedlings transforms your small space into a thriving garden—here's how to avoid common pitfalls and maximize success.
- Seed Placement Precision: In Step 1, when planting those tiny romanesco seeds, use a toothpick to create individual ⅛-inch deep dimples in the soil.
- Germination Temperature Control: The 75-80°F range specified in Step 2 is critical for optimal germination.
Frequently asked questions
about growing romanesco cauliflower seedlings—because even the greenest thumbs need a little help! Here are answers to the most common queries to set you up for success.How long does it take for romanesco cauliflower seedlings to mature?
From seed to harvest, romanesco typically takes 90–120 days in warm climates or 110–140 days in cooler ones. Seedlings need 4–6 weeks indoors before transplanting, then another 6–8 weeks to form a mature head. Start early if you want a fall harvest!
Can I grow romanesco seedlings indoors year-round?
Yes! With grow lights (14–16 hours/day) and a consistent 60–70°F temperature, you can grow romanesco seedlings indoors. Use container pots (12+ inches deep) and transplant outdoors when frost risk passes. Just mimic spring/summer conditions—sunlight, warmth, and patience!
What should I do if my romanesco seedlings look leggy or weak?
Leggy seedlings usually mean too little light or overcrowding. Fix it by:
- Moving them closer to a sunny window or under grow lights (6–8 inches away).
- Thinning seedlings to 12–18 inches apart to improve airflow.
- Using a balanced fertilizer (10-10-10) to boost growth.
If they’re already stretched, bury the stems deeper when transplanting—they’ll root and stabilize!
Are there easier alternatives to romanesco for beginners?
If romanesco feels tricky, try these low-maintenance cauliflower varieties first:
- Snowball Y Improved – Cold-hardy, reliable heads.
- Purple of Sicily – Unique color, easier to grow.
- Orange Cheddar – Sweeter, less finicky than romanesco.
Once you master these, romanesco’s fractal beauty will be worth the extra care!
Why did my romanesco seedlings turn yellow or wilt?
Yellowing or wilting often signals overwatering, underwatering, or pests. Check for:
- Root rot (mushy stems) → Use well-draining soil and pots with drainage holes.
- Drought stress (crispy leaves) → Water 1 inch/week (more in heat).
- Cabbage worms (chewed leaves) → Use neem oil or row covers.
Give them a week to recover—if not, start fresh seedlings!
Wrapping up and next steps
Growing romanesco cauliflower seedlings is a rewarding way to enjoy this stunning, nutrient-packed veggie year-round—even in small spaces! With the right setup, patience, and care, you’ll soon be harvesting fractal beauty that’s as delicious as it is eye-catching. 🌱✨
Ready to take the next step? Start by planting your seedlings in well-draining soil and keeping them cozy under grow lights or in a sunny window. Before you know it, you’ll be savoring homegrown romesco in soups, roasts, or raw snacks—all thanks to your green thumb!