Container Gardens
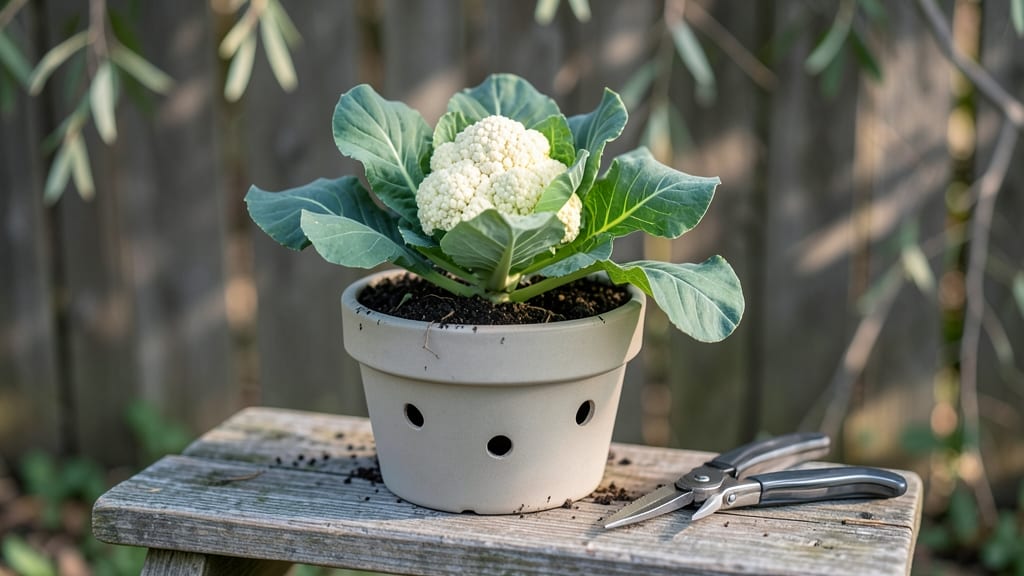
Planting cauliflower in pots lets you grow bold, compact heads without a backyard—though I’ll admit, my first attempt ended with a single sad, stunted head. The secret isn’t just the right pot size or soil mix; it’s understanding how cauliflower actually behaves when cooped up in containers.
Too much heat? Bolting. Not enough drainage? Rot. But get it right, and you’ll harvest heads as perfect as the ones at the farmers' market—just smaller and all yours.
You’ll need a 5-gallon container minimum (7+ gallons for full-sized heads) with drainage holes—no exceptions. Fill it with well-draining potting mix (avoid garden soil; it compacts and suffocates roots) and add a handful of compost for nutrients.
Cauliflower loves cool weather, so start seeds indoors 8-10 weeks before your last frost, or buy sturdy transplants. Place your pots where they’ll get 6+ hours of sunlight daily, and keep the soil consistently moist but never soggy. Overwatering is the #1 killer of container-grown cauliflower.
What you end up with is tight, flavorful heads that form faster in pots than in the ground—because they’re not competing with weeds or pests.
The leaves stay vibrant green, the stems stay sturdy, and you avoid the common problem of yellowing leaves (usually a sign of overwatering or nutrient deficiency). With the right care, you’ll pull those creamy-white curds from your pots by midsummer, and your neighbors will swear you’ve got a secret greenhouse.
This method works for varieties like ‘Snowball Y Improved’ or ‘Purple of Sicily’, which handle containers better than giant heirlooms. And don’t worry if your first try isn’t flawless—even my third attempt had a few bolting plants.
The key is adjusting water, shade, and fertilizer as you go. Once you nail the basics, you’ll be growing cauliflower in pots like a pro, with zero backyard required.
📚 In This Guide
- What you need
- Instructions
- Tips and common mistakes
- Wrapping up and next steps
What you need
- ● Container: A pot 12–18 inches deep (minimum 12" diameter) with drainage holes. Opt for fabric grow bags or ceramic pots for extra stability.
- ● High-quality potting mix: 10–12 quarts of a lightweight, well-draining mix (avoid garden soil—it compacts!). Add 10% perlite or vermiculite for aeration.
- ● Cauliflower seeds or seedlings: Seeds: 4–6 seeds per pot (thin to 1–2 strongest plants). Choose varieties like 'Snowball Y Improved' or 'Purple of Sicily' for compact growth.
- ● Seedlings: 1–2 plants per pot (transplant after hardening off). Pick short-statured varieties for pots.
- ● Fertilizer: Balanced starter fertilizer (e.g., 10-10-10) at planting time (follow label rates).
- ● Slow-release organic fertilizer (e.g., 5-5-5) or compost tea every 3–4 weeks.
- ● Watering can or hose with gentle nozzle: Cauliflower hates soggy roots—aim for 1–1.5 inches of water per week (adjust for heat).
- ● Mulch: 2–3 inches of straw or shredded leaves to retain moisture and suppress weeds.
- ● Grow lights: If indoors or in low-light spots, use a full-spectrum LED (12–16 hours/day).
- ● Cage or trellis: For 'Romanesco' varieties (they grow tall!).
- ● pH test kit: Cauliflower thrives in 6.0–7.0 pH—adjust with lime (to raise) or sulfur (to lower) if needed.
- ● Row covers: Protect young plants from pests like cabbage moths.
- ● Epsom salt: A tablespoon per plant monthly for magnesium (prevents yellowing).
Step-by-Step instructions for planting cauliflower in containers
Here's how to grow compact, high-quality cauliflower heads in pots with flawless drainage.
🪴 Step 1: Select the Right Containers and Drainage System
Choose containers that are at least 12 inches deep and 12 inches wide per plant—cauliflower needs room to develop a sturdy root system. I recommend fabric grow bags or terra cotta pots because they allow excess moisture to evaporate, preventing the soggy soil that causes rot. If using traditional plastic pots, drill 2-3 additional drainage holes near the bottom to ensure water flows freely.
Place a 2-inch layer of coarse gravel or perlite at the bottom of each container before adding soil. This creates an air pocket that prevents waterlogging while allowing roots to breathe. The key here is balance—too little drainage leads to root rot, while too much causes the soil to dry out too quickly. Test by filling a container with water; it should drain completely within 5-10 minutes.
🌱 Step 2: Prepare the Soil Mix for Optimal Growth
Fill the container with a custom soil blend that combines 50% premium potting mix, 30% compost, and 20% perlite or vermiculite. This ratio ensures the soil retains moisture without compacting, which is critical for cauliflower's shallow but widespread root system. Avoid garden soil—it compacts in containers and can introduce pests or diseases.
Mix in 1 tablespoon of balanced organic fertilizer (10-10-10) per container and 1 tablespoon of lime to raise the pH to 6.5-6.8, the ideal range for cauliflower. The lime prevents soil acidity, which can stunt growth. Gently fluff the soil with your fingers to create small air pockets—this encourages root development and prevents water from pooling around the base of the plant.
☀️ Step 3: Plant Seedlings at the Correct Depth and Spacing
Plant one cauliflower seedling per container, positioning it so the crown (where roots meet stem) sits just below the soil surface. Press the soil lightly around the roots to eliminate air pockets, but don’t compact it—cauliflower roots need loose soil to spread. If you’re starting from seed, sow 2-3 seeds per container at a depth of ¼ inch, then thin to the strongest seedling once it develops 2-3 true leaves.
Place the container in a location that receives full sun (6-8 hours daily) and protect young plants from strong winds, which can stress them. If your climate has hot afternoons, provide partial afternoon shade until seedlings are 4-6 inches tall—this prevents bolting (premature flowering) and ensures compact head formation. Water gently after planting to settle the soil around the roots.
💧 Step 4: Water and Fertilize for Consistent Moisture and Nutrition
Water the container deeply every 2-3 days, ensuring the top 2 inches of soil feel moist but not soggy. Cauliflower is particularly sensitive to moisture fluctuations—too little causes heads to split, while too much leads to rot. I use a self-watering system by placing the pot on a saucer filled with 1 inch of water, allowing the plant to draw up moisture as needed. Empty the saucer after 30 minutes to prevent waterlogging.
Fertilize every 3-4 weeks with a low-nitrogen, high-phosphorus fertilizer (5-10-10) to encourage head formation. Stop fertilizing 4-6 weeks before harvest—excess nitrogen at this stage promotes leafy growth over head development. Watch for yellowing leaves, which signal either overwatering or nutrient deficiency. Adjust your routine accordingly: reduce watering if leaves feel mushy, or add a balanced liquid fertilizer if they look pale.
✂️ Step 5: Monitor and Harvest for Perfect Heads
When the cauliflower head reaches 6-8 inches in diameter, check daily for tight, compact curds. If the head starts to loosen or turn yellow, harvest immediately—cauliflower heads continue to grow and may split if left too long. Cut the head 1-2 inches below the base with a sharp knife, leaving the stem intact for potential regrowth (though side shoots will be smaller).
After harvest, remove any yellowing or diseased leaves to redirect the plant’s energy. If your variety is self-blanching (like ‘Snowball Y Improved’), you can tie the outer leaves together to protect the head from sun exposure, which prevents discoloration. In warmer climates, cauliflower may bolt (send up a flower stalk) if stressed—watch for rapid stem elongation and act quickly by harvesting or providing shade if this occurs.
Tips & tricks for perfect container-grown cauliflower
A few strategic adjustments will help you grow cauliflower heads that are compact, flavorful, and free from common container gardening pitfalls.
Drainage Test: The 5-10 minute drainage test in Step 1 is non-negotiable for preventing root rot. I've ruined multiple containers by skipping this—if water pools after 10 minutes, add another drainage hole or use a different pot material. Terra cotta is my top recommendation because it wicks moisture away from roots, but fabric grow bags are a close second for their breathability.
Soil pH Precision: That 6.5-6.8 pH range in Step 2 isn't just a suggestion—it's critical for calcium uptake, which prevents head splitting. Test your soil mix with a simple pH kit before planting. If your tap water is acidic, use rainwater or distilled water for watering, as municipal water can throw off the balance over time. The lime addition should be mixed thoroughly into the bottom third of your soil blend for maximum effect.
Seedling Depth Secret: When planting seedlings in Step 3, the crown should sit just below soil level—not buried, not exposed. I've learned this the hard way: buried crowns rot, exposed ones dry out. For seed starters, that ¼-inch depth is perfect for germination, but once your seedlings develop 2-3 true leaves, thin aggressively to avoid competition. The strongest seedling should have plenty of space to develop its head.
Watering Watch: The 2-3 day watering schedule in Step 4 works best when you check soil moisture with your finger—not just the surface. Cauliflower roots spread widely, so the top 2 inches should feel like a damp sponge. I've seen heads split from uneven moisture, and the fix is always the same: consistent hydration without waterlogging. That self-watering saucer trick is a game-changer for busy gardeners, but remember to empty it after 30 minutes to prevent root suffocation.
Pro Tips for Planting Cauliflower In Pots
- A few strategic adjustments will help you grow cauliflower heads that are compact, flavorful, and free from common co...
- Drainage Test: The 5-10 minute drainage test in Step 1 is non-negotiable for preventing root rot. I've ruined multipl...
- Soil pH Precision: That 6.5-6.8 pH range in Step 2 isn't just a suggestion—it's critical for calcium uptake, which pr...
Frequently asked questions
Got questions about growing cauliflower in pots?
You’re not alone! Here are answers to the most common concerns to help you grow perfect heads—even in small spaces.
What’s the best temperature for cauliflower in pots?
Cauliflower thrives in cool weather (50–75°F). Start seeds indoors 6–8 weeks before the last frost, then transplant seedlings outdoors when soil is warm but not hot (above 40°F). Avoid planting when temps exceed 80°F—it’ll bolt (flower) prematurely! Use shade cloth if needed in hot climates.
How long does it take to grow cauliflower in pots?
From seed to harvest, expect 80–120 days, depending on the variety. Fast-maturing types (like ‘Snowball Y Improved’) may ready in 70–90 days. Check seed packets for specific timelines—patience pays off for those tight, compact heads!
Can I reuse the same pot for multiple cauliflower harvests?
Yes, but refresh the soil first! Cauliflower is heavy feeders and deplete nutrients. After harvest, remove old plants, add compost or balanced fertilizer, and repot with fresh potting mix. Avoid overcrowding—stick to one plant per 12–18” pot for best results.
Why is my cauliflower turning yellow or purple?
Yellowing leaves often mean overwatering or poor drainage. Purple tinges? It’s likely cold stress or nitrogen deficiency. Check your pot’s drainage holes and adjust watering—soil should stay moist but not soggy. A balanced fertilizer (like 10-10-10) can help if leaves look pale.
What’s a good alternative if cauliflower proves tricky in pots?
Try broccoli, kale, or Brussels sprouts—they’re equally rewarding and more forgiving! For a similar texture, ‘Calabrese’ broccoli or ‘Red Russian’ kale thrive in containers. Bonus: They’re cut-and-come-again crops, so you’ll get multiple harvests!
Wrapping up and next steps
Growing cauliflower in pots is totally doable—even for beginners! With the right container, soil, and sunlight, you’ll enjoy compact, delicious heads right on your patio or balcony. Remember, consistent care (watering, fertilizing, and pest control) is key to success.
Now that you’re ready to plant, why not start small with one or two pots and expand as you gain confidence? Happy gardening—your future homegrown cauliflower will be worth every effort! 🌱✨