Flowers
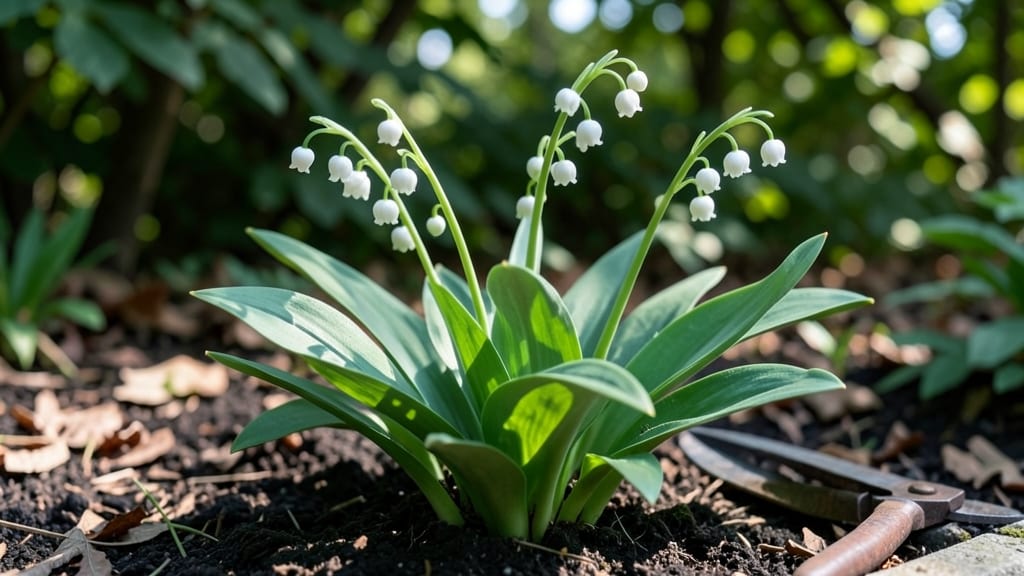
Growing lily of the valley means waking up to a garden filled with the sweetest fragrance nature has to offer—without fighting for sunlight. 🌿 This shade-loving perennial thrives where most flowers struggle, and once established, it spreads reliably with almost no effort.
My first batch took root in a damp corner under a maple tree, and now it’s the star of my woodland garden.
The secret to success lies in mimicking its natural habitat: moist, well-draining soil that stays consistently damp but never soggy. Plant the rhizomes in spring or early fall, just beneath the soil surface, and space them about 6 inches apart.
They’ll reward you with delicate bell-shaped blooms in late spring, followed by glossy foliage that stays attractive all season long.
You’ll know you’ve nailed it when the scent of lily of the valley fills your garden on warm mornings—it’s that intoxicating. Just be patient; it can take a couple of years for the plants to really establish and spread.
The trade-off? Once they do, they’re nearly indestructible and spread happily without invasive roots.
Common mistakes include planting in dry soil or full sun, which causes yellowing leaves and sparse blooms. If that happens, move the plants to a shadier, damper spot. With the right conditions, this fragrant beauty becomes the effortless centerpiece of any shaded garden corner.
📚 In This Guide
- What you need
- Instructions
- Tips and common mistakes
- Wrapping up and next steps
What you need
- ● Lily of the valley plants: 3–5 mature plants (for a small garden bed) or 10+ (for a lush border)
- ● OR 1–2 lbs of fresh seeds (if starting from seed—note: germination is slow!)
- ● Soil: Well-draining, moisture-retentive soil (amend with peat moss or compost if needed)
- ● pH level: 6.0–7.0 (slightly acidic to neutral)
- ● Fertilizer: Balanced 10-10-10 or organic compost (apply sparingly—too much nitrogen harms blooms!)
- ● Mulch: 2–3 inches of shredded bark, wood chips, or leaf mold (retains moisture and suppresses weeds)
- ● Garden tools: Trowel or small shovel
- ● Garden fork (for loosening soil)
- ● Pruners (for dividing clumps or trimming foliage)
- ○ Optional (but helpful): Garden hose with gentle spray nozzle (keeps soil evenly moist)
- ● Soil pH test kit (to confirm ideal conditions)
- ● Plant stakes or labels (if organizing multiple varieties)
Step-by-Step instructions for planting and caring for lily of the valley
Here's how to grow this classic fragrant perennial—thriving in shade with minimal fuss.
🌱 Step 1: Choose the Right Location and Prepare the Soil
Lily of the valley loves partial to full shade and moist, well-draining soil. Pick a spot that gets morning sun and afternoon shade—too much direct sun scorches the leaves. Test your soil by squeezing a handful; it should hold moisture but not feel soggy. If your soil drains poorly, mix in 2-3 inches of compost to improve texture and fertility.
This plant spreads slowly, so give it space to grow—each plant needs about 18-24 inches of diameter. Avoid planting where it will compete with aggressive roots like trees or shrubs. I like to mark the area with a garden hose to outline where the soil will be amended before digging.
🪴 Step 2: Plant the Crowns Correctly in Early Spring or Fall
Lily of the valley grows from bareroot crowns (not seeds), so handle them gently. Plant in early spring (just as new growth appears) or fall (4-6 weeks before the first frost). Dig a hole 1-2 inches deeper than the crown sits naturally—this ensures the roots have room to establish without drying out.
Space the crowns 12-18 inches apart in rows 2 feet apart for a natural, fragrant border. Place each crown so the top of the roots sits just below the soil surface—burying too deep suffocates the plant, while planting too shallow exposes it to drying winds. Water lightly after planting to settle the soil.
💧 Step 3: Water Consistently and Mulch to Retain Moisture
Keep the soil evenly moist but never waterlogged—lily of the valley hates dry spells. Water deeply once a week (or more often in hot weather) until the top 2 inches of soil feel damp. You’ll know it’s time to water when the leaves start to wilt slightly or the soil pulls away from the edges of the planting hole.
Apply a 2-3 inch layer of mulch (like shredded bark or leaves) around the plants to lock in moisture and suppress weeds. Avoid piling mulch directly against the stems—leave a 1-inch gap to prevent rot. This mulch layer also keeps roots cool in summer, which is critical for shade-loving perennials.
✂️ Step 4: Divide and Maintain for Long-Term Growth
Every 3-4 years, lily of the valley benefits from division in early spring or fall. Dig up the clumps, separate them into 3-5 inch sections with at least one growth point per piece, and replant immediately. This rejuvenates the plant and prevents overcrowding, which weakens blooms.
Deadhead spent flowers to encourage more blooms, but leave the foliage until it yellows naturally—this feeds the roots for next year’s growth. Fertilize lightly in early spring with a balanced 10-10-10 formula (½ cup per 10 square feet) to support flowering without overstimulating leafy growth.
☀️ Step 5: Protect and Enjoy the Fragrance
Watch for slugs and snails—they adore lily of the valley. Set out beer traps (a shallow dish of beer) or use copper barriers around the plants to deter them. The fragrance is strongest in early spring, so plant near patios or windows where you can enjoy the sweet scent.
With proper care, your lily of the valley will multiply over time, creating a lush, fragrant carpet. The key is consistent moisture and shade—once established, it’s one of the most low-maintenance perennials you can grow. Just avoid moving it once planted; these roots hate disturbance.
Tips & tricks for perfect lily of the valley planting
A few simple tricks will help your lily of the valley thrive and spread beautifully over time.
Soil Test Tip: Before planting, do a quick soil moisture test—press your finger about 2 inches into the soil. If it feels dry, your lily of the valley will struggle. The 2-3 inches of compost mentioned in Step 1 is especially important if your soil drains too quickly or stays soggy. I like to mix in a handful of worm castings too for extra nutrients.
Planting Depth Secret: When you're planting those bareroot crowns in Step 2, here's what nobody tells you—the crown should sit just below the soil line, but not buried too deep. I use a ruler to measure the depth of the crown's base and make sure it's only 1-2 inches below the surface. This prevents rot while allowing roots to establish properly.
Watering Hack: The once-a-week deep watering in Step 3 works perfectly, but I've found a simple trick to check moisture levels: Gently tug on a leaf. If it feels slightly limp, that's your cue to water. This method is more reliable than just checking the soil surface, especially during hot weather when evaporation happens quickly.
Mulch Strategy: That 2-3 inch mulch layer in Step 3 is your best friend for moisture retention, but don't let it pile up against the stems. I like to create a little donut shape around each plant, keeping a 1-inch gap. This prevents rot while still protecting the roots from temperature swings. In late winter, I rake back the mulch to check for any winter damage before adding fresh mulch.
Pro Tips for Lily Of Valley Flower
- A few simple tricks will help your lily of the valley thrive and spread beautifully over time.
- Soil Test Tip: Before planting, do a quick soil moisture test—press your finger about 2 inches into the soil. If it f...
- Planting Depth Secret: When you're planting those bareroot crowns in Step 2, here's what nobody tells you—the crown s...
Frequently asked questions
Got questions about growing and caring for lily of the valley? You’re not alone—this delicate, fragrant flower has a few quirks! Here are some of the most common queries from gardeners just like you.
When is the best time to plant lily of the valley?
Plant Convallaria majalis in early fall (4–6 weeks before the first frost) or early spring (as soon as the soil is workable). This gives the roots time to establish before extreme temperatures. Avoid planting in summer heat, as the soil may dry out too quickly.
How long does it take for lily of the valley to bloom?
With patience, you’ll see blooms in 2–3 years from seed (longer!) or 1–2 years from division. Established plants reward you with fragrant clusters in late spring (April–June, depending on your climate).
Why isn’t my lily of the valley blooming?
Common culprits include too much sun (they prefer shade), dry soil (keep it consistently moist), or overcrowding. Divide clumps every 3–4 years to refresh growth. Also, ensure they get well-draining soil—waterlogged roots can stunt blooms.
Are lily of the valley flowers toxic to pets?
Yes! All parts of the plant—flowers, leaves, and berries—contain cardiac glycosides, which can cause vomiting, diarrhea, or worse if ingested. Keep them away from dogs, cats, and small children. Wear gloves when handling to avoid skin irritation.
What can I plant near lily of the valley for a shade garden?
Pair it with hostas, ferns, heucheras, or bleeding heart for a lush, low-light combo. Avoid competitive plants like rhubarb or mint, which can spread aggressively. Mulch with organic matter (like shredded leaves) to retain moisture.
Wrapping up and next steps
The lily of the valley is a fragrant, low-maintenance gem that rewards patience with delicate blooms and a sweet scent.
Whether you’re a seasoned gardener or a beginner, its love for shade and moisture makes it a perfect addition to your garden—just remember to prioritize consistent care and proper propagation for the best results.
Ready to dive in? Start by gathering your supplies, finding the perfect spot in your garden, and planting your first clumps this spring or fall. With a little love, your lily of the valley will soon become a showstopper—and a favorite spot for pollinators! 🌿✨