Flowers
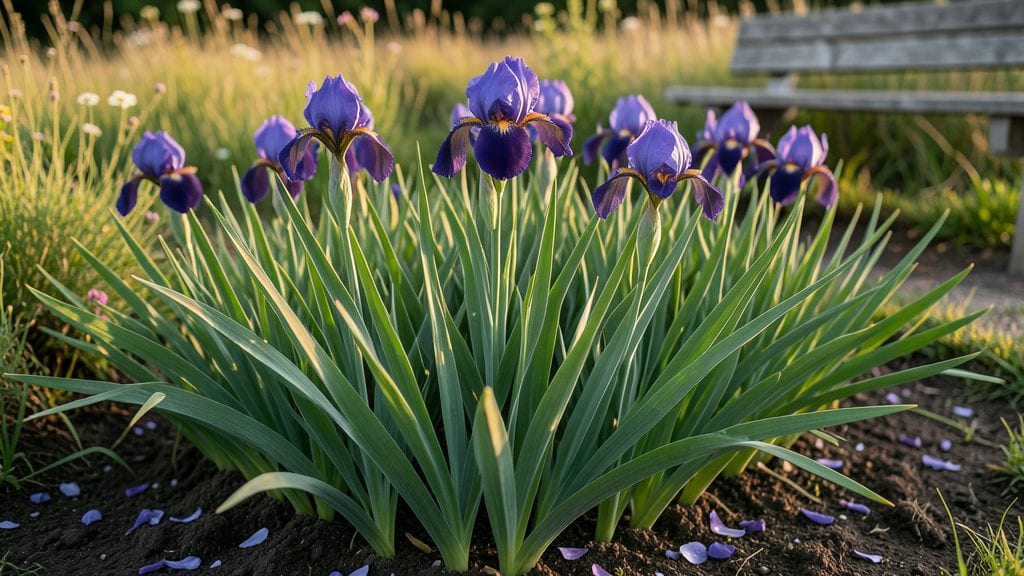
Your Pacific Northwest flower bed deserves irises that thrive through frost and rain—those striking, sword-like foliage and bold blooms that become the star of spring and summer. 🌿 I’ve designed beds where irises anchor the space with their deep purple, blue, or yellow hues, while their long-lasting blooms outshine even the wettest season.
The key? Pairing them with the right companions and giving them room to spread.
Start with 3-5 iris rhizomes per square yard, spaced 12-18 inches apart to prevent overcrowding and allow air circulation—critical for disease prevention. Their upright growth habit makes them perfect for the back of borders, where they’ll stand tall against ferns, hostas, or ornamental grasses.
In the PNW’s mild winters, they’ll reward you with early blooms that brighten gray days.
For a showstopping display, mix irises with dwarf coneflowers for vertical contrast or salvia for late-season color. Their deep roots tolerate wet soil better than many perennials, making them a low-maintenance choice. By late summer, their foliage turns golden, adding warmth to the garden before fading into dormancy.
This design works in sun or partial shade, from cottage gardens to modern landscapes. The secret? Let them naturalize over time—the more they spread, the more dramatic the effect. Ready to make irises the centerpiece of your bed?
📚 In This Guide
- What you need
- Instructions
- Tips and common mistakes
- Wrapping up and next steps
What you need
- ● Iris rhizomes: Choose Pacific Coast iris varieties (e.g., Iris tenax or Iris douglasiana) for frost resistance. Buy 5–10 rhizomes per square foot, depending on desired density.
- ● Well-draining soil: Mix 1 part native soil with 1 part compost and 1 part coarse sand or perlite (critical for preventing rot in wet climates).
- ● Organic fertilizer: A balanced 10-10-10 or low-phosphorus (5-10-10) blend to avoid leafy growth over blooms.
- ● Mulch: 2–3 inches of pine bark or straw to insulate roots in winter and retain moisture.
- ● Garden trowel or spade for digging.
- ● Pruning shears (sterilized with rubbing alcohol) for trimming dead foliage.
- ○ Garden gloves (optional but recommended—iris rhizomes have sharp edges!).
- ● Watering can or hose with a gentle spray nozzle (irises hate soggy roots!).
- ● Measuring tape or ruler for spacing rhizomes 12–18 inches apart.
- ● A sunny spot with 6+ hours of direct sunlight daily (PNW shade won’t cut it!).
- ● Good drainage—avoid low-lying areas where water pools.
- ● Patience! Established clumps take 2–3 years to reach full bloom.
How to plant and maintain irises in your Pacific Northwest flower bed
Here’s the simple, foolproof method I’ve used for years to grow vibrant, frost-tolerant irises that thrive in PNW’s cool climate.
🌱 Step 1: Choose the Right Iris Varieties for Your Climate
The Pacific Northwest’s mild winters and damp springs make bearded irises and Siberian irises the best choices—they handle frost beautifully. Avoid tropical varieties that need heat. I always pick blue flag irises for their bold color and hardiness; they bloom reliably even after our rainy winters.
Check your specific zone (most of the PNW falls in 6-8) and select varieties that match. You’ll see the difference in the first year—plants that thrive in your conditions will send up strong, healthy foliage by early spring. If you’re unsure, local nurseries often carry PNW-tested selections.
🪴 Step 2: Prepare the Planting Site for Drainage and Sun
Irises hate soggy roots, so pick a spot with well-draining soil and at least 6 hours of sun daily. The PNW’s clay-heavy soil needs amending—mix in 2-3 inches of compost or sand to improve drainage. I dig a hole twice as wide as the iris rhizome but only 1 inch deep—they need to sit half-buried with the top exposed to sunlight.
Space rhizomes 12-18 inches apart to give them room to spread. If your soil is very wet, consider planting on a slight mound or in raised beds. You’ll know the drainage is right when water runs through the soil within 10-15 minutes after watering.
☀️ Step 3: Plant Rhizomes Correctly for Strong Growth
Handle rhizomes gently—they bruise easily. Position each one so the fan of roots points downward and the top is visible. Planting them too deep or covering the top leads to weak stems and fewer blooms. I like to fan out the roots before placing them in the hole so they settle naturally.
Press the soil lightly around the rhizome but don’t pack it down. Water deeply right after planting to help roots establish. You’ll see the first signs of success when new leaves emerge in early spring—they should be straight and upright, not flopping or yellowing.
💧 Step 4: Water and Fertilize for Long-Term Health
Irises are drought-tolerant once established, but newly planted ones need consistent moisture for the first 2-3 months. Water 1 inch per week, more if your summer is dry. I use a soaker hose to avoid wetting the leaves, which reduces fungal diseases like iris borer—a common PNW pest.
In early spring, add a balanced fertilizer (10-10-10) around the base, keeping it 6 inches away from the rhizome. Too much fertilizer leads to leafy growth but fewer blooms. You’ll know you’re doing it right when your irises produce 2-3 strong flower stalks per rhizome by late spring.
✂️ Step 5: Prune and Divide for Continuous Blooms
After blooming, cut back dead flower stalks but leave the leaves until they yellow naturally in late summer. This ensures the rhizome stores enough energy for next year’s blooms. I mark the spots where I’ll divide clumps in fall—when rhizomes produce 3-4 new fans, it’s time to dig and separate them.
Divide in early fall to give new plants time to establish before winter. You’ll know it’s time when your iris bed looks crowded or blooms decline. Replant the strongest rhizomes immediately, and you’ll have new blooms in just 1-2 years—a great way to expand your garden without cost.
Tips & tricks for perfect Pacific Northwest irises
These little tricks will help you transform your flower bed into a frost-resistant PNW paradise that keeps blooming year after year.
Variety Matters: In Step 1, when selecting your irises, look for blue flag irises specifically—they're the toughest in our damp climate. I've found that these varieties handle our rainy winters better than others, and their vibrant colors pop against the PNW's muted greens. For maximum hardiness, choose rhizomes that are firm and plump rather than shriveled or soft.
Drainage is Everything: The 10-15 minute drainage test in Step 2 is crucial—if water pools after that time, you need to amend your soil further. I've had to add extra sand to heavy clay areas to prevent root rot. A simple trick is to create a slight mound when planting in wetter areas, which helps water run off faster. This small adjustment can mean the difference between thriving irises and struggling ones.
Planting Depth Secret: In Step 3, remember that the top of the rhizome should remain visible—this is often where beginners go wrong. I've seen many gardeners bury them completely, which leads to weak stems and fewer blooms. Think of it like planting potatoes: the "eyes" (top) need to stay above soil level to grow properly. This simple positioning will give you stronger plants.
Fertilizer Timing: When you apply that 10-10-10 fertilizer in Step 4, do it right after you see the first signs of new growth in spring. I've learned that fertilizing too early can encourage leafy growth at the expense of blooms. The key is to give them just enough to support those 2-3 strong flower stalks per rhizome we want to see by late spring.
Pro Tips for Iris In Flower Bed
- These little tricks will help you transform your flower bed into a frost-resistant PNW paradise that keeps blooming year after year.
- Variety Matters: In Step 1, when selecting your irises, look for blue flag irises specifically—they're the toughest in our damp climate.
- Drainage is Everything: The 10-15 minute drainage test in Step 2 is crucial—if water pools after that time, you need to amend your soil further.
Frequently asked questions
Got questions about adding irises to your Pacific Northwest flower bed? Here are some of the most common ones—and their answers!
When is the best time to plant irises in the PNW?
The ideal time to plant irises in the Pacific Northwest is late summer to early fall (August–September). This gives roots time to establish before winter. For spring planting, aim for February–March—just as new growth begins. Avoid planting in freezing temps or during extreme heat.
How much water do irises need in the rainy PNW?
Irises are drought-tolerant once established, but they still need moderate moisture—especially in the first year. Water deeply 1–2 times per week during dry spells, but avoid soggy soil. The PNW’s natural rain often suffices after the first growing season! Mulch lightly to retain moisture without suffocating roots.
Are irises prone to pests or diseases in the Pacific Northwest?
Irises are generally hardy, but watch for iris borers (larvae that tunnel into rhizomes) and leaf spot fungus in damp conditions. To prevent issues:
- Remove and destroy infected leaves immediately.
- Space plants 12–24 inches apart for airflow.
- Apply neem oil or copper fungicide if needed.
Most PNW gardens stay borer-free with proper care!
What colors of irises thrive best in the Pacific Northwest’s climate?
The PNW’s cool, moist climate favors blue, purple, and white irises (like Siberian or Louisiana varieties), which handle shade and humidity well. For sun-drenched spots, bearded irises (yellow, pink, or deep purple) shine. Experiment with tall bearded or dwarf varieties for height diversity!
Can I mix irises with other PNW-friendly flowers?
Pair irises with:
- Hosta (for shade)
- Ferns (moisture-loving companions)
- Salvia or catmint (drought-tolerant pollinator magnets)
- Rhododendrons (acid-loving neighbors)
Avoid competitive plants like daylilies, which can crowd irises. Aim for a layered look with tall irises in back and shorter perennials in front.
Wrapping up and next steps
Adding iris flowers to your Pacific Northwest flower bed is a fantastic way to enjoy year-round beauty with minimal fuss! Their frost-resistant nature and vibrant colors make them a standout choice, whether you're a seasoned gardener or just starting out. 🌸
Now that you’re equipped with the right knowledge, take the next step—visit your local nursery, grab some iris rhizomes, and start planting! Your garden will thank you with bursts of color that brighten every season.