Size
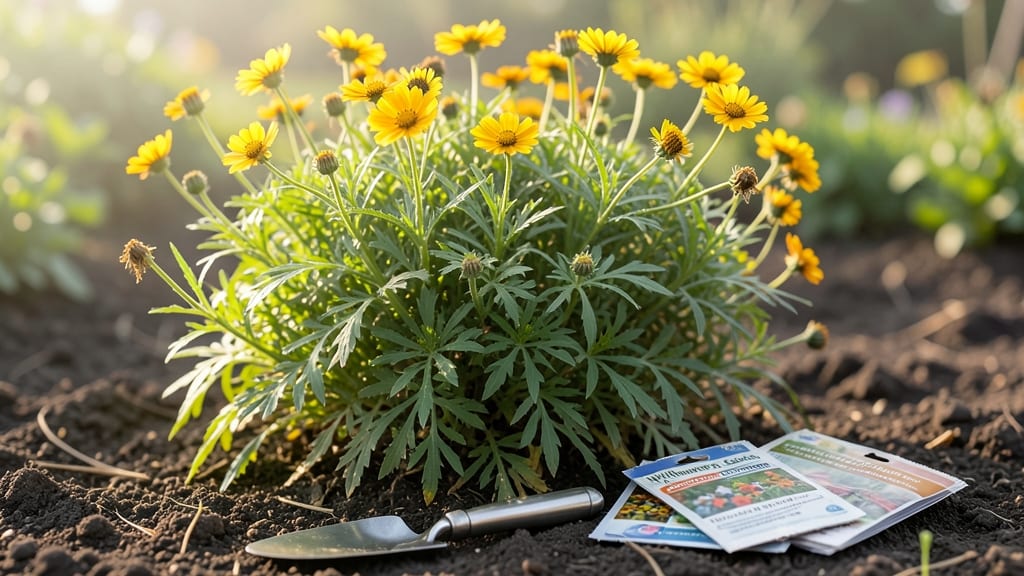
Growing a wildflower patch transforms bare ground into a buzzing, colorful ecosystem—and it’s easier than you think. 🌸 Last spring, I turned a patch of overgrown grass into a thriving meadow that now hums with bees and blooms from April through October.
The key? Choosing the right seeds, prepping the soil just once, and letting nature do the rest.
You’ll need a sunny spot (at least 6 hours of light daily), some basic tools, and either wildflower seeds, plugs, or transplants—native varieties are best for pollinators. The soil doesn’t need to be perfect, just loosened and free of weeds.
Once planted, water lightly for the first few weeks, then forget about it. That’s the beauty of wildflowers: they thrive on neglect once established.
By midsummer, you’ll have a patch bursting with color—purples, yellows, whites—that changes with the seasons. Butterflies will visit, birds will nest nearby, and you’ll spend less time maintaining than you would with a manicured lawn. The best part? Every year, it gets even more vibrant with minimal effort.
Works in backyards, roadside ditches, or even container gardens. Let’s get those seeds in the ground and watch the magic happen!
📚 In This Guide
- What you need
- Instructions
- Tips and common mistakes
- Wrapping up and next steps
What you need
- ● Wildflower seeds: Choose a native mix (1–2 lbs per 100 sq. ft.). Look for low-maintenance varieties like black-eyed Susans, coneflowers, or milkweed.
- ● Soil: Loose, well-draining topsoil (1–2 inches deep) or compost-amended native soil.
- ● Water source: A hose with a gentle spray nozzle or a watering can.
- ● Sunlight: A full-sun spot (6+ hours of light daily) or partial shade for shade-tolerant wildflowers.
- ● Space: A patch size of at least 3x3 feet (smaller for containers).
- ● Garden rake: For leveling soil (lightweight, 12–18 inches wide).
- ○ Garden hoe or trowel: For breaking up soil clumps (optional for small patches).
- ○ Mulch (straw or wood chips): 1–2 inches to retain moisture (optional but highly recommended in dry climates).
- ● Birdseed or pebbles: For lightweight ground cover (if mulch isn’t available).
- ● Gloves: Heavy-duty gardening gloves to protect your hands.
- ● 🌡️ Test your soil: If unsure, grab a pH test kit ($5–$10) to ensure it’s slightly acidic to neutral (6.0–7.0)—most wildflowers thrive here.
- ● ✨ Skip the fertilizer: Wildflowers hate rich soil—stick to native soil or compost only.
- ● 🎯 Timing matters: Plant in early spring or fall for best germination.
Step-by-Step instructions for creating a thriving wildflower patch
Here's how to transform any sunny spot into a vibrant, low-maintenance wildflower haven that blooms all season long.
🌱 Step 1: Choose Your Site and Clear the Area
Pick a location with at least 6 hours of direct sunlight daily—wildflowers thrive where nothing else wants to grow. Clear the area of weeds and debris using a hoe or rake, working down to bare soil. I like to remove any grass first because it competes aggressively with wildflower seeds.
Loosen the top 4-6 inches of soil with a garden fork or tiller to create a seedbed. Break up any large clumps but avoid overworking the soil—wildflowers prefer loose, natural conditions. If your soil is heavy clay, mix in 2-3 inches of compost to improve drainage without altering the soil's natural structure.
🪴 Step 2: Select and Prepare Your Wildflower Mix
Choose a wildflower seed mix that matches your climate and sunlight conditions—annuals for quick color, perennials for long-term blooms, or a blend for continuous seasonal interest. Scatter the seeds evenly across the prepared area, following the packet's recommended rate (typically 1-2 pounds per 1,000 square feet).
Lightly rake the seeds into the soil with a fine-toothed rake, covering them with no more than ¼ inch of soil. Press the seeds gently into the surface to ensure good soil contact. If you're planting in dry conditions, lightly mist the area with water to help settle the seeds without disturbing them.
☀️ Step 3: Water and Maintain Until Germination
Keep the soil consistently moist but not soggy for the first 2-3 weeks—this is critical for seed germination. Water lightly each morning, enough to moisten the top ½ inch of soil. You'll see the first tiny green sprouts appear in 7-14 days, depending on your climate and the seed mix.
Once germination begins, reduce watering to once every 2-3 days, allowing the soil to dry slightly between waterings. Wildflowers are drought-tolerant once established, but young seedlings need consistent moisture. Avoid walking on the patch until seedlings are at least 2 inches tall to prevent damage.
✂️ Step 4: Let Nature Take Over (With Minimal Help)
After the first flush of blooms, let spent flowers go to seed—this ensures next year's display. You can deadhead a few flowers if you prefer, but wildflowers rely on self-seeding for long-term beauty. In late fall, cut back the entire patch to 2-3 inches above the ground to remove dead foliage and encourage fresh growth in spring.
Add a 1-inch layer of mulch (like straw or leaves) in early spring to suppress weeds without smothering new growth. Wildflowers don’t need fertilizer—too much nitrogen produces leafy growth at the expense of blooms. Instead, focus on occasional light watering during dry spells to keep the patch looking its best.
🌿 Step 5: Enjoy Year-Round Beauty With Zero Fuss
Once established, your wildflower patch will require almost no maintenance. Watch for butterflies, bees, and birds that will flock to the nectar-rich blooms. If weeds start to encroach, pull them by hand when they're small—wildflowers can't compete with established weeds.
Every few years, you may need to thin out overcrowded areas by removing some plants and adding fresh soil. This keeps the patch vibrant and prevents competition for resources. Step back and admire your hard work—you've just created a pollinator paradise that requires less effort than a manicured lawn!
Tips & tricks for perfect wildflower patch creation
Here's what nobody tells you—these pro tips will help your wildflower patch thrive with minimal effort.
The Sunlight Secret: The 6 hours of direct sunlight mentioned in Step 1 is non-negotiable for most wildflower mixes. If your location gets less, choose shade-tolerant varieties like black-eyed Susans or asters. I've seen patches fail spectacularly when planted in partial shade—trust me, the blooms will be sparse and weak.
Soil Prep Game-Changer: When loosening that 4-6 inches of soil in Step 1, focus on breaking up compaction rather than creating a perfectly tilled bed. Wildflowers thrive in nature's imperfect conditions. For clay soil, mix in that 2-3 inches of compost and let it sit uncovered for a day or two—this helps break down clumps naturally without overworking the earth.
Seed Scattering Strategy: In Step 2, resist the urge to cover seeds too deeply—they need light to germinate! That ¼-inch maximum is crucial. I like to use a simple trick: sprinkle seeds, then lightly drag a slotted spoon across the surface to press them in without burying them. For larger patches, a broadcast spreader works beautifully but follow that 1-2 pounds per 1,000 square feet guideline precisely.
Watering Wisdom: Those first 2-3 weeks of consistent moisture are make-or-break. I set up a gentle drip irrigation system on a timer for my patches—it delivers that perfect ½-inch moisture without overwatering. Once germination begins, let the soil dry slightly between waterings to prevent fungal issues. The 2-inch height rule before walking is golden: those tiny seedlings are fragile but resilient once established.
Pro Tips for Grow A Wildflower Patch
- Here's what nobody tells you—these pro tips will help your wildflower patch thrive with minimal effort.
- The Sunlight Secret: The 6 hours of direct sunlight mentioned in Step 1 is non-negotiable for most wildflower mixes. ...
- Soil Prep Game-Changer: When loosening that 4-6 inches of soil in Step 1, focus on breaking up compaction rather than...
Frequently asked questions
Got questions about growing a wildflower patch?
You’re not alone! Here are answers to the most common concerns—from timing to troubleshooting—to help your dream patch thrive with minimal effort.
When is the best time to plant wildflower seeds?
Most wildflower seeds germinate best in early spring or fall. Spring planting (March–May) gives flowers a full season to establish, while fall (September–November) avoids summer heat stress. For perennial varieties, fall is ideal—they’ll root before winter and bloom earlier next year. Pro tip: Check your seed packet for specific timing!
Do wildflowers need much water once established?
Once rooted, wildflowers are drought-tolerant and thrive on rainwater alone. Water deeply once a week for the first month after planting, then taper off. Overwatering can drown seeds or attract pests. Bonus: Let nature do the work—mulch lightly to retain moisture without smothering sprouts.
Will weeds take over my wildflower patch?
Weeds are the biggest challenge, but prevention is key! Start with a bare soil base (no grass) and use cardboard or landscape fabric as a barrier if needed. Hand-pull weeds early, and let wildflowers outcompete them once established. Patience pays off!
Can I grow wildflowers in containers or small spaces?
Use shallow trays, window boxes, or even old boots for compact patches. Choose annual varieties like cosmos or zinnias for quick color, or dwarf perennials like black-eyed Susans. Just ensure good drainage—wildflowers hate soggy roots.
My wildflowers aren’t blooming—what went wrong?
Common culprits: too much shade, poor soil, or over-fertilizing (wildflowers prefer lean soil!). Check sunlight needs (most need 6+ hours/day) and avoid synthetic fertilizers. Deadhead spent blooms to encourage reblooming, and give them time—some perennials take 2–3 years to peak.
Wrapping up and next steps
Growing a wildflower patch is simpler—and more rewarding—than you might think! With just a little space, the right seeds, and minimal upkeep, you’ll soon have a vibrant, low-maintenance haven for pollinators and beauty.
Start small, experiment with native varieties, and let nature do the rest—your garden (and local wildlife) will thank you!
Ready to dive in? Pick a sunny spot this weekend, grab your seeds, and watch your patch bloom into a thriving ecosystem. 🌸🐝