Pruning
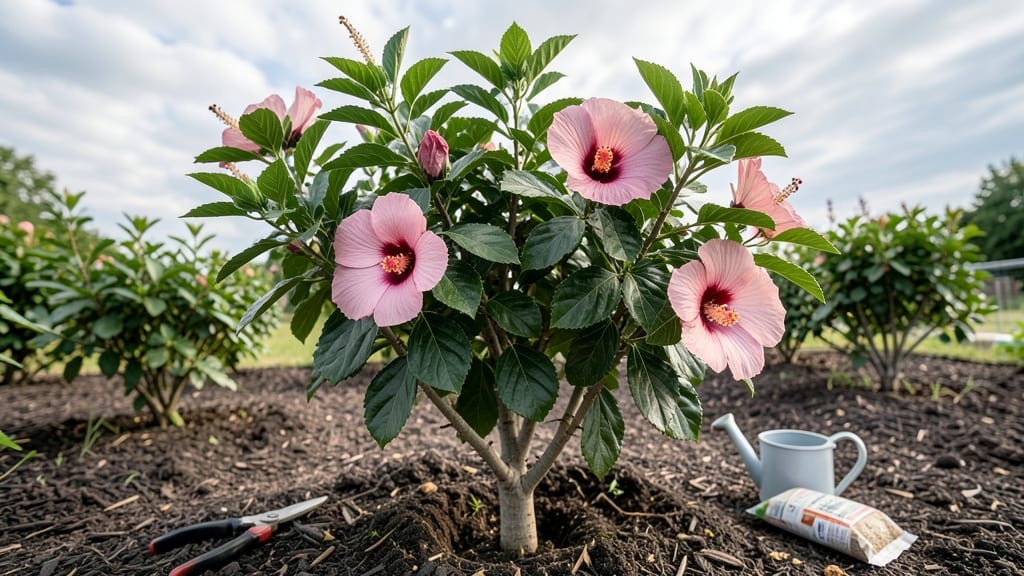
Growing a hibiscus flowering tree in the Pacific Northwest isn’t just possible—it’s rewarding when you understand its quirks. I’ve watched mine throw out bold blooms even through our damp summers, and the secret lies in mimicking its tropical roots while working with our cooler climate.
The key isn’t coddling it like a greenhouse plant; it’s giving it the right balance of shelter, sunlight, and moisture to thrive where it might seem out of place.
Start with the basics: a well-draining soil mix that mimics its native habitat, 6+ hours of morning sun to prevent fungal issues, and regular watering that keeps roots moist but never soggy.
My tree’s first winter nearly killed it—until I wrapped the trunk in burlap and moved it under an overhang. The difference in spring? A bush bursting with blooms instead of a sad, brown skeleton. Tropical hibiscus can handle our climate if you treat it like the tough survivor it is.
You’ll know you’re doing it right when those 5-inch blooms start appearing by midsummer, and the tree fills out with glossy, deep-green leaves that repel pests naturally. The real magic happens in late spring when you prune back the leggy growth—this forces fresh, bushier growth and more flowers.
Even in Zone 8, with the right care, your hibiscus can outlast the season and reward you with months of vibrant color.
Here’s the twist: the same techniques work for container-grown hibiscus too. Whether you’re planting in the ground or a 15-gallon pot, the principles stay the same—just adjust watering slightly for smaller roots. The goal isn’t perfection; it’s resilience. Let’s get yours thriving against the odds.
📚 In This Guide
- What you need
- Instructions
- Tips and common mistakes
- Wrapping up and next steps
What you need
- ● Pruning shears: Bypass pruners (sharp, 6-8" blades) – 1 pair (for clean cuts).
- ● Loppers: Bypass or anvil type (10-12" blades) – 1 pair (for thicker branches).
- ● Hand pruners: Small, ergonomic (for delicate trimming) – 1 pair.
- ● Disinfectant: 70% isopropyl alcohol or diluted bleach solution (1:9 ratio) – small bottle.
- ● Garden gloves: Cut-resistant, breathable (to protect hands) – 1 pair.
- ● Rubbing alcohol wipes: (for sterilizing tools between cuts) – pack of 50.
- ● Pruning sealant: (for large cuts > ½” diameter) – small tube.
- ● Sharpener: (for maintaining tool edges) – 1.
- ● Ladder: (if tree exceeds 6 ft) – sturdy, extendable.
- ● Trash bags: (for collecting debris) – 2-3.
- ● Notebook & pen: (to track pruning dates/notes) – 1.
Step-by-step instructions for cultivating a hardy hibiscus in the Pacific Northwest
Here’s the method I’ve refined over years of growing hibiscus where summers are cool and winters are wet.
Select the Right Variety for Your Climate
Not all hibiscus thrive in the Pacific Northwest’s mild summers and damp winters. Choose tropical varieties like Hibiscus rosa-sinensis ‘Dwarf Red’ or Hibiscus moscheutos (hardy hibiscus) for best resilience. These tolerate temperatures down to 20°F and bloom reliably even in shorter summers. Avoid delicate tropical hibiscus that require 80°F+ to flower—those will struggle here.
Start with a 2-3 gallon container-grown plant from a nursery, not a seedling. Mature plants have established root systems that handle transplant shock better in our unpredictable weather. Look for sturdy stems and vibrant leaves—this signals a healthy, disease-resistant specimen. If buying online, order early to allow time for proper acclimation before planting.
Prepare the Planting Site for Northwest Conditions
Hibiscus needs full sun (6+ hours daily) but also protection from harsh afternoon winds common in coastal areas. Choose a spot with morning sun and afternoon shade if summers are particularly hot, or a sheltered microclimate near a fence or building. Amend the soil with 3-4 inches of compost and a 5-10-10 fertilizer mixed into the top 12 inches of soil to improve drainage and nutrient availability.
Avoid heavy clay soils—hibiscus roots rot easily in waterlogged conditions. If your soil drains poorly, raise the planting area by 6-8 inches with a mound of amended soil. Test drainage by digging a hole, filling it with water, and checking if it drains within 30 minutes. If not, amend further with perlite or coarse sand until it does.
Plant and Stake for Wind Protection
Dig a hole twice as wide as the root ball but no deeper. Gently remove the plant from its container and loosen any circling roots with your fingers. Place it in the hole so the top of the root ball sits 1 inch above soil level—this prevents water from pooling at the base and causing rot. Backfill with native soil mixed with compost, tamping lightly to eliminate air pockets.
Stake the hibiscus immediately, even if it’s not windy. Pacific Northwest gusts can topple young plants, and hibiscus has shallow roots that struggle to anchor in loose soil. Use 2-3 stakes positioned in a triangle around the plant and secure with soft plant ties (not wire, which cuts into bark). Water deeply after planting to settle the soil and encourage root spread.
Water and Fertilize for Consistent Blooms
Water deeply 2-3 times per week during the first growing season, ensuring moisture reaches 12 inches down. Hibiscus roots need consistent hydration but hate soggy soil. Check moisture by inserting your finger 2 inches into the soil—if it’s dry, water; if damp, wait. In winter, reduce watering to once every 2-3 weeks unless the ground is frozen.
Feed with a balanced liquid fertilizer (10-10-10) every 4-6 weeks from spring through summer. When buds form, switch to a low-nitrogen, high-phosphorus fertilizer (5-10-10) to encourage flowering. In fall, apply a slow-release fertilizer to build reserves for next year’s growth. Avoid high-nitrogen fertilizers—they promote leafy growth at the expense of blooms.
Prune and Protect for Year-Round Health
Prune in late winter or early spring before new growth begins. Remove dead, diseased, or crossing branches first, then cut back remaining stems by one-third to encourage bushier growth. Use clean, sharp pruners and make cuts just above a leaf node or outward-facing bud. Avoid heavy pruning in fall—it stimulates tender growth that won’t survive winter.
Mulch with 3-4 inches of wood chips or shredded bark around the base, keeping it 6 inches away from the trunk to prevent rot. This insulates roots in winter and retains moisture in summer. In coastal areas, protect young plants from salt spray by rinsing leaves monthly with fresh water. If frost threatens, cover the plant with burlap or frost cloth—hibiscus can tolerate brief dips to 20°F, but prolonged cold will damage leaves.
Tips & tricks for perfect hibiscus flowering tree cultivation
Mastering hibiscus growth in the Pacific Northwest takes more than just planting—it's about understanding the subtle cues your plant gives you. Here are the refined techniques I've learned from years of trial and error with these resilient beauties.
Variety Selection: When choosing between Hibiscus rosa-sinensis and Hibiscus moscheutos, consider your specific microclimate. The Dwarf Red variety handles our cooler summers beautifully, while moscheutos thrives in wetter coastal areas. I always check the nursery's growing zone map—they often mark which varieties perform best in our region. The key difference is moscheutos's natural resistance to fungal diseases common in our damp winters.
Soil Preparation: The 30-minute drainage test is non-negotiable—hibiscus roots will rot if water pools around them. If your soil fails this test, create a raised bed with a mix of 60% native soil, 30% compost, and 10% perlite. I've seen plants thrive in amended raised beds when they struggled in the original ground. For coastal gardeners, add a handful of coarse sand to improve drainage further—this mimics the natural sandy soils hibiscus grows in tropical wetlands.
Staking Strategy: Don't wait for wind to test your hibiscus's stability—stake immediately using a triangular support system. I use bamboo stakes because they're lightweight yet strong, and they blend naturally into the landscape. The secret is positioning them at a 45-degree angle, buried about 6 inches deep, which provides maximum support without restricting root growth. This method has prevented more toppled plants than any other single technique.
Fertilization Timing: The switch to low-nitrogen, high-phosphorus fertilizer when buds form is critical—this is when hibiscus directs energy toward blooms rather than foliage. I always apply this fertilizer in early morning when temperatures are cool, as it reduces the risk of leaf burn. For organic gardeners, bone meal makes an excellent phosphorus source and won't leach out as quickly as synthetic fertilizers in our rainy climate.
Pro Tips for Hibiscus Flowering Tree
- Mastering hibiscus growth in the Pacific Northwest takes more than just planting—it's about understanding the subtle ...
- Variety Selection: When choosing between Hibiscus rosa-sinensis and Hibiscus moscheutos, consider your specific micro...
- Soil Preparation: The 30-minute drainage test is non-negotiable—hibiscus roots will rot if water pools around them. I...
Frequently asked questions
Got questions about growing a hibiscus flowering tree in the Pacific Northwest? You’re not alone!
Here are answers to the most common concerns—from timing to troubleshooting—so you can nurture a thriving tropical beauty even in cooler climates.
Can hibiscus trees survive winter in the Pacific Northwest?
Most hibiscus varieties (like Hibiscus syriacus) are hardy down to USDA Zone 5, but younger plants or tropical types (e.g., Hibiscus rosa-sinensis) need winter protection. Mulch heavily, wrap the trunk, or grow them in containers to move indoors. Pro tip: Prune back dead growth in early spring—new shoots are hardier!
How long does it take for a hibiscus tree to flower?
Patience is key! Established trees (3+ years old) typically bloom in late spring to fall, with peak blooms in summer. Younger plants may take 1–2 years to produce flowers. Boost flowering by fertilizing with low-nitrogen, high-phosphorus fertilizer (like 5-10-10) in early spring.
What’s the best way to prune a hibiscus tree for more flowers?
Prune in late winter or early spring before new growth starts. Cut back 1/3 of the plant to encourage bushier growth and more blooms. Remove dead, crossing, or overcrowded branches first. For tropical hibiscus, light pruning after flowering can extend the blooming season. Warning: Avoid heavy pruning in fall—it reduces winter hardiness.
Why aren’t my hibiscus leaves turning yellow, and how do I fix it?
Yellow leaves usually signal overwatering, nutrient deficiency, or pests. Check soil moisture—hibiscus hate soggy roots! Amend soil with compost and fertilize with iron or magnesium if leaves are pale. Inspect for aphids or spider mites (common in PNW humidity). Quick fix: Spray with neem oil or insecticidal soap.
Are there hibiscus alternatives that thrive in cooler climates?
Yes! If hibiscus proves too finicky, try these PNW-friendly flowering trees:
- Crapemyrtle (Lagerstroemia) – Drought-tolerant, vibrant blooms, Zone 6.
- Japanese tree lilac (Syringa reticulata) – Fragrant flowers, Zone 4.
- Oakleaf hydrangea – Loves shade, Zone 5, and blooms in summer.
Wrapping up and next steps
Growing a hibiscus flowering tree in the Pacific Northwest is absolutely doable with the right care and resilience! 🌿 From selecting the perfect variety to mastering pruning techniques, you’re now equipped to nurture a stunning, vibrant tree that thrives in your climate. Don’t wait—start your journey today!
Your next step? Pick a sunny spot, gather your tools, and give your hibiscus the love it deserves. Watch it bloom into a breathtaking centerpiece for your garden! 🌸