
Flowers
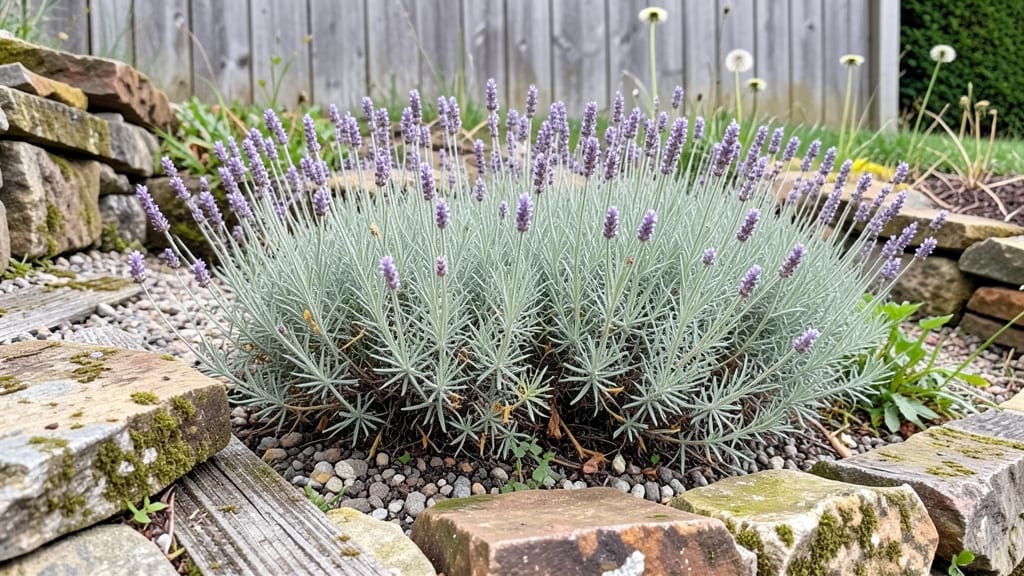
Transforming a steep hillside into showstopping flower beds turns what seems like a challenge into a dramatic landscape feature. 🌿 The key? Terraces that catch rainwater, stabilize the slope, and create perfect planting zones for cascading blooms.
My first attempt with a 20-foot slope nearly washed out until I added erosion-control fabric and native ground covers—now it’s the envy of the neighborhood.
Start with simple materials: gravel-filled gabion baskets for edges, retention fabric to prevent soil loss, and drought-resistant perennials like lavender or Russian sage. These plants thrive with minimal water and help hold the soil in place while adding color.
The best part? Terraces can be as wide as 3 feet or as narrow as 1 foot—adjust to your slope and plant sizes.
By summer, you’ll have a layered waterfall of blooms that softens the hillside’s harsh lines while keeping weeds at bay. The right plants—like creeping thyme or alpine strawberries—spread naturally, filling gaps without needing constant maintenance. Plus, the terraces create microclimates where sun-loving and shade-tolerant plants can coexist.
Works for any slope, from sun-drenched south-facing hills to shady north slopes. The secret is starting small—one terrace at a time—and letting the plants do the heavy lifting. Ready to turn that eyesore into a masterpiece?
📚 In This Guide
- What you need
- Instructions
- Tips and common mistakes
- Wrapping up and next steps
What you need
- ● Soil & Amendments: Topsoil (3–5 cubic yards, depending on hillside size)
- ● Compost or aged manure (1–2 bags per bed for nutrient-rich soil)
- ● Perlite or coarse sand (1–2 bags for drainage)
- ● Terraced Edging: Retaining wall blocks (e.g., TimberTrak or Allsteel) – Quantity depends on slope length (e.g., 20–50 blocks for a 10-foot section)
- ● Or, heavy-duty landscape fabric (1 roll) to line terraces and prevent erosion
- ● Drainage: Perforated drain pipe (½-inch diameter, cut to fit slope length)
- ● Gravel (5–10 pounds for pipe bedding)
- ● Plants: Native or drought-tolerant perennials/shrubs (e.g., lavender, coneflowers, or ornamental grasses)
- ● Ground cover plants (e.g., creeping thyme or ajuga) for erosion control
- ● Shovel & spade (for digging and leveling)
- ● Wheelbarrow (for hauling soil and materials)
- ● Level (to ensure terraces are even)
- ● String line & stakes (for marking terrace edges)
- ● Safety gear (gloves, knee pads, and sturdy boots)
- ○ Optional: Vibrating plate compactor (for compacting soil in larger terraces)
Step-by-step guide to designing terraced hillside flower beds
Transforming a steep slope into stunning terraces takes planning, but the payoff is worth every shovel stroke.
🪴 Step 1: Analyze the Slope and Plan Your Terraces
Start by walking the hillside and marking natural contours with a garden hose or spray paint. Terraces should follow these lines to prevent erosion and create stable planting areas. I typically space terraces 3-5 feet apart for manageable planting and maintenance. Measure the slope's steepness—gentler slopes can use wider terraces, while steeper ones need narrower, more frequent ones.
Sketch a rough layout on paper, noting where water will collect and where you'll need drainage solutions. This is where you decide between formal, geometric terraces or organic, flowing curves. I always include a 1-foot wide border at the bottom of each terrace to contain soil and plants. Use stakes and string to visualize the design before digging.
✂️ Step 2: Build Retaining Structures for Stability
For slopes under 30 degrees, you can use simple wooden or stone edging to contain soil. For steeper inclines, consider gabion baskets, stacked stones, or interlocking concrete blocks to create permanent retaining walls. I prefer natural stone or timber because they blend better with the landscape and allow roots to grow into the structure over time.
Dig a trench along your marked terrace line, about 12 inches wide and 6-8 inches deep. Place your retaining material at the back of the trench, ensuring each piece is level and tightly packed. For wood, use pressure-treated lumber and secure it with landscape screws. For stone, stack them tightly with mortar or landscape fabric between layers to prevent shifting.
🌱 Step 3: Layer Soil and Install Drainage
Before adding soil, lay a 4-inch layer of gravel or crushed stone at the bottom of each terrace to improve drainage. This prevents waterlogging, which can rot roots and suffocate plants. Cover the gravel with landscape fabric to keep it in place while allowing excess water to drain away.
Fill the terraces with a mix of topsoil and compost—I use a 60/40 ratio for most flowers. For slopes, I add 1-2 inches of organic mulch on top to retain moisture and suppress weeds. Avoid heavy clay soil, which compacts easily and doesn’t drain well. Test your soil’s drainage by digging a hole, filling it with water, and timing how long it takes to drain—under 30 minutes is ideal.
☀️ Step 4: Choose Plants for Hillside Conditions
Select drought-tolerant, erosion-resistant plants like lavender, sedum, or ornamental grasses for the front edges of terraces. These low-growing species help hold soil in place while adding texture. For mid-height, consider salvias, catmint, or Russian sage—they thrive in well-drained soil and attract pollinators. Taller flowers like black-eyed Susans or coneflowers can go in the back, where they won’t topple over.
Space plants closer together than you would in a flat bed—12-18 inches apart—to create a dense, erosion-proof mat. Group plants with similar water needs together to simplify care. Avoid heavy feeders like petunias or impatiens, which require frequent watering and struggle in terraced systems. Instead, opt for native perennials adapted to your climate.
💧 Step 5: Water and Maintain for Long-Term Success
Water newly planted terraces deeply 2-3 times per week for the first month to encourage root growth. Use a soaker hose or drip irrigation to deliver water slowly at the base of plants, avoiding the foliage to prevent disease. Mature terraces may only need watering once a week, depending on rainfall. Check soil moisture by sticking your finger 2 inches deep—if it’s dry, it’s time to water.
Mulch annually with 2-3 inches of wood chips or straw to retain moisture and suppress weeds. Prune spent flowers regularly to encourage continuous blooming and maintain the terrace’s shape. Every 2-3 years, refresh the soil with a 1-inch layer of compost to replenish nutrients. Keep an eye on erosion—if you notice soil slipping, reinforce edges with additional retaining material or plant more ground cover.
Tips & tricks for perfect hillside flower beds
Creating terraced flower beds on a hillside transforms challenging slopes into stunning, functional gardens—here's how to elevate your design from good to breathtaking.
Terrace Spacing Strategy: The 3-5 foot spacing between terraces isn't arbitrary—it balances visibility, maintenance, and plant health. For dramatic visual impact, consider slightly narrower terraces (2-3 feet apart) with taller plants like delphiniums or hollyhocks to create vertical layers. This approach works particularly well on steeper slopes where you want to emphasize height rather than width.
Drainage Design: That 4-inch gravel layer is your secret weapon against soggy roots. For even better drainage, add a perforated drainage pipe along the lowest edge of each terrace before filling with soil. This creates a secondary drainage path for heavy rains, especially critical if your hillside has clay soil that naturally retains moisture. Test your drainage by filling the trench with water and timing how quickly it drains—aim for under 15 minutes for optimal performance.
Plant Placement: The 12-18 inch spacing between plants creates a dense mat that prevents erosion, but strategic placement matters just as much. Position your tallest plants (like coneflowers) at the back of each terrace, mid-height plants (salvias) in the middle, and low-growing ground covers (like creeping thyme) at the front. This layered approach ensures nothing gets shaded out while maintaining the terraced structure. For extra stability, intersperse plants with fibrous root systems like Russian sage throughout the design.
Material Selection: When choosing retaining materials, consider both aesthetics and function. For a natural look, use locally sourced stone that blends with your landscape—it not only looks beautiful but also allows roots to grow into the structure over time. If using wood, opt for cedar or redwood which naturally resist rot. For steeper slopes, gabion baskets filled with river rock provide excellent drainage while adding a modern, industrial contrast to softer plantings.
Pro Tips for Flower Beds On Hillside
- Creating terraced flower beds on a hillside transforms challenging slopes into stunning, functional gardens—here's how to elevate your design from good to breathtaking.
- Terrace Spacing Strategy: The 3-5 foot spacing between terraces isn't arbitrary—it balances visibility, maintenance, and plant health.
- Drainage Design: That 4-inch gravel layer is your secret weapon against soggy roots.
Frequently asked questions
What’s the best way to stabilize a hillside before planting?
Use terracing with retaining walls (stone, wood, or concrete blocks) or erosion-control fabric to prevent soil slippage. For a natural look, layer logs or branches with soil and plants like creeping thyme or sedum. Start small—test slopes with a shovel first to check stability!
When is the ideal time to plant hillside flower beds?
Plant in early spring or fall when temperatures are mild and rain is frequent. Avoid summer heat, which stresses plants. If using perennials, divide them in spring for best root establishment. Cool-season flowers (like pansies) thrive in early planting, while sun-lovers (e.g., lavender) wait for warmer soil.
Are there affordable alternatives to expensive retaining walls?
Yes! Try DIY options like:
- Straw bales (temporary, biodegradable, and budget-friendly).
- Pallets or cinder blocks (stacked creatively for a rustic vibe).
- Native plants (e.g., ornamental grasses or ground covers) to anchor soil naturally.
How do I prevent erosion after planting?
Combine mulch (wood chips or straw) with deep-rooted plants (e.g., Russian sage or black-eyed Susans). Add erosion-control blankets (biodegradable fabric) on steep slopes. Water gently but regularly—avoid heavy downpours that wash away soil. A drip irrigation system works wonders!
Which flowers thrive on steep, sunny hillside slopes?
Opt for drought-tolerant, low-maintenance varieties:
- Lavender (fragrant, repels pests).
- Sedum (succulent, thrives in poor soil).
- Yarrow (tough, attracts pollinators).
- Blanket flower (Gaillardia) (vibrant, heat-loving).
Wrapping up and next steps
Creating flower beds on a hillside isn’t just about adding beauty—it’s about transforming your landscape into a stunning, gravity-defying masterpiece. With the right materials, planning, and a little elbow grease, you can turn even the trickiest slopes into lush, terraced gardens that wow neighbors and delight the senses.
Whether you’re a seasoned gardener or a curious beginner, the key is to start small, stay patient, and let nature do the rest! 🌸
Ready to take the next step? Sketch your design, gather your supplies, and dive in! Before you know it, your hillside will be blooming with color—and bragging rights. Happy gardening! 🌿