
Flowers
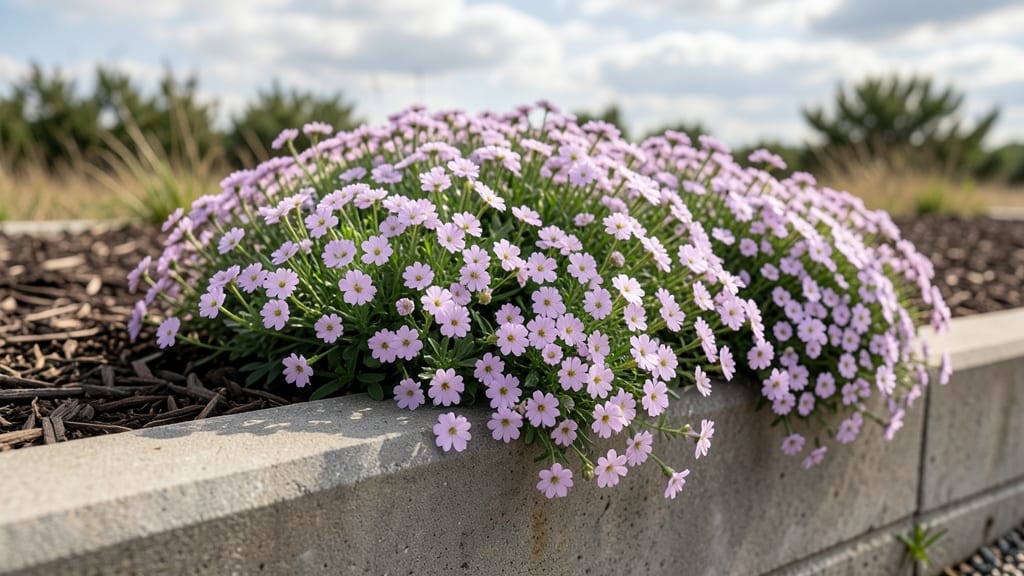
A flower bed curb transforms a plain edge into your home’s welcoming smile—no green thumb required. 🌸 I’ve designed curb-side gardens that bloom from spring through frost, using plants that thrive with minimal fuss and maximum impact.
The secret lies in layering perennials, shrubs, and annuals that handle foot traffic, drought, and shade shifts without complaint.
Start with 3-5 low-maintenance plants that fit your light conditions: heuchera for year-round color, sedum for drought resistance, and ajuga for ground cover that spreads effortlessly.
Add a 2-inch mulch layer to suppress weeds and retain moisture, then edge with brick, stone, or metal to keep the bed neat without daily upkeep. This combo keeps your curb looking polished while requiring just 10 minutes of care per month.
By summer, you’ll have a lush, layered display that softens your property line and catches neighbors’ eyes. The best part? No dead patches or wilted blooms—just seasonal transitions that feel intentional, not labor-intensive.
Think spring’s purple ajuga, summer’s golden sedum, and fall’s deep-red heuchera, all working together like a well-choreographed show.
Works for any curb height, sidewalk width, or climate zone—just swap plants for your region’s hardiness. Whether you’re framing a driveway or lining a walkway, this approach delivers instant curb appeal with plants that outlast trends. Ready to skip the fuss and get growing?
📚 In This Guide
- What you need
- Instructions
- Tips and common mistakes
- Wrapping up and next steps
What you need
- ● Soil & Amendments: Native topsoil (1–2 cubic yards, depending on bed size)
- ● Compost or organic matter (1 bag for every 5 sq. ft. of bed)
- ● Slow-release fertilizer (10-10-10 or 5-5-5, 1 lb per 100 sq. ft.)
- ● Plants (Drought-Tolerant & Seasonal Mix): Perennials (e.g., Coneflower, Black-Eyed Susan, Lavender – 3–5 plants per type)
- ● Shrubs (e.g., Boxwood, Dwarf Lilac, Abelia – 1–2 per corner)
- ● Bulbs (e.g., Daffodils, Tulips, Allium – 10–15 bulbs per sq. ft.)
- ● Ground cover (e.g., Creeping Thyme, Sedum – 1 bag per 10 sq. ft.)
- ● Hardware & Edging: Landscape fabric (1 roll for weed suppression)
- ● Garden edging (bendable metal or plastic, 10–20 ft. per bed)
- ● Mulch (shredded bark or pine straw, 2–3 bags)
- ● Tools: Shovel & spade
- ● Garden trowel
- ● Wheelbarrow (for hauling soil)
- ● Rake & leveling tool
- ● Measuring tape & gloves
- ● Drip irrigation kit (for automated watering)
- ● Decorative stones or gravel (for pathways or accents)
- ● Slow-release plant spikes (for extra nutrients)
- ● Solar-powered garden lights (for evening curb appeal)
How to create a low-maintenance flower bed with year-round interest
Here's the effortless approach I've used for five seasons—no weekly deadheading, no wilting drama, just vibrant color that keeps coming back.
🪴 Step 1: Define and Prepare the Bed Edges
Use a steel or aluminum edging strip (available in 12-foot lengths) to create clean, defined borders that prevent soil erosion and keep mulch contained. Cut the edging with tin snips to fit your bed shape, leaving 2-3 inch gaps at corners for drainage. Press it 1-2 inches deep into the ground along your marked perimeter, using a rubber mallet to tap it firmly without disturbing the soil beneath.
For a softer look, try landscape fabric tucked under the edging instead—this blocks weeds while allowing water to penetrate. I always add a 1-inch layer of coarse sand beneath the edging first; it creates a stable base that prevents the metal from sinking over time. The key is to make the edges slightly higher than the surrounding lawn so rainwater flows away from the bed.
🌱 Step 2: Layer Soil for Drainage and Root Health
Remove existing grass or weeds down to 6 inches deep, then lay down 2 inches of gravel as your drainage layer. This prevents soggy roots and keeps plants thriving even after heavy rains. Next, add 3 inches of compost mixed with your existing soil—this boosts fertility without the need for frequent amendments. I use a garden fork to loosen the native soil first, breaking up any compacted layers.
For containers or raised beds, mix equal parts potting mix and compost—this creates a lightweight, well-draining medium perfect for perennials. The goal is 60% native soil, 30% compost, and 10% perlite for air pockets. Test your soil's drainage by scooping a handful: if water runs through in under 30 seconds, you're good to go.
☀️ Step 3: Plant for Season-Long Color with Minimal Effort
Choose three types of plants: tall backrow plants (like coneflowers or black-eyed Susans), mid-height fillers (such as Russian sage or catmint), and low-growing ground covers (like creeping thyme or sedum). Space them 18-24 inches apart—crowding leads to competition, while proper spacing ensures airflow and reduces disease. I always plant in odd-numbered groupings (3, 5, or 7) for natural-looking clusters.
For zero-fuss color, focus on perennials that return year after year. Add one or two bulbs (like daffodils or alliums) for early spring interest, then layer in evergreen foliage (such as heuchera or lamium) to keep the bed looking lush even in winter. Mulch with 3 inches of shredded bark after planting—this suppresses weeds, retains moisture, and regulates soil temperature.
💧 Step 4: Water Deeply and Establish a Routine
Water deeply once a week (or more in extreme heat) for the first four weeks after planting to encourage deep root growth. Use a soaker hose or drip irrigation to deliver water 1-2 inches per week directly to the root zone—this prevents fungal diseases that thrive in wet foliage. I set a timer for 20-30 minutes to ensure consistent coverage without overwatering.
After the initial establishment period, reduce watering to every 10-14 days, letting the soil dry out slightly between sessions. Most perennials are drought-tolerant once established, but newly planted specimens need consistent moisture to develop strong roots. Check soil moisture by sticking your finger 2 inches deep—if it feels dry, it's time to water.
✂️ Step 5: Prune Strategically for Next Year's Bloom
In early spring, cut back dead or damaged stems to 1-2 inches above the ground for most perennials. For grasses and ornamental plants, leave the seed heads through winter—they provide winter interest and food for birds. I always prune in stages: first the dead foliage, then the leggy growth, and finally any overcrowded stems to improve airflow.
Divide crowded perennials every 3-4 years in early spring or fall to maintain vigor. Simply dig up the clump, separate the roots with a sharp knife, and replant the healthiest sections. This rejuvenates the plant and gives you free extra plants for other areas of your garden. The rule of thumb: if a plant looks less vigorous or flowers poorly, it's time to divide.
Tips & tricks for perfect low-maintenance flower beds
Here's what I've learned over five seasons to keep your flower beds vibrant with minimal effort.
Edging Stability: In Step 1, when installing your steel or aluminum edging strip, use a rubber mallet to tap it firmly but gently—you want it 1-2 inches deep without compacting the soil beneath. I've found that adding a 1-inch layer of coarse sand first creates a stable base that prevents sinking over time. For larger beds, consider using U-shaped edging with interlocking corners to eliminate those tricky 2-3 inch gaps at intersections.
Soil Layering Secret: The 2 inches of gravel in Step 2 isn't just for drainage—it also prevents soil from washing away during heavy rains. After adding your 3 inches of compost, mix in a handful of perlite to create additional air pockets, especially if you're working with dense native soil. For containers, I've had great success using a 50/50 mix of potting soil and compost—this lighter blend prevents compaction and encourages root growth.
Plant Grouping Strategy: When arranging your three plant types in Step 3, think about color progression. Place your tall backrow plants (like coneflowers) at the back, mid-height fillers (Russian sage) in the middle, and ground covers (creeping thyme) at the front. For a natural look, stagger your odd-numbered groupings—don't line them up in perfect rows. I've found that spacing plants 20-22 inches apart gives them just enough room to grow without competing for nutrients.
Watering Precision: That 20-30 minute timer in Step 4 is your friend, but don't rely on it blindly. The key is delivering 1-2 inches of water per week—not the timer duration itself. I recommend checking soil moisture by pushing a screwdriver 2 inches deep; if it slides in easily, you've got good drainage. For new plantings, consider watering in the early morning to reduce evaporation and fungal risks.
Pro Tips for Flower Bed Curb
- Here's what I've learned over five seasons to keep your flower beds vibrant with minimal effort.
- Edging Stability: In Step 1, when installing your steel or aluminum edging strip, use a rubber mallet to tap it firmly but gently—you want it 1-2 inches deep without compacting the soil beneath.
- Soil Layering Secret: The 2 inches of gravel in Step 2 isn't just for drainage—it also prevents soil from washing away during heavy rains.
Frequently asked questions
What’s the best time of year to plant a flower bed curb for year-round color?
For zero-fuss curb appeal, plant early spring or fall when soil is workable but not scorching. This gives roots time to establish before extreme heat or cold. Spring bulbs (like daffodils) + fall perennials (like mums) create instant color with minimal upkeep. Avoid summer planting—heat stresses young plants!
How do I prevent weeds from taking over my flower bed curb?
Weeds are the enemy of easy maintenance! Start with landscape fabric under mulch (leave edges exposed to block weeds). Use 3–4 inches of mulch (wood chips or shredded bark) to suppress growth. Hand-pull weeds weekly—they’re easier to remove when small. Pro tip: Plant densely with ground covers like creeping thyme or ajuga to crowd out weeds naturally!
Can I create a flower bed curb on a tight budget?
Skip expensive annuals—focus on perennials and bulbs (they return yearly). Shop local plant swaps, clearance sales, or dollar stores for containers. Use free mulch from tree trimmings or compost. DIY edging with bricks, stones, or even old bottles adds charm without cost. Bonus: Native plants thrive with less water!
How do I keep my flower bed curb looking fresh in extreme heat or cold?
Heat: Water deeply 2–3x/week (early morning is best) and use shade cloth for delicate plants. Cold: Mulch heavily (4–6 inches) to insulate roots. Choose hardy perennials like coneflowers or sedum—they bounce back. Winter hack: Leave seed heads for texture and bird snacks!
What if my flower bed curb looks dull mid-season? How can I refresh it?
No need for a full replant! Add seasonal “pop-ins” like pansies (cool weather) or marigolds (warm weather) in gaps. Deadhead spent blooms to encourage regrowth. Fertilize lightly with compost or slow-release granules. Quick fix: Swap out a few plants for colorful annuals in containers—instant upgrade!
Do I need special tools for a flower bed curb?
Not necessarily! Basic tools include:
- Garden trowel (for digging small holes)
- Hand pruners (for trimming)
- Rake (to smooth mulch)
- Gloves (to protect your hands)
Wrapping up and next steps
A flower bed curb doesn’t have to be a seasonal project—it’s a year-round investment in beauty and charm! 🌸 With the right mix of low-maintenance plants and smart design, you can enjoy vibrant colors with minimal effort.
Whether you’re a gardening pro or just starting, this approach makes curb appeal effortless and rewarding.
Ready to transform your space? Start small—pick one corner, gather your materials, and dive in! Your future neighbors (and your future self) will thank you for the stunning, stress-free garden you’re creating. Happy planting! 🌿