
Blooming
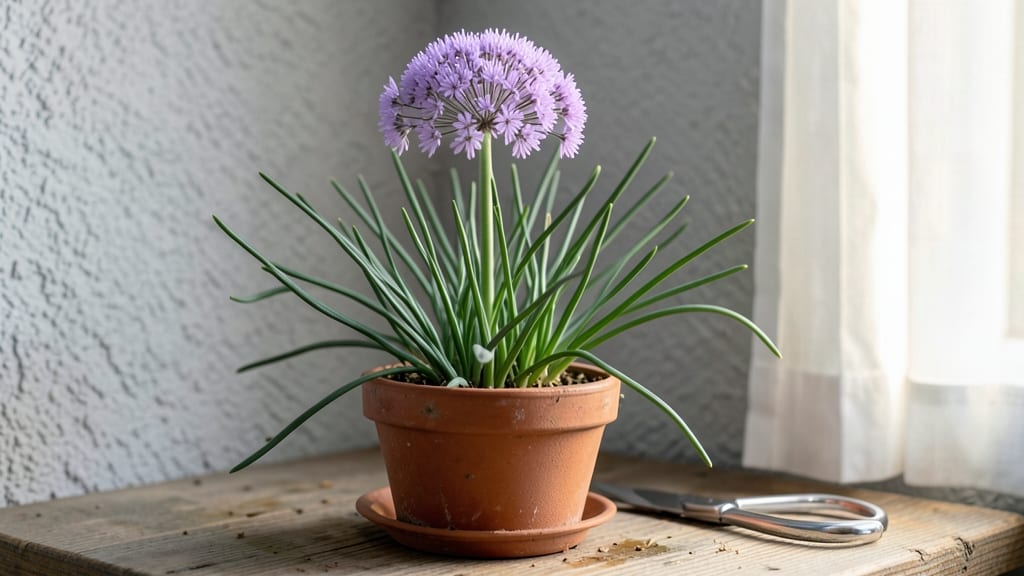
The chive blossom flower transforms your garden from ordinary to extraordinary with its delicate purple spikes that hum with pollinators while adding edible charm. 🌿 I still remember the first time I saw them—those tiny star-shaped blooms swaying above the green grass, turning an otherwise plain border into a cottage-garden dream.
What makes them special is their dual purpose: they look stunning in arrangements and taste like mild onions in salads, but their real magic lies in how effortlessly they blend into any design scheme.
These blossoms thrive in full sun to partial shade, making them perfect for borders, containers, or even as a cut-flower accent. Pair them with lavender for a fragrant purple cascade or mix them with snapdragons for vertical height.
The flowers last for weeks in vases, and their subtle onion scent lingers in arrangements—no strong perfume needed, just quiet elegance. Start with just a few plants, and you’ll soon wonder how you ever lived without them.
By midsummer, your garden will be alive with chive blossoms, their delicate spikes drawing bees and butterflies while adding texture to every view. The flowers are edible too, so you can snip a few for garnishes or infuse them into vinegar for a floral twist.
Their lightweight stems won’t overwhelm other plants, making them ideal for filling gaps or softening edges. Once you see how they brighten a space, you’ll want them everywhere.
They’re also surprisingly low-maintenance—just keep the soil well-drained, and they’ll reward you with blooms all season long. Whether you’re designing a cutting garden, a pollinator-friendly border, or just adding color to a container, chive blossoms deliver beauty and function without the fuss. Let’s get those purple spikes growing!
📚 In This Guide
- What you need
- Instructions
- Tips and common mistakes
- Wrapping up and next steps
What you need
- ● Chive plants (Allium schoenoprasum) – Choose healthy, established plants (at least 6–12 inches tall) with visible flower stalks emerging.
- ● Well-draining potting soil or garden soil – 2–3 gallons, enriched with compost for optimal growth.
- ● Containers or garden plot – Pots (6–8 inches deep) or a sunny garden bed with at least 6 hours of sunlight daily.
- ● Balanced fertilizer (10-10-10 or organic alternative) – 1 tablespoon per plant to boost flowering.
- ● Watering can or hose with a gentle spray nozzle – Keep soil consistently moist but not soggy.
- ● Pruning shears or scissors – For harvesting blossoms cleanly.
- ● Garden gloves – Protect your hands from soil and sharp chive edges.
- ● Mulch (straw or shredded leaves) – Helps retain moisture and suppress weeds.
- ○ Edible flower preserving spray (optional) – Extends freshness for culinary use.
- ● Decorative vase or jar – For showcasing your chive blossoms indoors.
How to grow and care for edible chive blossoms
Here's how to coax those delicate purple chive flowers into full bloom—naturally.
🌱 Step 1: Select the Right Chive Variety for Flowers
Start with common chives (Allium schoenoprasum) or garlic chives (Allium tuberosum), as these reliably produce edible blossoms. I always plant organic, disease-free starts from a trusted nursery—this prevents the fungal issues that can stunt flowering. Choose healthy clumps with firm, white roots and no yellowing leaves.
If you're growing from seed, expect flowers in the second year—patience pays off with bigger, more abundant blooms. For immediate results, plant established plants in early spring after the last frost date. Chives thrive in USDA zones 3-9, so they adapt well to most climates.
☀️ Step 2: Plant in Full Sun and Well-Draining Soil
Chives need 6+ hours of direct sunlight daily for strong stems and abundant blooms. A south-facing spot works best, but they tolerate partial shade—just expect fewer flowers. Amend your soil with 2 inches of compost before planting to ensure good drainage, as soggy roots lead to rot.
Space plants 6 inches apart in rows 12 inches apart to allow airflow and prevent fungal diseases. I dig a hole twice as wide as the root ball but only as deep as the container it came in—this keeps the crown level with the soil surface. Press the soil gently around the roots to eliminate air pockets.
💧 Step 3: Water Consistently and Fertilize Lightly
Keep the soil evenly moist but never soggy—chives hate wet feet. Water at the base in the morning so leaves dry quickly, reducing fungal risks. You'll know moisture is right when the top inch of soil feels damp but not waterlogged. Overwatering causes yellow leaves and stunted growth.
Feed with a balanced, organic fertilizer (like 10-10-10) once in early spring and again after the first flush of blooms. Too much nitrogen makes plants leafy but flower-sparse. I also sprinkle granulated kelp meal around the base for natural potassium, which supports strong stems and vibrant blooms.
✂️ Step 4: Encourage Blooming and Harvest Flowers
When flower stalks reach 4-6 inches tall, trim the bottom 2 inches of each stem to redirect energy upward. This simple pruning trick produces taller, sturdier blooms that don't flop over. I also remove any spent flowers regularly—this encourages continuous blooming throughout the season.
Harvest flowers in the morning when dew has dried but before the heat of the day. Snip stems with clean scissors, leaving 1-2 inches of stem attached to the plant. Use immediately in salads, garnishes, or preserve by drying or freezing. Never harvest more than one-third of the blooms at once—this keeps plants productive.
🌿 Step 5: Overwinter for Next Year’s Blooms
After the first frost, cut back foliage to 2 inches above the ground but leave the roots intact. Mulch with 2 inches of straw or shredded leaves to insulate roots through winter. Chives are perennial, so they’ll return year after year with even more abundant blooms.
In early spring, remove old mulch and add a top-dressing of compost to replenish nutrients. Watch for new shoots in 3-4 weeks—they’re your signal that the plant is ready for another season of edible flowers. I’ve had the same chive patch bloom reliably for five years with minimal care.
Tips & tricks for perfect chive blossoms
These simple strategies will help you coax the most vibrant, abundant chive blossoms from your garden—without the guesswork.
Selection Tip: In Step 1, when choosing your chive varieties, look for plants with plump, purple-tinged buds already forming at the base. These indicate plants that are primed to flower early. I’ve found that plants with at least 3-4 healthy leaves establish faster and produce blooms sooner than smaller starts. If you’re growing from seed, sow them indoors 8-10 weeks before your last frost date—this gives seedlings a head start for that second-year flowering.
Sunlight Strategy: For Step 2, if your garden doesn’t have a true south-facing spot, create one by placing chives near a reflective surface like a light-colored wall or patio stones. This bounces extra light onto the plants, helping them compensate for partial shade. Also, avoid planting near tall perennials that will cast shade later in the season—chives need that uninterrupted 6+ hours of sunlight to produce their best blooms.
Pruning Secret: In Step 4, when those flower stalks hit 4-6 inches, here’s my pro trick: instead of just trimming the bottom 2 inches, make a diagonal cut at that point. This exposes more surface area for new growth and prevents the stems from splitting as they grow taller. I also like to harvest flowers every other day during peak bloom—this encourages the plant to produce more flowers in response.
Overwintering Hack: For Step 5, if you’re in a particularly cold climate (zones 3-4), add an extra 1 inch of mulch around the base after the first frost. This creates an insulating blanket that protects roots from extreme temperature swings. In early spring, when you see those first 3-4 week shoots, gently brush away the old mulch to reveal fresh green growth—it’s like uncovering a hidden treasure!
Pro Tips for Chive Blossom Flower
- These simple strategies will help you coax the most vibrant, abundant chive blossoms from your garden—without the guesswork.
- Selection Tip: In Step 1, when choosing your chive varieties, look for plants with plump, purple-tinged buds already forming at the base.
- Sunlight Strategy: For Step 2, if your garden doesn’t have a true south-facing spot, create one by placing chives near a reflective surface like a light-colored wall or patio stones.
Frequently asked questions
about chive blossoms—because every gardener deserves a little clarity!Can I eat chive flowers?
Chive blossoms are 100% edible and add a mild onion-garlic flavor to dishes. Use them fresh in salads, garnishes, or as a decorative (and tasty!) topping for soups, eggs, or cocktails. Just ensure they’re pesticide-free if harvesting from your garden.
When is the best time to harvest chive flowers?
Harvest chive blossoms in the morning after the dew dries but before the sun peaks (around 8–10 AM). Choose fully open, vibrant flowers—avoid wilting or browned blooms. Snip stems just above a leaf node to encourage more growth. Pro tip: Harvest regularly to prolong the blooming season!
How do I store chive flowers?
Store chive flowers in a paper towel-lined container in the fridge for up to 5–7 days. For longer storage, dry them by hanging small bunches upside down in a dark, dry place (like a pantry) for 1–2 weeks. Once dried, store in an airtight jar—perfect for winter garnishes!
What can I substitute for chive flowers if I don’t have any?
If you’re in a pinch, try these flavorful alternatives:
- Nasturtiums (peppery, edible blooms)
- Borage flowers (cucumber-like taste)
- Garlic chives (milder, but still onion-y)
- Dill or cilantro flowers (bright, herbal notes)
Will chive flowers attract bees?
Yes! Chive flowers are a bee magnet—their tiny blooms are packed with nectar. Planting chives supports pollinators while adding beauty and flavor to your garden. If you’re concerned about bees near food, harvest flowers in the morning when bees are less active or use them immediately after picking.
Wrapping up and next steps
From their delicate lavender-blue blooms to their culinary versatility, chive blossoms are a true garden gem. 🌸 Whether you’re drawn to their beauty, their edible charm, or their low-maintenance growth, these flowers prove that nature’s best gifts are often the simplest.
Now that you’re armed with insights on cultivation, care, and creative uses, why not plant a few this season?
Start small—add a pot to your patio or a row to your herb garden—and let these cheerful blooms inspire your next culinary or decorative adventure. Happy gardening! 🌱